
Makeup brushes are essential tools for creating a smooth, polished, and well-blended makeup look. Whether you prefer a simple everyday routine or a more detailed makeup style, using the right brushes can make applying foundation, concealer, powder, contour, and eyeshadow easier. Each brush is designed with a particular shape, size, and bristle arrangement to help distribute makeup across different areas of the face.
Choosing suitable makeup brushes can also improve the way products blend into the skin. A dense brush may help spread liquid foundation evenly, while a fluffy brush can apply powder lightly without creating a heavy finish. Smaller brushes provide greater control around the eyes, brows, and other detailed areas.
However, buying a large brush collection is not necessary for everyone. A few versatile, good-quality brushes can be enough to create many different makeup looks. Understanding the purpose of each brush will help you select useful tools, avoid unnecessary purchases, and get better results from your existing makeup products.
This complete makeup brush guide explains the most common face and eye brushes, their uses, and how to choose the right options for your routine.
Face Brushes: Essential Tools for a Smooth Base
Face brushes help apply and blend complexion products, including foundation, concealer, setting powder, and contour. Their shapes and bristle densities influence how much product they pick up and how it spreads across the skin.
Some face brushes are designed for precise application, while others cover larger areas quickly. Selecting the right brush depends on the formula you use, your preferred coverage, and the finish you want to achieve.
Contour Brush
A contour brush is designed to apply contour products beneath the cheekbones, along the jawline, and around the edges of the forehead. Contouring creates the appearance of shadows, helping define certain facial features.
Contour brushes commonly have angled, tapered, or slightly curved heads. These shapes make it easier to follow the natural contours of the face without applying product over an unnecessarily large area.
An angled contour brush is particularly useful for placing powder or cream contour beneath the cheekbones. A smaller tapered brush may provide more control around the nose or jawline.
For powder contour, choose a brush that feels soft and distributes product evenly. For cream contour, a denser brush may help blend the formula into the foundation.
How to use a contour brush:
- Pick up a small amount of contour product.
- Tap off excess powder if necessary.
- Apply the product where natural shadows would fall.
- Blend using light, controlled movements.
- Add more product gradually if additional definition is needed.
Avoid drawing thick, dark lines and leaving them unblended. Start with a small amount and build the colour gradually for a more natural result.
Buffing Brush
A buffing brush is commonly used to blend foundation into the skin using small circular or gentle pressing movements. It usually has dense bristles and a rounded or slightly flat head.
Its compact bristle arrangement allows it to distribute foundation evenly and blend visible edges around the cheeks, forehead, and jawline. Depending on the brush design, it can work with liquid, cream, and certain powder products.
A buffing brush is particularly helpful when you want a smooth base without obvious streaks. However, the finish also depends on the foundation formula, the amount applied, and your skin preparation.
How to use a buffing brush:
Apply a small amount of foundation to the skin or brush. Work across one area at a time, using light circular movements or gentle pressing motions. Blend carefully around the hairline, nose, and jawline.
Avoid pressing too hard because excessive pressure can move the product around rather than blend it evenly. If the foundation starts looking heavy, use the clean side of the brush to soften the finish.
Clean your buffing brush regularly because dense bristles can collect foundation and oils from the skin. Product buildup may affect application and make the brush harder to clean.
Powder Complexion Brush
A powder complexion brush is designed to apply loose or pressed powder across the face. It generally features soft, fluffy bristles that distribute powder without depositing too much product in one place.
Large powder brushes are useful for lightly setting foundation, reducing unwanted shine, and creating a more even finish. Smaller versions offer more control when applying powder beneath the eyes or around the sides of the nose.
The density of the brush affects the result. A fluffy brush generally provides a lighter application, while a denser brush can deposit more powder in a concentrated area.
How to use a powder complexion brush:
Dip the brush lightly into the powder and tap away any excess. Sweep or press the brush gently over areas where you want to set your makeup.
If your skin is dry, avoid applying too much powder across the entire face because it may emphasize dry patches. People with oily skin may prefer to focus on areas that become shiny throughout the day.
Wash the brush regularly to prevent powder, oil, and product residue from accumulating between the bristles.
Foundation Brush
A foundation brush helps spread liquid, cream, or selected stick foundation products across the skin. It comes in several designs, including flat brushes, rounded brushes, angled brushes, and dense buffing-style brushes.
A flat foundation brush can provide controlled application, especially around the nose and mouth. A dense rounded brush is useful for blending foundation over larger areas, while an angled design can help reach the sides of the face.
The best foundation brush depends on your preferred coverage and the formula you use. Dense brushes may build coverage quickly, whereas less dense designs can create a lighter finish.
How to use a foundation brush:
Begin with clean, moisturized skin and allow skincare products to settle. Apply a small amount of foundation and blend from the centre of the face outward.
Use short strokes or gentle circular movements, depending on the brush design. Pay attention to the hairline, jawline, and sides of the nose to avoid visible foundation edges.
For a more natural result, apply thin layers rather than covering the face with a large amount of foundation at once. You can add extra product only where more coverage is needed.
Clean your foundation brush frequently because liquid and cream formulas can remain trapped between its bristles.
Concealer Brush
A concealer brush is a smaller makeup brush designed for targeted application. It can help cover blemishes, redness, dark areas, and uneven-looking skin while providing greater precision than a large face brush.
Concealer brushes often have flat, tapered, or rounded heads. A small flat brush works well for placing product directly over a blemish, while a soft tapered brush can help blend concealer beneath the eyes.
The ideal brush depends on the texture of your concealer. Creamy formulas may work well with a compact brush, while lighter liquid concealers may be blended using a softer design.
How to use a concealer brush:
Place a small amount of concealer on the brush or directly onto the area you want to cover. Gently tap the product into the skin instead of rubbing it across the face.
For blemishes, blend the edges while keeping sufficient coverage in the centre. For the under-eye area, use light pressure to avoid disturbing the foundation underneath.
A smaller brush can also help apply concealer around the corners of the nose and mouth, where larger brushes may be difficult to control.
Keep this brush clean because it often comes into contact with blemishes and delicate areas. Regular washing helps remove product residue and keeps the bristles in better condition.
Kabuki Brush
A kabuki brush is generally a short-handled brush with a dense head. It may have a rounded, flat, angled, or tapered shape, depending on its intended use.
Kabuki brushes are popular for applying and blending powder foundation, mineral makeup, bronzer, and some liquid complexion products. Their dense bristles can distribute makeup efficiently across larger areas.
A flat-top kabuki brush is useful for buffing foundation into the skin. A rounded kabuki brush can provide a softer application of powder or bronzer, while an angled design can help follow the contours of the face.
How to use a kabuki brush:
Pick up a small amount of product and remove excess powder if necessary. Apply the makeup using light circular or pressing motions, depending on the formula.
For powder foundation, work gradually until you reach your preferred coverage. For bronzer, concentrate the product where you want warmth and blend the edges carefully.
Because kabuki brushes are often dense, they can hold a significant amount of product. Avoid loading the brush too heavily, and clean it thoroughly to remove makeup from the inner bristles.
Eye and Brow Brushes: Tools for Precision
Eye and brow brushes help apply, blend, and define makeup in smaller areas. Their compact shapes allow more precise movements than most face brushes.
Different eye brushes serve different purposes. Some place colour on the eyelid, others blend several shades together, and specialised brushes help define the lash line or fill the eyebrows.
You do not need every type to create attractive eye makeup. Choosing a few versatile brushes that suit your preferred looks can be a practical starting point.
Angled Eye Brush
An angled eye brush has bristles cut diagonally to create a slanted edge. This shape offers greater control when applying eyeshadow along the lash line, defining the outer corner, or filling the eyebrows.
Some angled brushes are soft and designed for blending powder eyeshadow, while others have firmer bristles for precise application of gel or cream products. The correct choice depends on the formula and the level of definition you want.
For eyebrows, a small, firm angled brush can help apply brow powder or pomade in short strokes that resemble natural hairs. For eye makeup, it can help create a defined line without requiring a large brush.
How to use an angled eye brush:
Pick up a small amount of product and position the angled edge along the area you want to define. Use short, controlled strokes rather than drawing one thick line.
When filling eyebrows, follow their natural shape and use less product near the inner corners for a softer appearance. When applying eyeshadow, blend the edge lightly to avoid harsh lines.
Choose a brush with bristles that maintain their shape after washing. A brush that becomes misshapen may be harder to use for precise work.
Eye Contour Brush
An eye contour brush helps apply and blend eyeshadow around the natural shape of the eyelid. It is particularly useful for adding depth to the crease and outer corner, creating a more defined appearance.
Eye contour brushes often have tapered or rounded bristles that fit comfortably into the crease. Their shape allows you to concentrate colour in a smaller area without spreading it across the entire eyelid.
These brushes are useful when working with multiple eyeshadow shades. For example, you can apply a medium brown shade to the crease and blend it gently to create a soft transition between colours.
How to use an eye contour brush:
Pick up a small amount of eyeshadow and tap away excess powder. Place the brush in the natural crease of your eyelid and move it gently back and forth.
Use light pressure and build the colour gradually. If you want more depth, add a darker shade to the outer corner and blend the edges to avoid harsh lines.
For beginners, a soft contour brush is often easier to control than a very dense brush. It allows you to blend colour gradually and create a more natural-looking result.
Eye Crease Blending Brush
An eye crease blending brush is designed to soften eyeshadow edges and combine different shades smoothly. It usually has soft, fluffy bristles with a rounded or tapered shape.
Blending is an important part of eye makeup because unblended eyeshadow can leave visible lines between colours. A suitable blending brush helps create a gradual transition, making the overall look appear more polished.
Although an eye contour brush and a crease blending brush can look similar, their main purposes may differ. A contour brush is often used to place colour and define the crease, while a fluffy blending brush is primarily used to soften the colour and its edges.
How to use an eye crease blending brush:
After applying eyeshadow, use the brush to move gently along the edges of the colour. Small circular movements or light windshield-wiper motions can help blend the shades.
Avoid pressing too hard, as excessive pressure may spread the eyeshadow too far or make the colours look muddy. If necessary, use a clean blending brush to soften the edges without adding more product.
A blending brush is also useful for diffusing transition shades above the crease. These shades can help connect lighter and darker colours for a balanced eye makeup look.
For better results, clean the brush between significantly different colours, especially when working with dark or highly pigmented eyeshadows.
Tightline Eye Brush
A tightline eye brush is a small, precise brush designed to apply eyeliner close to the roots of the eyelashes. Depending on its shape and the product used, it can help create a subtle lash-line definition or a more noticeable eyeliner effect.
Some tightline brushes have very fine, narrow bristles, while others have a small angled head. These designs allow you to work close to the lash line without using a large brush.
Tightlining is different from drawing a thick eyeliner line across the eyelid. The goal is to make the area around the lashes appear more defined while keeping the result relatively subtle.
How to use a tightline eye brush:
Choose an eyeliner product specifically intended for use around the eyes. Pick up a small amount of product and apply it carefully along the upper lash line.
Work in short strokes and avoid getting the product into the eye. Never share eye makeup brushes, and clean them regularly to maintain good hygiene.
If you have sensitive eyes, contact lenses, or a history of eye irritation, take extra care when applying products close to the lash line. Stop using the product if discomfort develops.
A tightline brush can also be used for precise eyeliner work, particularly when creating a thin line or filling small gaps between the upper lashes.
How to Choose the Right Makeup Brushes
Selecting makeup brushes becomes easier when you consider your routine, the products you use, and the results you want to achieve. Instead of buying a large set immediately, start with tools that serve your most frequent makeup needs.
Consider the Brush Shape
Brush shape affects how makeup is applied and blended. Flat brushes can provide controlled product placement, fluffy brushes are useful for diffusing colour, and angled brushes can follow the natural contours of the face.
A small tapered brush may be suitable for precise concealer application, while a large powder brush can cover broader areas quickly.
Before buying a brush, consider whether its shape matches the task you want it to perform.
Choose Suitable Bristles
Makeup brushes are commonly available with synthetic or natural bristles.
Synthetic brushes are widely used with liquid and cream products because they are generally easy to clean and can work well with different formulas. Many synthetic brushes are also suitable for powder makeup.
Natural-hair brushes may be preferred by some users for certain powder products because of their texture and product pickup. However, performance varies by brush quality, construction, and intended use.
There is no universal rule that one bristle type is always better. Choose brushes according to your needs, preferences, budget, and cleaning habits.
Check the Handle and Construction
A comfortable handle can make makeup application easier, particularly when working around the eyes or other detailed areas.
Look for a brush that feels balanced in your hand and has bristles securely attached to the handle. Loose bristles, an unstable ferrule, or a handle that feels uncomfortable may indicate poor construction.
You do not necessarily need expensive brushes to achieve good results. A reasonably priced brush with suitable bristles and solid construction can be a practical choice.
Build a Basic Brush Collection
If you are new to makeup, a small collection can cover many everyday tasks. Consider starting with:
- A foundation or buffing brush.
- A concealer brush.
- A powder brush.
- A contour brush.
- A fluffy eyeshadow blending brush.
- A small angled eye brush.
These brushes can be used for several purposes, depending on their design. As you become more familiar with makeup application, you can add specialised brushes for techniques you use regularly.
How to Clean and Maintain Makeup Brushes
Cleaning makeup brushes is an important part of maintaining them. Brushes collect cosmetic residue, skin oils, and other debris during use. Regular cleaning helps remove buildup, maintain bristle performance, and support better hygiene.
Clean Brushes According to Their Use
Brushes used with liquid foundation, cream concealer, or other creamy products may accumulate residue more quickly than brushes used occasionally with powder.
Clean frequently used face brushes regularly, and pay particular attention to brushes used around the eyes. The ideal cleaning frequency depends on how often you use the brush and the type of products involved.
If you share makeup tools, clean them appropriately before use. Ideally, avoid sharing personal eye makeup brushes because doing so can increase the risk of transferring microorganisms.
Use a Suitable Brush Cleanser
Use a cleanser designed for makeup brushes or another gentle cleaning product that is suitable for the brush material.
Wet the bristles with lukewarm water, keeping the handle and ferrule as dry as possible. Gently work the cleanser through the bristles until makeup residue begins to loosen.
Rinse thoroughly until the water runs clear. Avoid twisting or pulling the bristles aggressively, as this can damage their shape.
Dry Brushes Properly
After rinsing, gently press excess water out of the bristles with a clean towel. Reshape the brush head and place the brush flat or with the bristles angled downward so that water does not collect near the handle.
Allow brushes to dry completely before using or storing them. Avoid placing wet brushes in closed containers because trapped moisture can interfere with proper drying.
Do not use excessive heat to dry brushes, as high temperatures may damage bristles or loosen the adhesive holding them in place.
Know When to Replace a Brush
A well-maintained brush may last a long time, but it should be replaced when its condition affects performance or hygiene.
Consider replacing a brush if the bristles continue to shed heavily, the handle becomes loose, the brush develops an unusual smell that does not disappear after cleaning, or the bristles become permanently misshapen.
Regular maintenance can help extend a brush’s useful life and make makeup application more consistent.
Common Makeup Brush Mistakes to Avoid
Even good-quality makeup brushes may not perform well when they are used incorrectly. A few simple adjustments can help improve your results.
Using too much product: Loading a brush with excessive foundation or eyeshadow can create a heavy finish. Start with a small amount and build coverage gradually.
Using one brush for everything: Multi-purpose brushes can be useful, but different tasks often benefit from different shapes and densities. A large powder brush may not provide the precision needed for eyeliner.
Skipping cleaning: Product buildup can affect blending and make bristles stiff. Clean your brushes regularly according to how often they are used.
Pressing too hard: Excessive pressure can disturb foundation, create uneven eyeshadow, or spread contour beyond the intended area. Use controlled movements and adjust pressure according to the brush.
Ignoring brush quality: A brush that sheds heavily or has poorly secured bristles may be frustrating to use. Check construction and comfort before purchasing.
Storing brushes while damp: Moisture trapped in a closed container can prevent proper drying. Allow brushes to dry completely before storing them.
Avoiding these mistakes can help you get more consistent results without needing to purchase an entirely new brush collection.
Conclusion
Makeup brushes are useful tools for applying, blending, and refining different cosmetic products. From foundation and concealer brushes to contour, powder, and specialised eye brushes, each design offers different levels of coverage and precision.
Understanding brush shapes, bristle materials, and intended uses can help you select the tools that suit your routine. Beginners can start with a few versatile brushes and gradually add specialised options as their skills develop.
Proper cleaning and storage are equally important. Regular maintenance helps preserve brush performance, remove cosmetic residue, and support better hygiene.
Ultimately, you do not need the largest or most expensive makeup brush collection to achieve an attractive makeup look. Choosing suitable tools, using them gently, and maintaining them properly can make everyday makeup application easier and more effective.
Final Thoughts
Makeup brushes are essential tools for achieving smooth, blended, and professional-looking makeup. From foundation and powder brushes to contour and eye blending brushes, each type serves a specific purpose in creating your desired look. Choosing the right makeup brushes can make application easier and help you achieve more consistent results.
You do not need an expensive or extensive collection to get started. Focus on a few versatile, good-quality brushes that suit your makeup routine and skin needs. Remember to clean your brushes regularly and store them properly to maintain their performance and hygiene.
Whether you are a beginner or an experienced makeup enthusiast, understanding how to use different makeup brushes can improve your skills and make your beauty routine more enjoyable. With the right tools and proper techniques, creating a flawless makeup look becomes much easier.
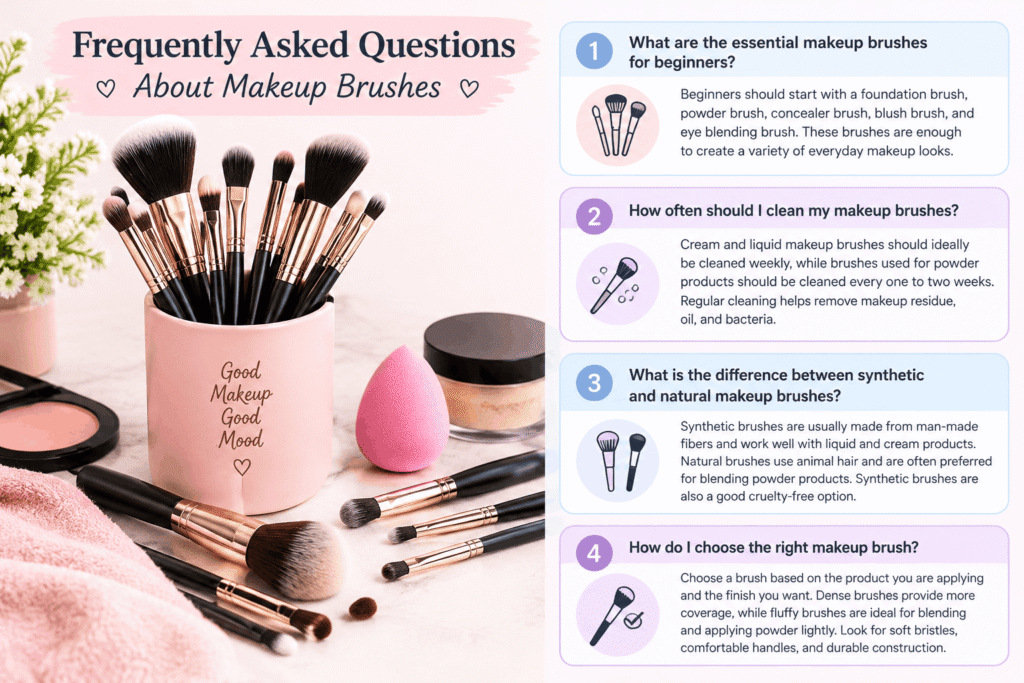
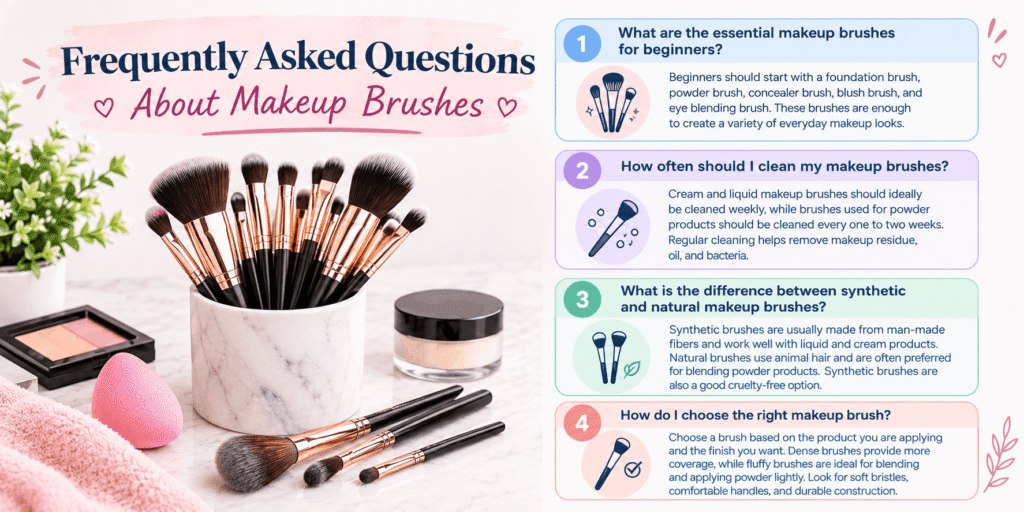
Beginners should start with a foundation brush, powder brush, concealer brush, blush brush, and eye blending brush. These brushes are enough to create a variety of everyday makeup looks.
Cream and liquid makeup brushes should ideally be cleaned weekly, while brushes used for powder products should be cleaned every one to two weeks. Regular cleaning helps remove makeup residue, oil, and bacteria.
Synthetic brushes are usually made from man-made fibers and work well with liquid and cream products. Natural brushes use animal hair and are often preferred for blending powder products. Synthetic brushes are also a good cruelty-free option.
Choose a brush based on the product you are applying and the finish you want. Dense brushes provide more coverage, while fluffy brushes are ideal for blending and applying powder lightly. Look for soft bristles, comfortable handles, and durable construction.
2 Comments