
Makeup does not always need more coverage to create a noticeable difference. Sometimes, the face looks more balanced simply by adding subtle shadows in a few carefully chosen places. That is where contouring comes in. Instead of changing the natural shape of your features, contouring uses differences in color and light to create the appearance of depth. A contour stick makes this technique approachable because it places the product directly where you want to work, without requiring a separate palette or complicated setup.
Unlike loose powders that need to be picked up with a brush, a stick format gives you a solid cream product that can be applied in short strokes. You can place it beneath the cheekbones, around the jawline, near the temples, or along selected areas of the nose, depending on your preferred makeup style. The product still needs blending, but its format can make placement easier to understand, especially when you are learning how shadows affect the appearance of your face.
The challenge is choosing a shade and texture that work with your complexion. A contour color that is too warm may look more like bronzer, while one that is too dark can create harsh stripes. A formula that is difficult to blend may disturb the foundation underneath. Finding a suitable product means considering how you want your makeup to look, how much time you have, and which areas you want to define.
Understanding What Makes a Contour Stick Work
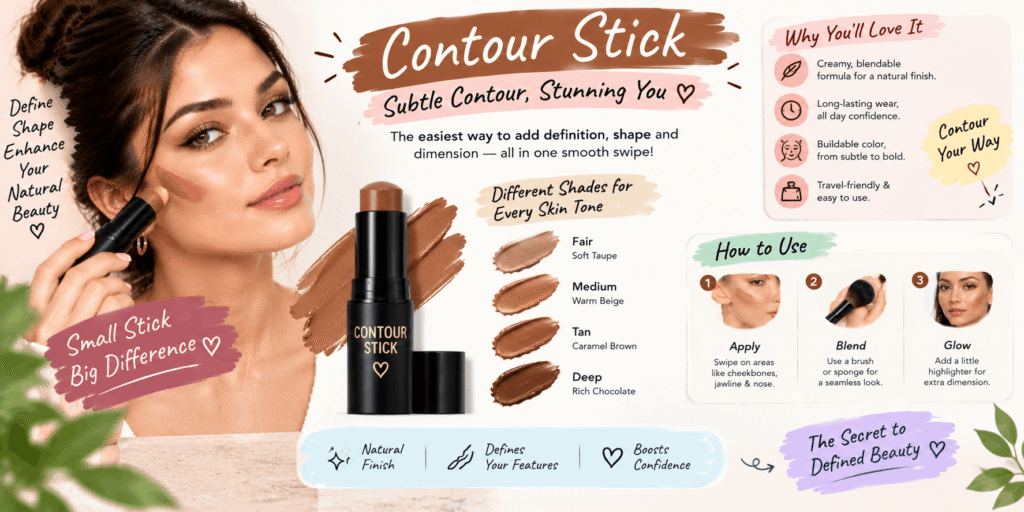
Contouring is based on creating the appearance of shadow rather than simply adding color. Natural shadows tend to appear cooler or more muted than the warm tones associated with sunlight on the skin. This is one reason a contour product can look different from a bronzer, even when both are used to add dimension.
Choosing a Shade That Looks Believable
A useful starting point is to look for a shade that appears slightly deeper than your natural skin tone without creating an obvious orange or red cast. The right depth depends on your complexion and the strength of the effect you want. Someone seeking a barely noticeable change may prefer a subtle shade, while a more dramatic makeup look may call for greater contrast.
Undertone is just as important as depth. A neutral or cool-leaning shade can imitate the appearance of shadow on some complexions, while certain warmer shades may work better for others. There is no single undertone that suits everyone, so examine how the color looks against your skin rather than relying only on labels such as light, medium, or deep.
How to Avoid Choosing a Shade That Looks Too Strong
When testing a shade, apply a small amount and blend it completely. Looking at the unblended stripe alone can make it difficult to judge the final result. Check the color near your cheek and jaw in natural lighting, then compare it with your foundation.
If the shade remains noticeably orange, red, or muddy after blending, it may not create the shadow effect you want. If it disappears entirely, you may need a little more depth or a slightly different application method. Testing the finished result is more useful than assuming a shade will work because it matches a product photograph.
Cream Texture Can Change the Entire Experience
Two contour sticks with similar colors can behave very differently once they touch the skin. One may glide smoothly and remain workable for several seconds, while another may set quickly or require repeated blending. Texture influences how easily you can control the placement and whether the product sits comfortably over your foundation.
A creamy formula can be convenient when you want to blend with a brush, sponge, or fingertips. It may also be useful when applying makeup in small sections because the product can often be softened before the edges become difficult to move. However, a very emollient formula may feel heavier on some skin types or move more easily when layered over a slippery base.
A firmer formula can provide a more controlled stroke, especially when you want to place color precisely. The trade-off is that you may need to work more carefully to soften the edges. If the product drags against your skin, avoid applying additional pressure. Try warming a small amount on the back of your hand or picking it up with a brush, provided the product instructions allow that method.
Where and How to Apply Contour
The most convincing contour sticks usually comes from placing a modest amount of color in a location that makes sense for your chosen look. Applying the same shape to everyone can create an unnatural result because cheekbones, jawlines, and facial proportions differ. Treat popular techniques as starting points rather than strict rules.
Creating Definition Along the Cheeks
For a softly sculpted appearance, begin near the outer part of the cheek and work inward only as far as needed. Many people find it easier to keep the deepest color closer to the hairline and gradually soften it toward the center of the face. This helps prevent a visible stripe across the cheek.
Use a small amount first. Blend with short upward or diagonal movements, then check the result before adding more. The goal is to soften the transition between the contour and your natural skin tone, not to erase the product through endless rubbing. If the cheek begins to look muddy, a clean brush or sponge can help diffuse the edges.
The position of the cheek contour can influence the overall effect. A line placed higher may create the appearance of more lifted definition, while a lower placement can make the face look more angular. Your natural bone structure and the result you prefer should guide the placement. You do not have to follow a dramatic tutorial to achieve a flattering finish.
Defining the Jawline and Temples
A little contour near the jawline can create a more defined transition between the face and neck. Apply the product sparingly and blend the edges so there is no obvious line of color. If you are wearing foundation on your neck, consider how the shades meet to avoid a visible difference between the two areas.
Around the temples, contour can help balance the overall appearance of a makeup look. Use a light hand and blend toward the hairline, especially if you are working with a deeper shade. Too much product in this area can create a dark patch that is difficult to disguise.
A More Careful Approach to Nose Contouring
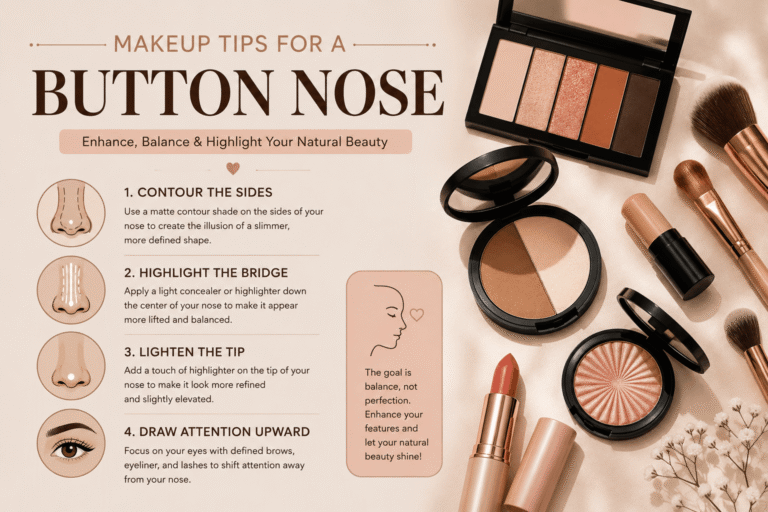
Nose contouring requires smaller amounts of product because the area is narrow and highly visible. Instead of drawing thick lines immediately, pick up a little color with a small brush and create delicate marks where you want the appearance of shadow. Blend gently while keeping the central area relatively clear if you want to maintain the illusion of a narrow highlight.
There is no need to make both sides look perfectly identical while the product is still unblended. Work gradually and check the result from the front rather than judging it only in a close-up mirror. Small adjustments often create a more natural effect than adding more pigment.
Blend Without Losing the Shape
Blending is not simply about making every edge disappear. If you blend too aggressively, the contour may spread across a larger area and lose the definition you intended. If you do too little, the color can remain as a visible stripe.
Start with gentle movements and use a tool that suits the formula. A dense brush may provide control for concentrated areas, while a softer brush can diffuse wider sections. A makeup sponge may also work well when you prefer a more pressed, seamless finish. The best tool depends on the texture of the product and the way you naturally apply makeup.
Give yourself time to inspect the result in different lighting. A contour that looks subtle in a dim room may appear much stronger in daylight. Checking the whole face rather than focusing on one small area helps you decide whether the makeup looks balanced.
Finding a Contour Stick That Fits Your Everyday Needs
Buying makeup becomes easier when you know what you want the product to do. Some people prefer barely noticeable definition for daily wear, while others want sharper cheekbones and a more sculpted appearance for evening makeup. Before choosing a contour stick, think about the finish you enjoy, the time you usually spend getting ready, and how comfortable you feel blending cream products.
The best choice is not necessarily the most expensive one or the product receiving the most attention online. A useful formula should offer a shade that complements your complexion, spread without excessive effort, and allow you to control the amount of colour on your face. Packaging also matters if you regularly carry makeup in your handbag or travel with your beauty essentials.
Choose a Colour That Creates Realistic Shadows
A common problem with contouring is choosing a colour that looks attractive in the tube but unnatural once applied. A shade with too much orange or red may resemble bronzer, while a colour that is excessively grey can leave the skin looking dull. Neutral shades can provide a useful middle ground, although the right undertone depends on your natural complexion.
Fair skin often needs only a subtle change in depth to create visible definition. Medium skin tones may suit balanced taupe, neutral brown, or slightly cooler shades, depending on their undertones. Deeper complexions may require richer colours to ensure the contour remains visible after blending. These suggestions are general guidelines rather than strict categories, so testing the shade remains important.
When testing a product, do not judge it only by the unblended swatch. Blend a small amount and observe how the colour changes as it spreads. Check it near a window if possible, because indoor lighting can make a shade appear warmer or cooler than it really is. The finished colour should complement the rest of your makeup instead of creating an obvious stripe.
Decide Which Texture Works for You
Texture influences how much control you have during application. A soft, creamy formula may spread quickly across the cheeks, whereas a firmer product can make precise placement easier. Some formulas are designed to leave a powder-like finish, while others retain a creamier appearance.
If you are new to contouring, consider a product that allows gradual application. A highly pigmented formula can still be useful, but it may require a lighter hand. Those who prefer a defined makeup look might appreciate a formula that can be layered without becoming uneven.
Think about the applicator as well. A narrow stick can help place colour beneath the cheekbones, while a wider tip may be convenient for the temples and jawline. However, you do not have to draw directly on your face. Picking up colour with a makeup brush gives you additional control and can help prevent applying too much at once.
Adjusting Your Technique to Different Skin Types
Your skin’s condition can influence the way cream makeup looks throughout the day. Preparation, application pressure, and the amount of product you use can all affect the final result. Rather than following one universal technique, make small adjustments according to what your skin needs.
When Your Skin Feels Dry
Dryness can make makeup cling to flaky areas, particularly around the cheeks and mouth. Start with a moisturiser that suits your skin and allow it to settle before applying your base products. If you use a primer, choose one that works comfortably with your skincare rather than layering several products without checking how they interact.
For contour, use a brush or sponge to distribute a small amount over the desired area. Avoid dragging a firm stick repeatedly across rough patches because friction can disturb the surface of your makeup. If the formula looks uneven, pause before adding more. Additional product may make the texture more noticeable rather than solving the problem.
A comfortable, flexible finish is often preferable to a heavy layer of pigment. You can still create definition without covering the entire area with cream makeup.
When Your Skin Becomes Shiny
If your complexion tends to become oily during the day, concentrate on applying a thin layer of makeup and blending it thoroughly. Heavy application may feel comfortable at first but can become harder to manage as natural oils develop.
After blending your contour stick, give the makeup a moment to settle before deciding whether additional setting products are necessary. A small amount of powder may help in areas where your makeup commonly shifts, but applying powder everywhere can reduce the natural appearance of cream products.
The compatibility of your foundation and contour formula also matters. If one product separates or slips over another, experiment with a different application order or test the products together on a small area before using them for a full day.
When Your Skin Has Both Dry and Oily Areas
Combination skin may need different approaches across the face. Your forehead might become shiny while the cheek area remains comfortable or slightly dry. Applying the same amount of skincare and powder to every section may not give you the most balanced finish.
Keep preparation appropriate for each area and apply contour only where it adds the definition you want. If the cheeks look smooth without powder, there is no need to set them heavily simply because your forehead requires more control.
The aim is to help the different products work together. A lighter application and a little patience can make a greater difference than purchasing several additional products.
Mistakes That Can Make Contour Look Unnatural
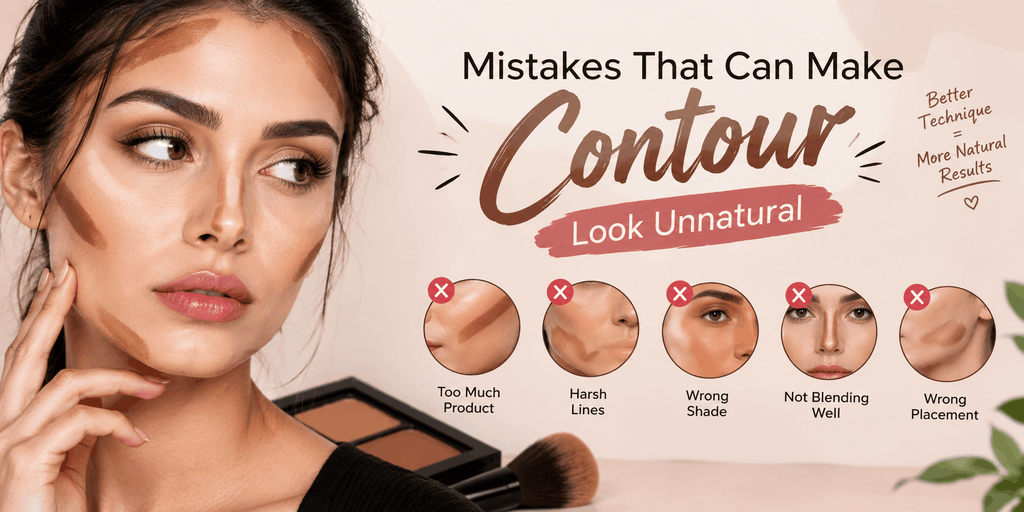
Contouring can appear harsh when the colour, placement, or amount does not suit the face. Fortunately, these problems are often easy to correct with a more controlled technique.
One mistake is starting with a thick stripe beneath the cheekbones. A large amount of product creates more work during blending and can leave the base looking muddy. Instead, place a small amount close to the area where you want the shadow and gradually soften its edges. You can always add more colour after checking the result.
Another mistake is copying a tutorial without considering differences in facial structure. The cheekbone placement that works on one person may not suit another person’s features. Use tutorials as a source of ideas rather than exact instructions. Experiment with placement in small adjustments and check the result from the front and side.
Blending can also become counterproductive when it removes all the definition. If you spread the colour too far across the cheek, the entire area may look slightly darker without creating a clear shadow. Concentrate the colour where you first placed it and blend outward until the transition looks smooth.
Using the wrong undertone is another common issue. A warm product may add a bronzed appearance rather than the impression of depth you wanted. If your goal is traditional contouring, look for a shade that resembles a believable shadow on your complexion. You can add bronzer separately when you want warmth.
Finally, check your makeup in natural light before leaving home. Strong bathroom lighting can hide uneven edges, while direct sunlight may make the contour look more intense. Looking at your face under ordinary daylight helps you decide whether the colour needs further blending.
What Matters When Comparing Different Contour Products
Product descriptions and promotional photographs can give you an initial idea of a formula, but they do not always show how it will behave with your own makeup. If you can test a contour stick, pay attention to how it spreads, how much colour it deposits, and whether the edges blend without disturbing the base.
A good comparison should consider more than the first few seconds of application. Notice whether the colour remains reasonably even, whether the finish suits your preferences, and whether the product feels comfortable as you wear it. Results can vary with climate, skin preparation, foundation, and individual skin characteristics, so no single formula will perform identically for everyone.
Packaging deserves consideration, too. A secure cap can prevent mess in a makeup bag, while a twist-up mechanism makes the product convenient to use. Check the size and quantity if you are comparing prices, because a lower purchase price does not always mean better value for the amount of product provided.
When reviewing your options, use these practical questions as a guide:
- Does the shade look believable when fully blended?
- Can you apply a small amount without creating a heavy patch?
- Does the formula work with the foundation or skin tint you normally wear?
- Is the finish suitable for your preferred makeup style?
- Can you carry and use the packaging conveniently?
- Does the product offer reasonable value for its size and performance?
These points help you compare products according to your own needs rather than relying entirely on popularity or price. If you are choosing between two similar options, a suitable shade and easy application may matter more than extra features you are unlikely to use.
Final Thoughts
A successful contour routine does not depend on applying the darkest shade or creating the sharpest lines. It comes from choosing a colour that suits your complexion, finding a formula that blends comfortably, and placing the product where it supports your preferred look.
A contour stick can simplify the process because it offers convenient placement and makes gradual application possible. Start with a light layer, blend carefully, and evaluate the result in natural lighting. Once you understand how the product works with your skin and foundation, you can adapt the technique for anything from understated daytime makeup to a more defined evening look.
Above all, treat contouring as a flexible makeup technique rather than a set of rules. Your features, preferences, and routine should guide the final result. The right product is the one that helps you achieve the appearance you want without making your makeup feel unnecessarily complicated.
Yes. You can use clean fingertips or a makeup sponge to blend many cream formulas. Fingers provide direct control and warmth, while a sponge can soften the edges for a diffused appearance. Begin with a very small amount and build the colour gradually until you achieve your preferred level of definition.
For many cream products, applying contour over foundation before setting the face with powder is a convenient approach. This allows you to blend the products while the base remains flexible. However, the best order can depend on the formula and the finish you want. Testing your products together can help you determine what works best.
It can add definition on its own, but contour and bronzer generally serve different purposes. Contour creates the appearance of shadow, while bronzer adds warmth. If you want both effects, you can use a contour product to shape selected areas and apply bronzer separately wherever you prefer a warmer finish.


2 Comments