
A great manicure is not created by nail polish alone. Behind smooth shaping, clean cuticles, durable extensions, and detailed nail art is a collection of carefully chosen nail tools. Whether you enjoy doing your nails at home or work as a professional nail technician, the right equipment can make each step easier, more controlled, and more enjoyable.
The interesting thing about nail tools is that you do not need an enormous collection to achieve impressive results. A small, well-organized setup can handle everyday manicures, gel applications, nail extensions, and creative designs. What matters is understanding what each tool does, when to use it, and how to choose one that suits your technique.
Some tools focus on preparation, others help create structure, and a few make the finishing touches possible. Together, they turn a basic manicure into a more polished experience. Here are ten essential nail tools worth understanding before building your own nail kit.
1. The Tools That Build a Clean Nail Foundation
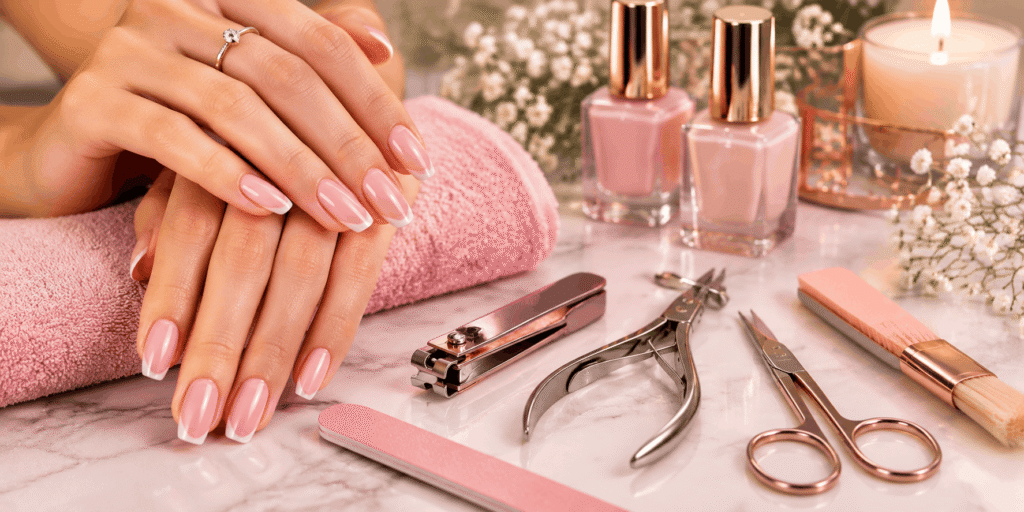
Before applying color or creating elaborate designs, natural nail tools need proper preparation. This stage is often overlooked, but it has a major influence on how neat the final manicure looks and how well certain nail products perform.
1. Nail Files and Buffer Blocks
Nail files are among the most frequently used tools in any manicure setup. They help shape the free edge, refine corners, remove roughness, and prepare artificial enhancements for finishing. Although they may look simple, different files serve different purposes.
A coarse file is generally used for reducing bulk on suitable artificial enhancements, while a finer-grit file is better for refining surfaces and shaping natural nails. Buffer blocks provide a softer finishing action and can help smooth minor surface irregularities.
The grit number matters. Lower numbers indicate a coarser abrasive, while higher numbers indicate a finer one. Using an excessively coarse file on natural nails can cause thinning, peeling, and unnecessary damage. Choose the grit according to the material being filed rather than reaching for the roughest option.
For a practical collection, keep a few different grits available instead of relying on one file for every job. Disposable files are convenient for maintaining hygiene, while washable or reusable options must be cleaned according to their manufacturer’s instructions.
2. Cuticle Pushers and Precision Nippers
Cuticle nail tools help create a clean-looking area around the nail plate. A pusher gently moves back the non-living tissue attached to the nail surface, making the nail appear more defined and helping technicians work neatly around the cuticle area.
Metal pushers are popular because they are durable and easy to clean when designed for professional use. Wooden orangewood sticks offer a softer, disposable alternative. The best choice depends on the user’s technique and comfort.
Nippers are designed for carefully removing loose, dead pieces of skin, such as hangnails. They should not be used to aggressively cut living skin or remove the protective tissue around the nail. Cutting too deeply can cause bleeding, irritation, and infection.
A comfortable grip and sharp, properly maintained blades are important. Dull nippers may pull or tear skin instead of making a clean cut. Keep these tools disinfected according to professional requirements, and never share inadequately sanitized equipment.
3. Nail Dust Collector
Filing artificial nails creates fine dust that can spread across the workstation and settle on nearby surfaces. A nail dust collector helps capture much of this airborne and surface-level debris near its source.
This tool is particularly useful for technicians who regularly work with acrylic, builder gel, hard gel, or other enhancement products that require filing. It can make the workstation more comfortable and reduce the amount of dust that escapes into the surrounding area.
Some models are built directly into a manicure table, while others are portable units that sit beneath the client’s hands. Look for effective filtration, suitable airflow, replacement filter availability, and a design that is easy to maintain.
A dust collector is not a replacement for general ventilation or appropriate protective practices. Fine particles can still escape, so a clean working environment and suitable respiratory protection remain important.
2. Electric Tools That Make Technical Work Easier
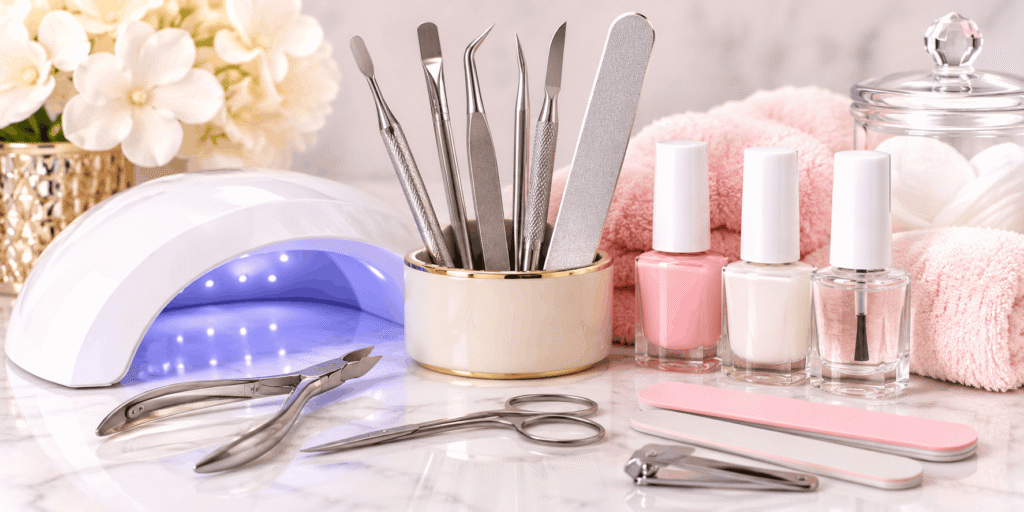
Manual tools are essential, but electric equipment can improve efficiency when used correctly. These tools are especially useful for professional nail technicians who regularly perform detailed preparation, product removal, and enhancement services.
4. Electric Nail File (E-File)
An electric nail file, often called an e-file, uses a motorized handpiece to rotate interchangeable bits. It can help with reducing artificial product, refining enhancements, cleaning certain areas, and performing other controlled filing tasks.
Different bits are designed for different purposes. Ceramic and carbide bits are commonly used for removing or reducing suitable artificial products, while finer diamond bits may be used for specific surface-preparation and cuticle-area techniques by trained professionals.
The shape, grit, material, and intended use of a bit matter. A barrel bit, flame bit, and ball bit do not perform the same job. Choosing a bit simply because it looks professional can lead to poor results.
An e-file also requires training. Excessive pressure, incorrect angles, high speed, or prolonged contact can create heat and damage the natural nail plate or surrounding skin. Beginners should learn safe handling before attempting advanced techniques. Never use an e-file to aggressively thin natural nails.
A reliable machine should offer controllable speed, a comfortable handpiece, low vibration, and a stable forward-and-reverse function where appropriate. The best e-file is not necessarily the fastest one; control is far more valuable than impressive numbers on the packaging.
5. UV and LED Nail Lamps
Gel products need the correct light exposure to cure. A UV or LED nail lamp provides the light required by compatible gel formulas, turning them from a liquid or semi-liquid coating into a hardened layer.
Not every lamp works equally well with every gel product. The wavelength, lamp design, output, curing time, and compatibility with the formula all matter. Follow the manufacturer’s curing instructions rather than assuming that a longer or shorter exposure will automatically produce a better result.
An important detail is that a gel surface can appear dry while the material underneath remains insufficiently cured. Inadequate curing can increase the risk of product failure and skin sensitization. Avoid allowing uncured gel to touch the skin, and do not use a lamp that is incompatible with the product.
When choosing a lamp, consider its internal space, hand positioning, timer settings, sensor features, and compatibility with the gels you use most often. A lamp that comfortably accommodates the entire hand can make application more consistent.
3. Tools for Extensions, Structure, and Long-Lasting Results
Nail tools and structured manicures require more than color. They depend on products and accessories that help create the desired shape, support the nail, and produce a balanced finish.
6. Nail Forms and Extension Tips
Nail forms and extension tips are two common ways of creating additional length. Although both can produce longer nails, they work differently.
Extension tips are pre-shaped pieces that are attached to the natural nail using a suitable adhesive or compatible system. They are available in different lengths, curves, and shapes, allowing technicians to create a starting structure before applying enhancement products.
Nail forms, on the other hand, are positioned beneath the natural nail’s free edge. They provide a temporary guide for sculpting an extension directly with an appropriate enhancement product. Forms are particularly useful when a technician wants more control over the extension’s shape and structure.
The correct fit is essential. A tip that is too narrow or too curved can create pressure or an unnatural appearance. A poorly positioned form can produce an uneven extension that requires excessive filing.
Choose forms that fit securely and tips that match the client’s natural nail shape as closely as possible. The goal is not simply to create length; it is to create a balanced extension that looks attractive and feels comfortable.
7. Nail Brushes for Gel, Acrylic, and Art
Nail brushes are small tools with a surprisingly large influence on the final result. Their shape, bristle material, size, and flexibility determine how easily a product can be placed, moved, blended, or detailed.
A flat gel brush is useful for spreading compatible gel products across the nail surface. A liner brush helps create fine lines, borders, and delicate patterns. Detail brushes are helpful for small decorative elements, while suitable acrylic brushes are designed to pick up and control acrylic product.
Using one brush for every material is not always practical. Different formulas have different consistencies, and a brush that works beautifully with one product may be difficult to control with another.
Brush care also deserves attention. Clean brushes using the product manufacturer’s recommended method, reshape the bristles gently, and store them in a way that protects their tips. Leaving gel in a brush can cause the bristles to harden, while incorrect cleaning products may damage certain brush materials.
For someone starting a nail kit, a medium gel brush, a fine liner, and a suitable detail brush are a useful foundation. More specialized brushes can be added as new techniques are learned.
8. Builder Gel and Builder-in-a-Bottle Products
Builder gel is used to create structure, reinforce suitable nails, or build extensions depending on the formula. It is different from ordinary decorative gel polish because its purpose is not simply to add color.
Builder-in-a-bottle products, often called BIAB, are packaged in a bottle with a brush applicator. They can be convenient for creating a structured overlay or adding support to suitable natural nails. Their consistency and application method may feel more familiar to people who already use regular gel polish.
Traditional builder gels may come in pots and often require a separate brush. Some are designed for overlays, while others can be used for sculpting extensions. Hard gel is generally more rigid and may require filing for removal, whereas certain soak-off builder formulas are designed to be removed using a compatible soaking process.
These categories are not interchangeable. Always check the product’s instructions, intended use, removal method, and lamp requirements. Applying a product too thickly or allowing it to touch the skin can create problems, and incorrect curing may leave material insufficiently hardened.
A good builder product should suit the technician’s working speed and the client’s nail condition. Stronger does not automatically mean better; the right structure should be balanced, comfortable, and appropriate for the service.
4. The Finishing Touches That Make a Manicure Stand Out
Once preparation and structure are complete, the finishing stage gives a manicure its personality. This is where clean color application, thoughtful decoration, and attention to detail make the difference between an ordinary result and a memorable one.
9. Nail Art Tools and Mixing Palettes
Nail art tools allow technicians to experiment with designs that go beyond a single shade. Dotting tools, stamping accessories, striping brushes, tweezers, and fine detail brushes can all help create different effects.
Dotting tools are useful for polka dots, flower centers, and small decorative patterns. Striping brushes can produce delicate lines, geometric designs, and abstract details. Tweezers help position small decorations such as rhinestones, foil pieces, and charms.
A small mixing palette or dedicated nail art palette is useful for arranging colors and blending compatible products. It also helps keep the main product containers clean and organized.
The most useful nail art collection is not necessarily the largest. A few dependable tools can create many different designs when paired with creativity and practice. For example, a dotting tool can create flowers, dotted borders, and simple character details without requiring a large collection of specialized accessories.
Clean tools between colors and avoid returning contaminated product to its original container. This simple habit helps maintain cleaner application and reduces unnecessary product waste.
10. Sanitization and Workstation Hygiene Tools
A professional-looking manicure should also be a hygienic one. Cleaning and disinfection equipment may not be the most exciting part of a nail kit, but it is among the most important.
Useful supplies include an appropriate cleaning solution, disinfectant approved for the intended tools, disposable towels, covered storage containers, hand hygiene products, and suitable waste bins. Some reusable metal implements can be disinfected and, where required, sterilized using the correct professional process.
Cleaning and disinfection are not identical. Cleaning removes visible dirt and product residue, while disinfection uses an appropriate method to reduce microorganisms on suitable surfaces and implements. Tools must be cleaned before disinfection because leftover debris can interfere with the process.
Follow the disinfectant label for concentration, contact time, and material compatibility. Do not assume that a quick spray or wipe is sufficient for every implement. Porous or single-use items, such as certain wooden sticks and disposable files, should not be treated as reusable tools.
A clean workstation also includes regularly wiping surfaces, managing dust, replacing disposable materials, and keeping clean implements separate from used ones. Good hygiene protects both the technician and the person receiving the service.
How to Build a Nail Tool Kit Without Buying Everything at Once
A common mistake is purchasing dozens of products before understanding which services will actually be performed. A better approach is to build a kit in stages.
For a beginner, start with a selection of nail files, a gentle buffer, a cuticle pusher, a suitable brush, a nail clipper, and basic hygiene supplies. These tools support simple manicures without requiring a large investment.
If you plan to work with gel polish, add a compatible UV or LED lamp and the preparation products recommended by the gel manufacturer. Choose products from a system that provides clear instructions and curing guidance.
For extensions, the next stage may include nail forms or tips, a suitable builder product, and brushes designed for the material. An e-file and dust collector can be added when you have learned how to use them safely and have a regular need for their functions.
If nail art is your interest, gradually introduce liner brushes, dotting tools, palettes, tweezers, and decorative accessories. You can expand your collection as your skills develop rather than buying every tool at the beginning.
The best kit is the one that supports the services you perform consistently. Quality, compatibility, hygiene, and safe handling matter more than the number of items inside a storage case.
What to Check Before Buying Professional Nail Tools
Before purchasing a tool, consider how often you will use it and what job it needs to perform. A low-cost item may be perfectly suitable for occasional home use, while a professional technician may need a more durable version designed for frequent use.
Pay attention to the material and construction. Metal tools should feel sturdy and have smooth working edges. Brushes should hold their shape and suit the product they are intended for. Electric equipment should have reliable controls and replacement parts where necessary.
Compatibility is especially important with gel products and curing lamps. Check the manufacturer’s instructions rather than relying on a product’s general description. Similarly, choose e-file bits according to their intended application and learn the correct technique before using them on clients.
Hygiene should influence every purchase. Tools that are difficult to clean or have inaccessible areas may be less practical in a professional setting. Look for products that can be maintained according to relevant salon standards.
Finally, avoid buying equipment only because it is popular on social media. A tool may look impressive in a video but offer little value for your particular services. Choose based on your actual needs, working style, and level of experience.
Final Thoughts
Nail tools are the foundation of a well-executed manicure. Files and cuticle implements support preparation, electric equipment can improve efficiency, brushes and builder products help create structure, and nail art accessories make creative expression possible. Hygiene supplies keep the entire process responsible and professional.
You do not need to own every tool available to create beautiful nails. Start with the essentials, learn how to use each item correctly, and expand your collection as your experience grows. A carefully selected kit can make nail care more organized, precise, and enjoyable—whether you are perfecting your own manicure or building a professional nail business.

One Comment