
Black nails have a way of making even the simplest manicure feel intentional. They can look sleek and understated, playful and artistic, or full of sparkle without relying on bright colors. Whether you love a clean, glossy finish or enjoy experimenting with patterns, textures, and tiny details, black is a versatile shade that gives you plenty of room to create a look that feels personal.
The secret to making black nails interesting is to play with contrast. A little silver can create a cool metallic effect, a touch of gold adds warmth, and a matte topcoat can completely change the mood of a familiar design. You can also experiment with translucent finishes, colorful accents, delicate linework, or unexpected patterns.
These 27 black nail designs offer inspiration for different moods and styles, from minimalist manicures to statement-making nail art. Some are easy to recreate with a few basic tools, while others are better suited to a nail artist who enjoys detailed work. You can adapt the colors, shapes, and placement to suit your own nails, whether you prefer short, rounded tips or longer, more dramatic shapes.
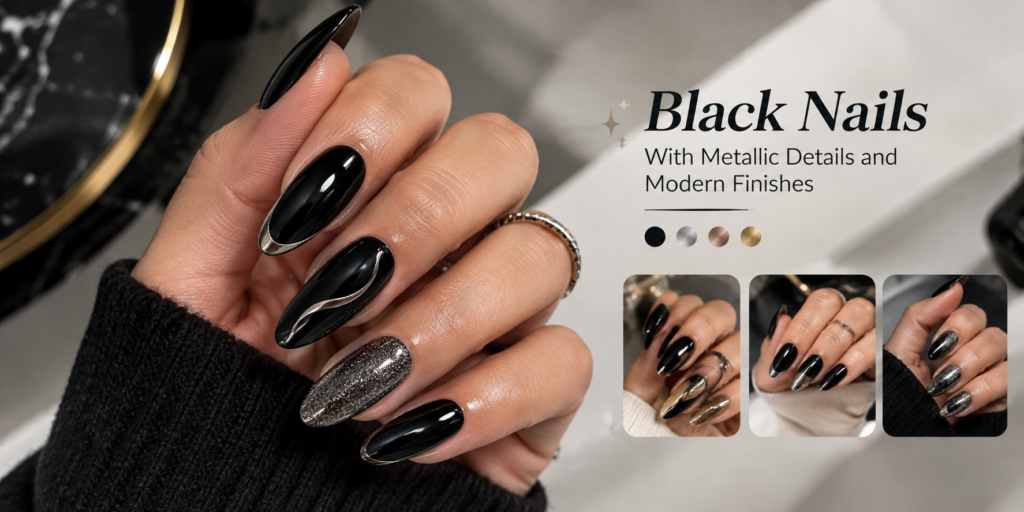
Black Nails With Metallic Details and Modern Finishes
Metallic accents are an easy way to give black nails extra dimension. Silver creates a crisp, cool contrast, while gold brings a warmer, more decorative finish. You do not need to cover every nail in glitter or foil, either. Sometimes one tiny detail is enough to make the entire manicure feel considered.
1. Minimalist Black and Silver
black and silver nails are a lovely option when you want something refined without making the design too complicated. Start with a glossy black base and add a small silver line, dot, or geometric accent to one or two nails. The contrast feels clean and modern, especially when the metallic detail is kept delicate.
For a more understated version, paint most nails black and leave one accent nail with a sheer or nude base. Add a narrow silver stripe down the center or close to the cuticle. This creates visual interest without making the manicure feel crowded.
You can also experiment with tiny silver studs or foil fragments. Place them asymmetrically rather than repeating the exact same pattern on every nail. The small differences give the set a more custom look.
2. Black and Gold Lightning Bolts
Black and gold lightning bolts bring a graphic, energetic feel to a manicure. The black base makes the gold design stand out, while the sharp zigzag shape gives the nails a little movement. This is a fun choice if you like bold details but still want to keep the color palette simple.
Paint the nails black, then add a gold lightning bolt to one or two accent nails. You can use metallic nail polish, a fine nail-art brush, or nail stickers if you prefer a more precise shape. Keep the bolt narrow for a subtle look, or make it larger so it becomes the main feature.
A variation is to use a gold bolt on a clear or milky base, with the remaining nails painted black. This creates a different balance between the dark background and the metallic detail.
3. Black Glitter Swirl Nails
Glitter swirls are a playful way to soften the solid appearance of black polish. Instead of covering the entire nail with sparkle, use curved lines that flow across the surface. The result can feel elegant, festive, or artistic depending on the glitter you choose.
For a classic version, start with glossy black polish and draw thin silver glitter swirls over the top. You can make each nail slightly different, using a single curve on some and a more intricate double swirl on others.
If you want a more subtle finish, use fine glitter rather than chunky pieces. Fine glitter catches the light without overwhelming the design. A clear topcoat helps smooth the surface and gives the swirls a more polished appearance.
4. Black and Silver Disco
Black nails and silver disco nails are made for anyone who enjoys a manicure with a little extra sparkle. The combination brings to mind mirrored surfaces, tiny flashes of light, and party-inspired nail art. You can make the design as dramatic or as restrained as you like.
One approach is to use a black base with silver glitter concentrated near the tips. Another is to apply small reflective pieces across one or two accent nails while keeping the rest glossy black. This gives the manicure a disco-inspired effect without making every nail equally busy.
For a more coordinated look, repeat one silver detail throughout the set. A small cluster near the cuticle or a narrow glitter stripe can tie the design together.
5. Black and Silver Cat-Eye
Cat-eye nail polish creates a shifting line of light that appears to move as the nails catch different angles. On a black base, silver magnetic polish can create a striking, almost metallic effect. It is a good choice when you want your manicure to look dimensional without adding lots of separate decorations.
Apply the magnetic polish according to the product instructions, then use the magnet to guide the reflective particles into a line or diagonal highlight. The exact effect depends on the polish and magnet, so experimenting with the angle can help you find a finish you like.
You can keep all nails in the same cat-eye style or combine them with plain black nails. A mix of glossy black and magnetic silver creates contrast while keeping the overall palette consistent.
6. Glossy Black and Gold
Glossy black and gold nails offer a warm, polished alternative to silver accents. The combination can look minimal when you use only a thin gold line, or more decorative when you add foil, tiny stars, or abstract shapes.
For a simple design, paint each nail black and add a small gold detail near the base. You could also create a gold outline along one side of the nail, leaving most of the black surface untouched.
Gold foil is another option. Apply a few small pieces over a tacky layer or suitable nail-art adhesive, following the product directions. Avoid placing too many pieces in one area if you want the design to stay balanced.
7. Criss-Cross Black Nails
Criss-cross nail art uses intersecting lines to create a graphic pattern. It can resemble delicate ribbons, a simple grid, or a more intricate lattice, depending on how closely the lines are spaced.
Start with a black base and use silver, white, or a contrasting glossy finish to draw diagonal lines across the nail. Keep the lines thin for a subtle effect, or make them thicker if you want the pattern to be more visible.
You can also reverse the design by using a sheer base with black intersecting lines. This version feels lighter while still keeping black as the main design element. If you are creating the pattern at home, a striping brush or nail-art tape can help you achieve cleaner lines.
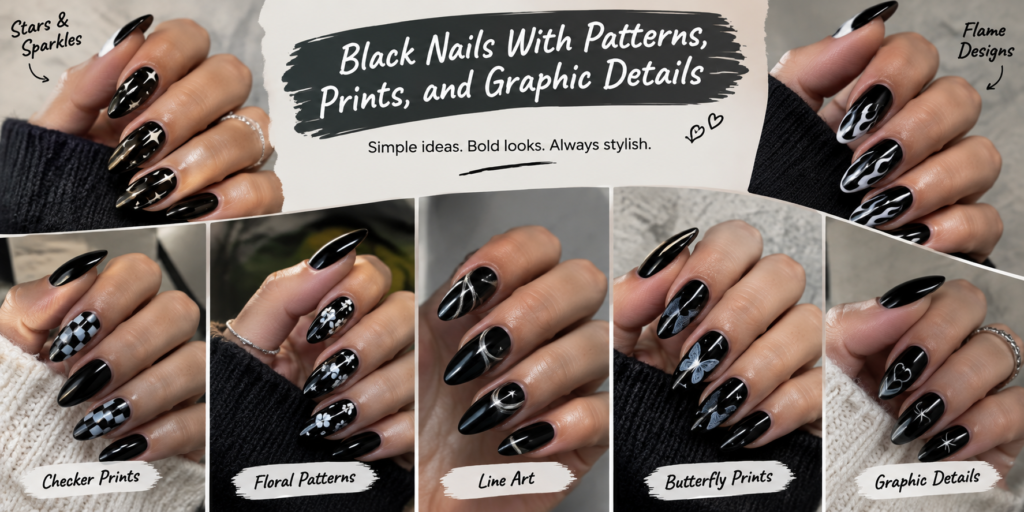
Black Nails With Patterns, Prints, and Graphic Details
Patterned black nails are ideal when you want your manicure to feel more expressive. Animal prints, checkerboard designs, and abstract lines can all look different depending on how much space they occupy. A useful approach is to choose one main pattern and pair it with simpler nails, rather than trying to fit every idea into a single set.
8. Matte Black Leopard
Matte black leopard nails offer a softer, more textured take on animal-print nail art. The matte finish reduces shine, while the leopard spots create a pattern that feels playful without needing several colors.
You can create the look with a matte black base and glossy black spots. Because the colors are similar, the design is subtle and relies on the difference in finish to become visible. For a more noticeable version, add a few gray or taupe details around the spots.
The placement does not need to be identical on every nail. A scattered pattern across one or two accent nails can look just as intentional as a full leopard-print set. Finish with the appropriate topcoat for the texture you want to preserve.
9. Black Mix-and-Match Nails
Mix-and-match black nails combine several designs within one manicure. You might pair a plain glossy nail with a checkerboard pattern, a silver accent, a tiny heart, and a simple French tip. The shared black color helps the different elements feel connected.
The trick is to create variety without making the set look random. Choose two or three supporting colors, such as white, silver, or nude, and repeat them throughout the designs. You can also keep the patterns at a similar scale so that no single nail feels disconnected from the others.
This style is especially useful if you cannot decide between several nail-art ideas. Instead of choosing only one, use a different design on selected nails and let the black base tie everything together.
10. Zebra Print
Zebra-print nails bring a bold pattern into a simple black-and-white palette. The irregular stripes make the design lively, and you can adjust their thickness to create different effects.
For a classic version, use a white or pale base and add black stripes that curve slightly rather than running in perfectly straight lines. The variation makes the pattern look more natural. You can use zebra print on every nail or reserve it for two accent nails alongside solid black polish.
For a more unexpected take, use a sheer base with black stripes or add a small silver detail to one nail. Keep the stripes relatively clear and avoid overcrowding the surface, especially if your nails are short.
11. Black Glitch Checkered Nails
Glitch checkered nails mix the familiar checkerboard pattern with offset lines or small distortions. The effect feels digital and graphic, as though the pattern has shifted slightly out of place.
Start with a black-and-white checkerboard on one or two nails. Then add a narrow colored or metallic line along one edge of a few squares. Silver, pale blue, or bright white can help suggest the glitch effect without introducing too many colors.
Another version uses slightly misaligned black squares over a light base. The imperfect spacing is part of the design, so the pattern does not need to look completely uniform. Keep the other nails simple to let the checkerboard remain the focal point.
12. Black Grids
Black grid nails use straight lines to create a clean, structured pattern. The design can be delicate and minimal or bold and graphic, depending on the thickness of the lines and the color of the base.
A sheer pink, nude, or milky background with fine black lines creates a light, modern look. For a stronger version, use a black base and draw a contrasting grid in white or silver.
You can create a full grid across each nail or place the lines only on one side. A partial grid often feels less busy and can be easier to adapt to different nail shapes. Nail tape may help with straight lines, while a fine brush works well for more delicate details.
13. Matte Black and White Scratches
This design combines a matte black background with irregular white marks that resemble abstract brushstrokes or scratches. It has a slightly artistic, distressed appearance without needing a complicated pattern.
Apply matte black polish, then use a fine brush to add short white strokes in different directions. Vary the length and spacing so the marks do not look like a perfectly repeated pattern. You can place them near the tips, across the center, or on just one or two nails.
For a softer version, use gray instead of bright white. You can also leave some nails completely matte black to give the design more breathing room.
14. Colorblock Black Nails
Colorblock nails use distinct areas of color to create a bold, organized design. Black works well as the anchor shade because it gives the other colors a clear outline and makes the shapes stand out.
Try combining black with white, muted pink, pale blue, or a warm neutral. Divide the nail into two or three sections using diagonal lines, curved blocks, or simple vertical panels. The design does not need to be identical on every nail; repeating the same colors in different arrangements can make the set feel more creative.
If you prefer a more minimal look, use black as the main color and add just one small block of a contrasting shade. This keeps the manicure visually interesting without covering the nail in multiple colors.
Black Nails With Hearts, Stars, and Playful Details
Black nail art does not have to feel serious or overly dramatic. Tiny hearts, smiley faces, cherries, and stars can give a dark manicure a lighter personality. These designs work particularly well when you keep the base simple and let a few small illustrations do the talking.
15. Black Cherries
Black cherry nails offer a fun alternative to traditional red cherry nail art. The dark color palette gives the fruit-inspired design a slightly unexpected twist, especially when paired with a glossy finish.
Start with a sheer pink, nude, or pale background and paint small black cherry shapes on one or two nails. Use two rounded shapes for the cherries and thin lines for the stems. You can add a tiny highlight in white or silver to make the design look more dimensional.
For a darker version, use a black base and create the cherries in a contrasting shade such as burgundy, deep red, or pale pink. The cherries can be placed near the tips or scattered across the nail. Keep the illustrations small enough that their shapes remain clear.
16. Black Smiley Nails
Black smiley nails bring a cheerful detail to a manicure while keeping the overall look simple. The familiar smiley-face design can be adapted with different expressions, sizes, and placements.
A classic version uses a pale base with small black smiley faces. You can place one face on each nail or use them only on accent nails, pairing them with solid black polish elsewhere.
If you want a more unusual look, use a black base and draw the smiley faces in white, silver, or a bright pastel. You can also vary the expressions slightly, using a wink or a simple curved smile on different nails. A dotting tool can help create the eyes, while a fine brush works for the mouth.
17. Black Opal Hearts
Black opal heart nails combine a dark base with colorful, reflective details. The idea is to create hearts that seem to shift in color when they catch the light, inspired by the changing tones of opal.
You can achieve a similar effect with iridescent flakes, special-effect polish, or nail-art pieces designed for a reflective finish. Place the heart on one or two accent nails rather than covering every nail with the same motif.
A black base makes the colorful details stand out, while a clear topcoat can help smooth the surface. If you prefer a subtle design, use a small opal heart near the cuticle. For a more decorative set, combine the hearts with fine silver lines or tiny stars.
18. Translucent Black Heart Nails
Translucent black heart nails use sheer black polish to create a smoky, glass-like effect. The hearts can be slightly darker than the background, giving the design a layered appearance rather than a flat, solid look.
Start with a clear or sheer base and apply a translucent black layer. Add a heart using a more concentrated black polish, keeping the edges neat but not necessarily perfectly sharp. The contrast between the two finishes creates the main effect.
You can also reverse the design by using a black base with a sheer heart shape left in the center. This works especially well when the heart is simple and not too small. A glossy topcoat helps bring the different layers together.
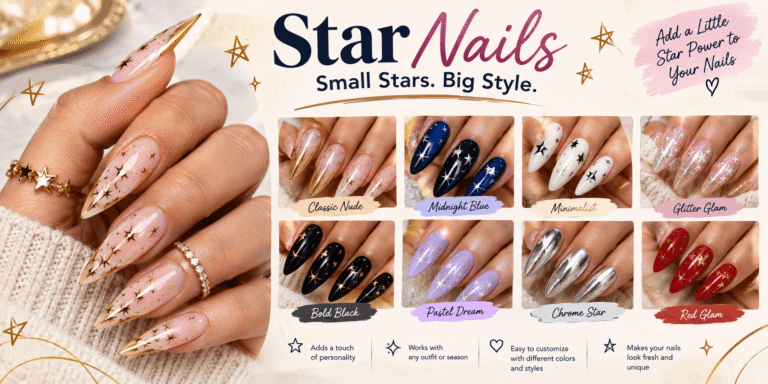
19. Black Star Nails
Black star nails are a versatile choice because stars can look delicate, playful, or bold depending on their size and placement. You can use tiny scattered stars, a single oversized star, or a combination of different shapes.
For a minimalist manicure, apply black polish and add one small silver or white star to each accent nail. If you prefer a softer look, use a sheer base with black stars and a few tiny dots around them.
Another option is to combine black stars with a moon motif or fine metallic lines. Keep the spacing balanced so the design does not become too crowded. Star stickers can make the shapes easier to apply, while a fine brush gives you more control over the final arrangement.
20. Black Moon and Star Nails
Moon-and-star nail art creates a celestial theme using simple shapes. Black provides a natural background for silver, white, or gold details, making it easy to build a design around small moons, stars, and dots.
You could paint every nail black and add a crescent moon to one accent nail, then scatter tiny stars across another. Alternatively, use a sheer base and draw the celestial shapes in black for a lighter effect.
Gold details create a warmer, decorative finish, while silver feels cooler and more metallic. If you want a coordinated set, repeat the same moon or star shape on several nails but change its position slightly. This keeps the theme consistent without making every nail identical.
Black French Tips, Auras, and Gradient Designs
French tips and gradient effects are popular ways to experiment with black without covering the entire nail. A small dark tip can create a clean outline, while an aura or ombre effect blends black into another shade. These designs can be adjusted for different nail lengths and shapes, so you can choose a subtle or more dramatic finish.
21. Dual-Finish Black French Tips
Dual-finish black French tips combine two different textures, usually matte and glossy, within the same manicure. The result is understated because the colors stay the same, but the difference in shine makes the design noticeable.
Start with a black base and create a French tip using a contrasting finish. For example, a matte nail with glossy black tips creates a subtle shine-on-shine effect. You can reverse the textures by using a glossy base and matte tips.
This design works well with both curved and straight French-tip shapes. If you want a more distinctive version, add a thin silver line between the base and the tip. Keep the line narrow so it does not compete with the finish contrast.
22. Mod French Tips
Mod French tips use graphic shapes and exaggerated curves to give the classic French manicure a more modern appearance. Instead of following a traditional narrow white tip, you can create a black tip with a rounded, angled, or unusually wide shape.
A simple version pairs a sheer nude base with a thick black tip. For a more graphic design, make the tip asymmetrical or add a second curved line just below it.
You can also combine black tips with small white dots or a fine silver outline. The overall effect depends on the shape you choose, so consider how the design follows the natural curve of your nails. A clean outline helps the manicure look intentional.
23. Black and White Pastel Gradient Grid Nails
This design brings together three elements: a soft gradient, a black-and-white grid, and pastel shades. The combination can look detailed and artistic, so it helps to keep the pattern focused on selected nails.
Begin with a pastel gradient using two or more soft shades, such as pink, lavender, or pale blue. Once the base is dry, add thin black or white grid lines over the gradient. The lines create structure, while the blended colors keep the design from feeling too rigid.
You can use the grid on one or two accent nails and paint the rest black, white, or a matching pastel. This makes the manicure easier to coordinate and gives the detailed nails space to stand out.
24. Black and Blue Auras
Black and blue aura nails create a soft, diffused effect by blending dark polish with a blue center or halo. The contrast can feel atmospheric without requiring additional decorations.
Use a black base and blend blue polish into the center of the nail, allowing the color to fade outward. A sponge or an airbrush-style technique can help create a soft transition, depending on the products you have available.
For a more subtle effect, choose a muted blue. A brighter blue creates a stronger contrast and makes the aura more noticeable. You can leave the nails free of extra art or add a tiny silver star to one accent nail.
25. Black and White Auras
Black and white aura nails use a light center surrounded by a darker edge, or the reverse, to create a soft-focus effect. The monochrome palette keeps the design simple while the blended finish gives it depth.
One version begins with a white or milky center and blends black toward the edges. Another uses a black center surrounded by a smoky gray or white halo. Both approaches create a gradient that looks different from a traditional French tip.
The key is to blend the transition rather than leaving a hard line between the colors. You can use a sponge to soften the edges, building the effect gradually. A glossy topcoat can make the finished gradient appear smoother.
26. Black Jelly Nails
Black jelly nails use a translucent black polish that allows some light to pass through. Unlike an opaque black manicure, the sheer finish gives the nails a glassy, layered appearance.
Apply a thin layer of jelly polish and build up the color gradually until you reach the transparency you like. You can leave the finish plain or add small details such as silver stars, fine lines, or tiny hearts.
A particularly interesting variation is to use different levels of transparency across the set. Some nails can have one sheer coat, while others have two or three. Keeping the same color family helps the manicure feel coordinated even when the opacity changes.
27. Black Grunge Ombre
Black grunge ombre nails blend black into another shade to create a smoky, faded effect. The look can be subtle when paired with gray or nude, or more colorful when blended with burgundy, purple, or blue.
For a classic version, begin with a lighter base and blend black toward the tips. A sponge can help soften the transition, while several thin layers allow you to build the darker edge gradually.
You can keep the ombre smooth and glossy or add a matte topcoat for a softer, hazier appearance. If you want a more textured design, combine the gradient with a few fine silver marks or small stars. Avoid adding too many details if you want the fade to remain the main feature.
How to Choose and Maintain Your Black Nail Design
With so many ways to wear black nails, choosing a design often comes down to the finish and level of detail you enjoy. A simple glossy manicure can feel just as deliberate as a detailed mix-and-match set. Think about whether you prefer a clean, minimal look, a playful pattern, or a manicure with metallic accents that catch the light.
Matching the Design to Your Style
If you like understated nail art, consider minimalist black and silver, dual-finish French tips, or a sheer black jelly manicure. These designs rely on small differences in texture and placement, so they do not need many decorations to feel complete.
If you enjoy graphic patterns, zebra print, grids, checkerboards, and criss-cross lines offer plenty of ways to experiment. You can use one pattern across the entire set or combine it with solid black nails for contrast.
For a more playful manicure, try smiley faces, cherries, hearts, or stars. These small illustrations can make black nails feel less formal while keeping the color palette coordinated. Metallic designs, including gold lightning bolts and silver cat-eye polish, are useful when you want a more reflective finish.
Adapting Black Nail Art to Different Nail Lengths
Black nail designs can be adapted to short or long nails. On shorter nails, small details and simple patterns may be easier to see clearly. A narrow French tip, a single heart, or a tiny star can create interest without requiring much space.
Longer nails provide more room for detailed illustrations, gradients, and patterns that extend across the nail. However, you do not need long nails to enjoy intricate nail art. A skilled nail artist can adjust the scale and placement of a design to suit the available surface.
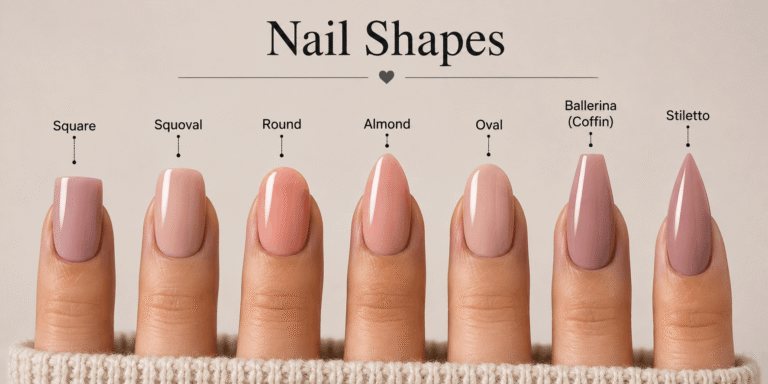
The shape of the nail also affects the final appearance. Rounded and oval shapes can soften graphic patterns, while square or almond shapes may create a different outline for French tips and geometric art. Choose the shape that feels comfortable and practical for your routine.
Keeping the Finish Smooth and Neat
Preparation can make a noticeable difference to how your manicure turns out. Start with clean nails, gently shape the edges, and use a suitable base coat before applying color. Follow the polish instructions and allow each layer to dry or cure as directed.
Black polish can make uneven application more noticeable, so thin coats are often easier to control than one thick layer. Use a small cleanup brush with an appropriate remover to tidy the edges if needed. For designs that include glitter, foil, or raised details, choose a topcoat that is compatible with the products you are using.
A glossy topcoat can enhance the shine of solid black nails, while a matte topcoat changes the finish without requiring a different color. If you are combining matte and glossy sections, make sure you apply each finish carefully so the contrast remains clear.
Making Your Manicure Last
A manicure’s durability depends on the polish system, preparation, application, and your daily activities. Try to avoid using your nails as tools, and follow the care instructions for the products used. If you notice lifting, chipping, or irritation, take a break from the manicure and seek appropriate professional advice when needed.
For press-on nails, choose a size that fits comfortably and follow the adhesive instructions. Avoid forcing a nail into place if it does not fit correctly. When removing polish or enhancements, use the recommended removal method rather than pulling or scraping them off.
If you are visiting a salon, bring a reference image and explain which parts of the design matter most to you. You can ask the nail artist to simplify tiny details or adjust the colors to suit your preferences. This can help you get a design that feels personal while staying practical for your nails.
Final Thoughts
Black nails offer much more variety than a single solid manicure. Metallic details can add shine, matte finishes create a different texture, and patterns such as leopard print, zebra stripes, grids, and checkerboards bring a graphic element to the look. Hearts, stars, smiley faces, and cherries add a playful touch, while French tips, jelly polish, and aura gradients provide more subtle ways to experiment.
The most interesting design is not necessarily the one with the most decorations. A small silver accent, a softly blended blue aura, or a glossy black French tip can make a manicure feel distinctive without becoming complicated. You can also combine a few ideas from this list to create a mix-and-match set that reflects your own taste.
Use these 27 black nail designs as inspiration, then adjust the colors, patterns, and finishes to make the manicure your own. Whether you prefer something minimal or enjoy detailed nail art, black gives you a flexible starting point for a look that feels polished, creative, and uniquely yours.
3 Comments