
A good manicure can change the entire mood of a look, and happy nails are all about bringing that feeling directly to your fingertips. Instead of relying on one specific color or pattern, this nail trend focuses on cheerful shades, playful details, unexpected combinations, and designs that simply feel fun to look at.
The idea is intentionally flexible. Happy nails can be bright and colorful, soft and pastel, fruity, floral, smiley, sparkly, or even slightly nostalgic. You can go all out with a different design on every nail, or keep the base simple and add one tiny detail that makes the manicure feel more joyful.
What makes this trend especially easy to personalize is that there is no strict formula. A colorful French manicure can qualify just as easily as tiny flowers on a milky base or a collection of miniature smiley faces. The key is choosing details that make the manicure feel energetic and positive rather than overly serious or predictable.
If you have been searching for a manicure that feels fresh instead of repetitive, these 10 ideas offer plenty of inspiration. They cover different color palettes, nail lengths, finishes, and levels of detail, so you can find a version that actually fits your style.
What Makes a Nail Design Feel “Happy”?
Before choosing a specific manicure, it helps to understand what gives this style its cheerful character. There is no official rulebook for happy nail art, but certain design choices naturally create a more playful impression.
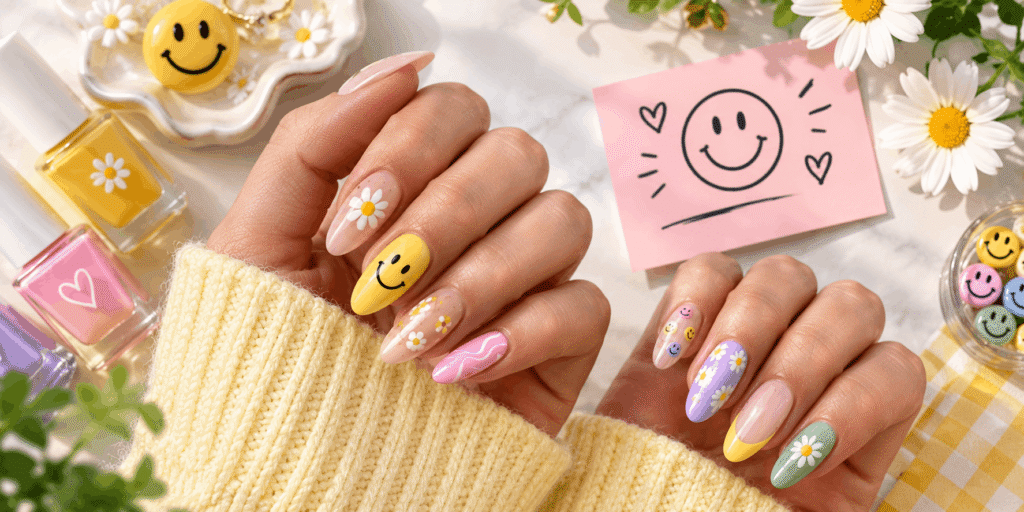
Bright colors are an obvious starting point. Yellow, pink, orange, turquoise, green, lavender, and blue can instantly make a manicure feel more energetic. However, bright colors are not essential. Soft pastels can create the same mood when combined with playful shapes or small illustrations.
Another important element is contrast. Pairing unexpected colors can make a simple manicure much more interesting. Pink with orange, blue with yellow, green with lavender, or red with baby blue can create a lively effect without requiring complicated artwork.
Small illustrations can also change the entire personality of a manicure. Smiley faces, flowers, cherries, hearts, stars, clouds, fruit, and tiny bows all bring a sense of playfulness.
The finish matters too. Glossy polish generally creates a fresh, polished appearance, while chrome, shimmer, jelly, and glitter can make the same colors feel more expressive.
Quick Guide to Choosing Your Happy Nail Style
| If you want… | Try… | Overall feel |
|---|---|---|
| Something subtle | Milky base + tiny colorful details | Soft and cheerful |
| Maximum color | Rainbow or mismatched tips | Playful and energetic |
| Cute nail art | Smiley faces, flowers, or fruit | Fun and youthful |
| A polished look | Pastel French tips | Clean and bright |
| Something bold | Neon accents + graphic shapes | High-energy |
| A glamorous finish | Chrome + colorful details | Fun with a polished edge |
| A warm, cheerful look | Coral + tiny floral or heart details | Sunny and lively |
You do not have to follow one category exactly. Combining two approaches can often make the manicure feel more personal.
1. Sunshine Yellow With Tiny Smiley Details
Yellow is almost impossible to ignore when you want a manicure with an instantly cheerful personality. Instead of covering every nail in an intense yellow, you can use a softer butter-yellow shade or combine yellow with a neutral base.
One of the easiest versions is to create a milky or sheer base and add small yellow smiley faces to selected nails. The simple facial expression becomes the main decorative element without making the manicure overly complicated.
For a stronger look, paint several nails in a sunny yellow and leave the remaining nails sheer or pale pink. The contrast keeps the manicure interesting while preventing the yellow from becoming visually overwhelming.
You can also experiment with different expressions. Some smiley faces can have tiny closed eyes, while others can be simple dots and curved smiles. Slight variations make the manicure feel more playful.
How to Make Yellow Nails Look More Refined
If you like the cheerful idea but want something less cartoon-like, use a muted yellow instead of a neon shade. A soft butter or pastel yellow can look surprisingly elegant when paired with a clean glossy finish.
Another option is to use yellow only as an accent. A yellow French tip with one tiny smiley face on an accent nail can give you the same playful effect while keeping most of the manicure understated.
This approach works particularly well if you normally prefer simple nails but want to experiment with something more expressive.
2. Rainbow French Tips With a Clean Base
A rainbow French manicure is one of the easiest ways to create happy nails without covering the entire nail with artwork.
Start with a sheer, nude, or milky base. Then use a different color for the French tip on each nail. You could choose pink, orange, yellow, green, blue, and purple, or create your own combination using your favorite shades.
The colors do not have to follow the traditional rainbow order. A more random arrangement can make the manicure feel contemporary and less predictable.
For short nails, keep the tips relatively thin. A micro-French design leaves enough visible base to prevent the nails from looking crowded.
Longer nails give you more room to experiment with wider tips, double French lines, or tiny details above the colored sections.
Adding One Extra Detail
If you want more than colorful tips, add a tiny star, dot, flower, or heart to one or two nails.
The important thing is not to add a different illustration to every nail. The rainbow tips are already doing most of the visual work, so a few small details can be enough.
You can also match the decorative details to the tip colors. A tiny yellow flower above a yellow tip or a blue star above a blue tip creates a subtle connection between the elements.
3. Mini Flower Power Nails
Flowers are naturally associated with cheerful designs, but you do not need detailed botanical artwork to create the effect.
Tiny five-petal flowers can be placed across a sheer or pastel base. Each flower can have a different color, or you can keep the petals consistent and change only the centers.
For example, a pale pink base could feature tiny yellow, blue, and white flowers scattered across the nails. The result feels playful without requiring a heavy layer of decoration.
Another option is to use a different pastel base on each nail and place one small flower in the center. This creates a mismatched manicure while keeping the design visually connected.
A Simple Way to Balance Floral Nail Art
If you are worried that flowers will make the manicure look too busy, leave one or two nails mostly plain.
A completely simple nail between decorated ones creates negative space and gives the eye somewhere to rest.
You can also vary the size of the flowers. Small flowers work well near the cuticle or tip, while one larger flower can become the focal point of an accent nail.
For a more modern interpretation, use abstract petals rather than trying to paint realistic flowers. Slightly irregular shapes can actually make the design look more intentional and artistic.
4. Candy-Colored Mismatched Nails
If choosing one color feels impossible, do not choose one.
A mismatched manicure can combine several cheerful shades while keeping each nail slightly different. Think strawberry pink, lemon yellow, orange, mint green, sky blue, and lavender.
The easiest way to keep the result coordinated is to choose colors with a similar intensity. Pairing several soft pastels creates a completely different effect from mixing extremely bright neon shades.
You can also give each nail its own finish. One could have a French tip, another a small heart, another a solid color, and another a few dots.
The Three-Color Rule
If a fully mismatched manicure feels too chaotic, choose three main colors and repeat them throughout the set.
For example, pink, yellow, and blue can appear in different combinations across all ten nails. This creates variety without making the design look random.
You can also use one neutral shade as an anchor. A milky white or sheer nude between colorful nails can make the brighter shades stand out more clearly.
5. Cherry-Red Fruit Details
Tiny cherries can turn a simple manicure into something playful almost immediately.
Instead of painting large fruit illustrations, use small pairs of red circles with thin green stems. They can be scattered across a neutral base or placed only on a few accent nails.
A pale pink, cream, or milky base works particularly well because it allows the red details to stand out.
For a stronger design, combine cherry details with red French tips. The repeated red color creates consistency without making every nail identical.
Making Fruit Nail Art Look Modern
The secret is keeping the illustrations small and simple. You do not need to draw realistic cherries.
Two red dots connected to a tiny green stem are enough to communicate the idea.
You can also place a single cherry near the cuticle or at the side of the nail instead of centering it. Off-center details often create a more contemporary appearance.
If you want a more colorful version, add tiny yellow or pink dots around the cherries. Just be careful not to add so many elements that the fruit loses its visual impact.
6. Pastel Clouds and Tiny Rainbows
For a softer interpretation of happy nails, combine pastel clouds with tiny rainbows.
A pale blue or milky base can become the background for small white clouds. Add miniature curved lines in pink, yellow, orange, green, and blue to create tiny rainbows on one or two nails.
This design has a whimsical quality without requiring a large amount of detail.
If you prefer a simpler manicure, skip the rainbows and use only tiny cloud shapes on a pastel blue base. The result can still feel cheerful while remaining relatively understated.
Creating Depth With a Soft Base
A sheer base with a subtle shimmer can make the clouds and rainbow details appear slightly more dimensional.
You can also use a glossy top coat to make the colors look brighter.
For a dreamy variation, use lavender, pale pink, and baby blue instead of traditional sky-blue shades. This shifts the design from a literal sky theme toward a softer fantasy-inspired manicure.
The same concept can be adapted to different nail lengths. On short nails, use very small clouds and minimal rainbow lines. Longer nails give you enough space for larger illustrations or several small elements.
7. Pink and Orange Pop Art
Pink and orange create a particularly energetic combination. The contrast between the two shades can make even simple shapes feel more dynamic.
Instead of painting every nail solid pink or orange, experiment with graphic details. You could create half-and-half nails, curved blocks of color, checkerboard sections, or abstract waves.
Tiny hearts, dots, or stars can be added to selected nails.
This is a good choice if you want happy nails that feel bold without relying on traditional smiley faces or flowers.
Keeping Bright Colors Wearable
If neon shades feel too intense, choose softer versions of the same colors. Coral and dusty pink can provide the same contrast with a more muted appearance.
You can also use a neutral base and reserve the bright colors for thin lines or small shapes.
This approach gives you the energy of a colorful manicure without requiring every nail to be highly saturated.
8. Jelly Fruit Nails
Jelly-style polish can give colorful nail art a translucent, almost candy-like appearance.
A sheer pink, orange, yellow, green, or blue base can create the foundation. Tiny fruit-inspired details can then be layered on top.
Watermelon slices, citrus shapes, strawberries, or tiny grapes can all work, but you do not need to use every fruit at once.
Choose one main fruit and repeat it in slightly different positions. This keeps the manicure recognizable while avoiding visual clutter.
For an especially playful result, use different translucent colors on each nail and add small white highlights to make the manicure look glossy and juicy.
Why Jelly Finishes Work So Well
The transparency keeps bright colors from looking too heavy. Instead of a completely opaque layer, the light passes through the polish and creates a softer effect.
This can be especially useful if you want colorful happy nails but prefer designs that still feel light.
A glossy top coat can enhance the glass-like appearance, making the colors look even more vibrant.
9. Tiny Hearts on a Milky Base
Sometimes the simplest design can have the strongest effect.
A milky white or translucent pink base creates a clean canvas for tiny colorful hearts. Each nail can have one heart, or you can scatter several small hearts across selected fingers.
Use different colors for the hearts to make the manicure more playful. Pink, red, orange, yellow, blue, and purple can all work together.
If you want a more sophisticated version, use only one color for the hearts, such as cherry red or soft pink.
Playing With Heart Placement
Try placing the hearts near the cuticle rather than directly in the center. Another option is to put one near the tip or along the side of the nail.
Changing the placement from nail to nail prevents the design from looking mechanically repeated.
You can also combine filled and outlined hearts. The contrast creates variety while keeping the manicure simple.
10. Confetti Celebration Nails
For the most energetic option, turn the nails into a miniature celebration with colorful dots, tiny shapes, and scattered accents.
Start with a clear, nude, or milky base. Then add small circles in different colors, along with tiny stars, hearts, or short lines.
The decorations should look scattered rather than arranged into a strict pattern.
You can use bright colors for maximum impact or pastel shades for a softer interpretation.
How to Keep Confetti Nails Balanced
The biggest risk with confetti designs is adding too much.
Instead of covering every nail completely, concentrate the details toward the tips or place them in small clusters.
You can also leave several nails with only a few dots while giving one or two accent nails more decoration.
This creates a sense of movement without making the entire manicure visually overwhelming.
Which Happy Nail Design Fits Your Style?
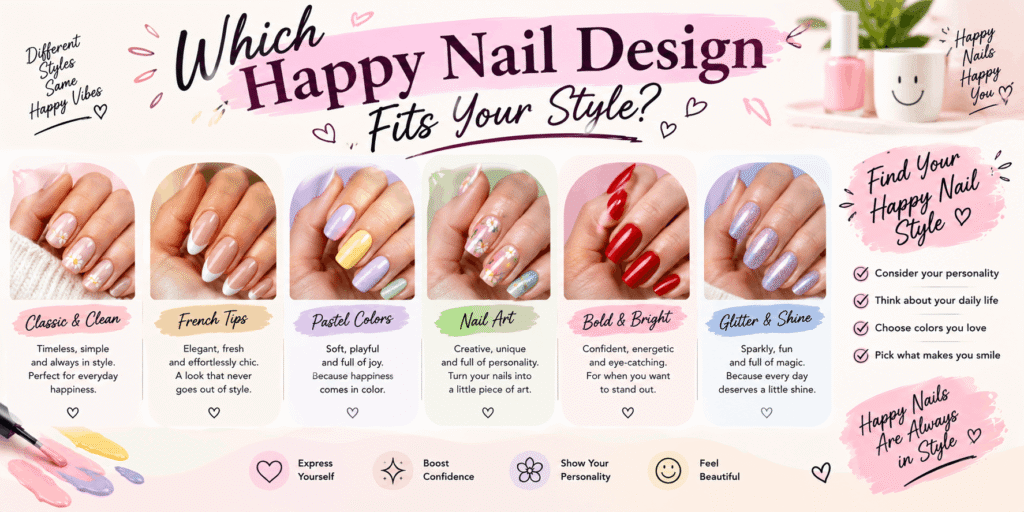
With so many ways to interpret the trend, the right choice depends less on what is currently popular and more on the mood you want your manicure to create.
If you like minimal designs, tiny hearts, small flowers, or a few smiley details over a sheer base can give you the look without excessive decoration. If you enjoy color, rainbow French tips or mismatched candy shades can make the manicure much more expressive.
For something cute, cherries and clouds are easy choices. If you want a stronger statement, pop-art color combinations and confetti details offer more visual impact.
You can also combine two ideas. A rainbow French manicure can include tiny flowers, while a milky heart design can incorporate a few pastel stars.
The goal is not to follow a fixed formula. Happy nails work best when the colors and details feel enjoyable to you.
Choosing Happy Nails for Your Nail Shape and Length
Your nail shape can change how a colorful manicure looks. The same design may appear completely different on short square nails compared with longer almond or oval nails, so it is worth considering the available space before choosing complicated artwork.
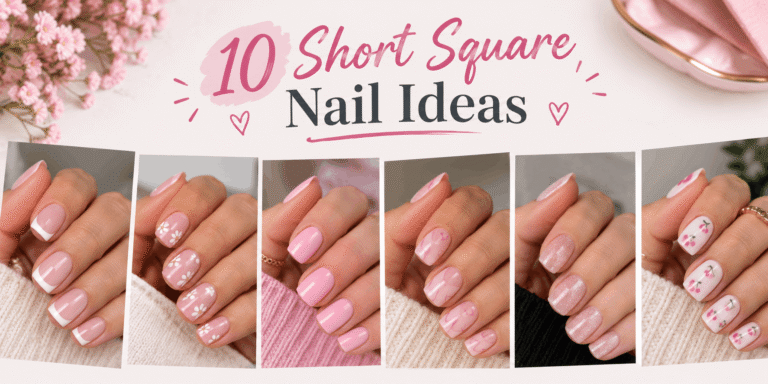
Short nails can look especially fresh with small-scale details. Tiny flowers, hearts, dots, mini fruit illustrations, colorful French tips, and simple smiley faces can fit naturally without requiring a large canvas. Keeping the artwork relatively small can also make the manicure look cleaner as the nails grow.
Medium-length nails give you more flexibility. You can combine a colorful base with small artwork or use different designs across individual nails. This length is also useful if you want your happy nails to look playful while still working with everyday outfits.
Longer nails provide additional space for more detailed artwork. Abstract shapes, larger flowers, rainbows, clouds, and layered designs can become more noticeable. However, extra length does not automatically mean you need more decoration. Sometimes a simple glossy color combination can have more impact than several competing patterns.
Matching the Design to the Shape
Almond and oval nails naturally provide a softer canvas for delicate details. Pastel shades, tiny flowers, curved French tips, and small hearts can complement the shape without making the manicure feel too busy.
Square and squoval nails work particularly well with graphic designs. Straight French tips, color-blocking, checker-inspired details, dots, and simple geometric shapes can emphasize the clean edges of the nail.
Round nails are a natural choice for playful designs because their softer outline pairs well with cheerful illustrations and rounded shapes. If your design includes smiley faces, flowers, clouds, or other curved details, the overall manicure can feel especially cohesive.
The important thing is not to treat these combinations as strict rules. Happy nails are meant to be expressive, so your favorite color or design can matter more than following a particular trend.
How to Build a Color Palette That Still Looks Polished
Color is one of the biggest parts of the happy nails aesthetic, but using too many unrelated shades can make the finished manicure look disconnected. A simple color strategy can make even a very playful design appear coordinated.
One approach is to choose a dominant shade, a supporting shade, and one accent color. The dominant shade appears most often, while the supporting color connects the different nails. The accent can then be used sparingly for small details.
Pastels create a softer version of happy nails. Pink, lavender, baby blue, butter yellow, mint, and peach can create a lighthearted manicure without feeling overly intense. These shades are particularly easy to combine because their softer appearance allows several colors to sit together comfortably.
Bright colors create a more energetic effect. Coral, vivid pink, orange, turquoise, yellow, and green can make the manicure stand out immediately. When using several saturated colors, a neutral or translucent base can provide visual breathing room.
A milky white or sheer nude base is another useful option because it allows colorful artwork to become the focus. Instead of covering every nail with a strong shade, you can use the base as a clean background for tiny decorative elements.
A Simple Happy Nails Color Guide
| Style you want | Color direction | Details that pair well |
|---|---|---|
| Soft and sweet | Pastels | Flowers, hearts, tiny dots |
| Bright and playful | Saturated colors | Smiley faces, fruit, graphic shapes |
| Clean and cheerful | Milky or sheer base | French tips, mini artwork |
| Retro-inspired | Red, orange, pink, yellow | Flowers, swirls, dots |
| Dreamy | Lavender, blue, pink | Clouds, stars, soft shimmer |
| Modern | Two or three contrasting colors | Abstract lines, blocks, French tips |
You can also use the colors already present in your wardrobe or accessories as inspiration. That can make a playful manicure feel surprisingly coordinated without requiring every nail to match exactly.
Making Playful Nails Feel More Elegant
Cheerful does not have to mean overly decorated. If you prefer a more sophisticated manicure, the trick is usually to reduce the scale of the artwork rather than remove the personality completely.
A transparent, nude, or milky base can instantly make colorful details feel more refined. Instead of covering the entire nail, place one small design near the tip or side. Tiny flowers, miniature hearts, small dots, and delicate French tips can create the same cheerful mood with a quieter finish.
Gloss also plays an important role. A smooth, shiny top coat can make simple artwork look more finished and can help several different colors appear intentional.
Another option is to use a single cheerful color throughout the manicure and vary the placement. For example, the same shade can appear as a French tip on one nail, a tiny dot on another, and a small graphic detail elsewhere. The manicure remains playful while maintaining a visual connection.
If you enjoy colorful nails but want them to work in more formal settings, this approach can be particularly useful.
DIY Happy Nails: Keeping the Application Clean
You do not need complicated equipment to create many happy nails designs at home, but neat application makes a significant difference. Before applying polish, make sure the nail surface is clean and dry. Removing excess oils can help the polish adhere more evenly.
Apply thin coats rather than trying to achieve full coverage with one thick layer. Thick polish can take longer to dry and may become uneven around the edges.
For small details, use a fine nail-art brush or dotting tool. If you do not have professional nail-art tools, simple household alternatives may work for basic dots and small shapes, provided they are clean and used carefully.
Do not worry if your first attempt is not perfectly symmetrical. Many cheerful nail designs are intentionally varied. Small differences between nails can actually make the manicure feel more handmade and personal.
When to Keep the Design Simple
If you are new to nail art, start with designs that rely on simple shapes. Dots, tiny hearts, curved lines, French tips, and basic flowers are easier to control than highly detailed illustrations.
You can also practice the artwork on a piece of paper or nail-art practice surface before putting it directly on your nails. This helps you understand how much polish your brush carries and how much pressure is needed.
A clean top coat can help unify the finished look. Apply it once the artwork has had enough time to settle so that the brush does not drag the details across the nail.
How to Make Happy Nails Last Longer
A good manicure is not only about how it looks immediately after application. Your everyday habits can affect how long the design stays fresh.
Try to avoid using your nails as tools. Opening packages, scraping surfaces, or repeatedly putting pressure on the nail tips can cause polish to chip or the nail itself to become damaged.
Moisturizing around the nails can also help keep the surrounding skin comfortable and cared for. Cuticle oil or a suitable hand moisturizer can become a simple part of your routine.
When washing dishes or using cleaning products, protective gloves can reduce prolonged exposure to water and household chemicals. This can be especially useful when you want a detailed manicure to remain intact.
If one nail chips, you do not necessarily need to remove the entire manicure. A small repair can sometimes extend the overall look, depending on the type of polish and design.
Turning One Happy Nails Idea Into Your Own
One of the easiest ways to make a trend feel unique is to change one element. You could keep the same base but switch the colors, replace flowers with hearts, change a glossy finish to shimmer, or use a different accent on only one nail.
For example, a rainbow French-tip concept can become softer when you use pastel shades instead of bright ones. The same concept can become more dramatic with vivid colors and a chrome finish.
You can also choose a theme based on something you already enjoy. Fruit, flowers, clouds, smiley faces, candy-inspired colors, tiny bows, stars, or abstract shapes can all create a cheerful effect without copying a particular manicure exactly.
The goal is not to reproduce a design perfectly. Happy nails work particularly well when there is room for personality.
Using Accent Nails Without Losing Balance
An accent nail can be useful when you want detailed artwork but do not want the entire manicure covered in it. Four nails can remain relatively simple while one nail receives the most noticeable design.
Another option is to use two accent nails with related artwork. For instance, one nail might have a small flower while another has a matching leaf. The remaining nails can use the same base color.
This approach gives the manicure a clear focal point while keeping the overall appearance organized.
Common Mistakes That Can Make Cheerful Nail Art Look Too Busy
One common problem is adding too many unrelated colors. There is nothing wrong with a colorful manicure, but repeating at least one or two shades across the design can help everything feel connected.
Another issue is placing large decorations on every nail. Charms, glitter, artwork, and strong colors can compete for attention when they are all used together. Choosing one dominant feature often produces a cleaner result.
Uneven spacing can also affect the appearance of small artwork. If you are creating dots, flowers, or other repeated details, leaving enough space between them can make the design easier to read.
Finally, do not feel pressured to copy a trend exactly. A manicure that fits your preferred colors, nail length, and everyday style will usually feel more natural than one chosen simply because it is popular.
Happy Nails for Different Occasions
Happy nails can be adapted for everyday wear, celebrations, holidays, vacations, and special events simply by changing the colors or amount of decoration.
For everyday nails, softer colors and small details can create a cheerful appearance without becoming distracting. A milky base with tiny colorful accents is one flexible approach.
For parties or celebrations, stronger colors, shimmer, chrome details, or more noticeable artwork can make the manicure feel festive.
For a vacation-inspired look, bright tropical colors, fruit details, sunshine motifs, or playful French tips can create a fun theme.
For events where you want something more polished, reduce the number of colors and use one or two delicate details. A glossy neutral base with small colorful accents can still capture the happy nails aesthetic while looking refined.
final thoughts
Happy nails are less about following one exact design and more about creating a manicure that feels bright, playful, and personal. You can achieve that mood with colorful French tips, tiny illustrations, cheerful patterns, pastel shades, glossy finishes, or even one small accent detail.
The most successful designs usually have some kind of visual balance. A strong color can be paired with a neutral base, detailed artwork can be surrounded by simpler nails, and several shades can be connected by repeating one color throughout the manicure.
You also do not need long nails or elaborate salon artwork to enjoy the trend. Short nails can look just as expressive with carefully placed dots, flowers, hearts, smiley details, or colorful tips.
Ultimately, the best approach is to use the idea of happy nails as a starting point rather than a strict formula. Choose colors you enjoy, adapt the design to your nail shape, and leave enough space for the manicure to look intentional. That is what turns a simple colorful manicure into something that feels genuinely cheerful and personal.
One Comment