Makeup is an important part of many beauty routines, and having the right tools can make a significant difference in the final look. While foundation, concealer, blush, and other cosmetics receive plenty of attention, makeup application tools are equally important. One of the most popular beauty accessories is the makeup sponge, a simple yet effective tool that helps create a smooth, even, and natural-looking finish.
A makeup sponge is designed to blend cosmetic products into the skin without leaving obvious streaks or uneven patches. Whether someone prefers light everyday makeup or a full-glam appearance, a good-quality sponge can make product application easier and more comfortable. It is especially useful for blending liquid and cream products, including foundation, concealer, contour, and blush.
Today, makeup sponges are available in different shapes, sizes, colors, and materials. Some feature pointed tips for detailed application, while others have rounded or flat surfaces for covering larger areas. There are also specialized options for applying powder and blending different cosmetic formulas.
Choosing the right makeup sponge can sometimes feel confusing because every type offers different features. Understanding how these tools work, how to use them correctly, and how to maintain them can help you make better beauty decisions. This guide explores everything you need to know about makeup sponges, from their benefits and different types to application techniques, cleaning methods, and buying tips.
What Is a Makeup Sponge?
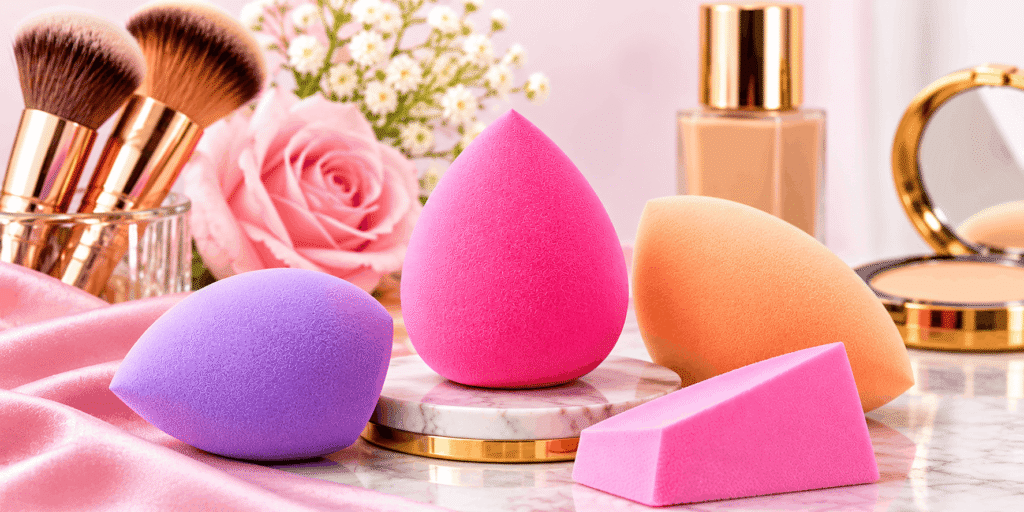
A makeup sponge is a soft cosmetic applicator used to distribute, blend, and smooth makeup products across the skin. Most traditional makeup sponges are made from flexible foam materials that become softer and larger when exposed to water.
Their main purpose is to help makeup blend evenly while reducing visible application lines. Unlike brushes, which use bristles to spread products, makeup sponges have a cushioned surface that gently presses cosmetics against the skin.
These tools are particularly popular for applying foundation and concealer. Their flexible texture makes it easier to work around different facial areas, including the cheeks, forehead, chin, nose, and under-eye region.
One of the biggest advantages of makeup sponges is their versatility. Depending on their shape and material, they can be used for several makeup techniques. A traditional sponge can help create a natural foundation finish, while a smaller sponge offers more control when blending concealer or correcting minor makeup mistakes.
Makeup sponges are also available in reusable and disposable varieties. Reusable options are commonly made from soft foam and require regular washing, while disposable sponges are designed for limited use.
Different Types of Makeup Sponges
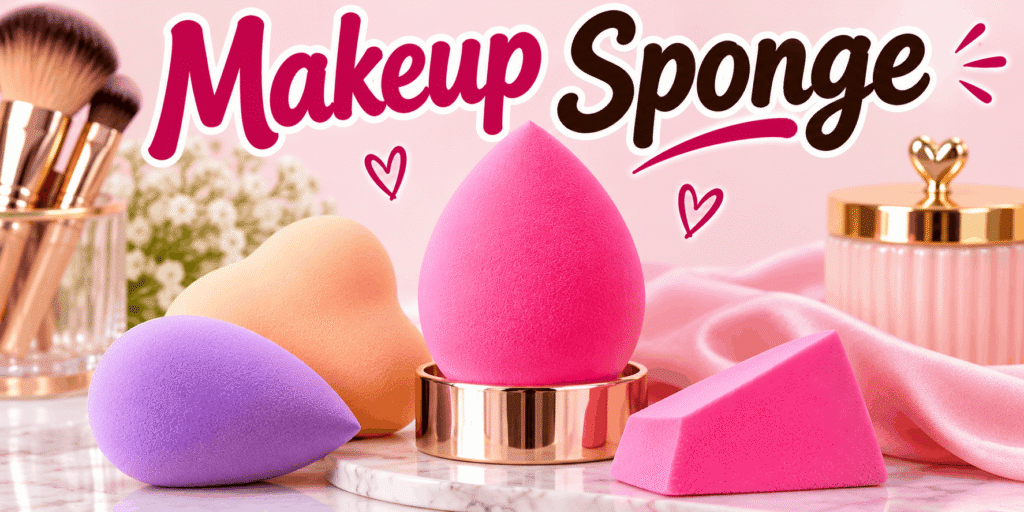
Not all makeup sponges are created for the same purpose. Their shapes, textures, and materials influence how they perform and which products they work best with. Understanding the different types can help you select an option that matches your makeup routine.
1. Teardrop Makeup Sponge
The teardrop makeup sponge is one of the most recognizable beauty applicators. It features a rounded bottom and a narrow pointed tip, making it suitable for several application techniques.
The rounded section is useful for blending foundation across larger areas, such as the cheeks, forehead, and chin. The pointed tip provides better control when applying concealer around the eyes and nose.
Its versatile design makes it a popular choice for beginners and professional makeup enthusiasts. People who prefer keeping their beauty collections simple often choose this style because it can perform several tasks.
2. Flat-Edge Makeup Sponge
Flat-edge makeup sponges feature one or more straight surfaces that provide additional control during makeup application. Their flat sides can be used to press foundation into the skin and blend products around the jawline and forehead.
Some versions have angled edges that make it easier to reach areas where a rounded sponge may feel less precise.
This type is especially useful for people who prefer controlled application and want to create a smooth complexion without using several different tools.
3. Mini Makeup Sponge
Mini makeup sponges are smaller than traditional blending sponges. Their compact design makes them ideal for detailed makeup work and areas that require extra precision.
They are commonly used for blending under-eye concealer, covering small imperfections, and applying makeup around the corners of the nose.
Mini sponges are also convenient for traveling because they occupy very little space in a makeup bag. Many beauty enthusiasts keep several small sponges for different products and application areas.
4. Silicone Makeup Sponge
Silicone makeup sponges have a smooth, flexible surface instead of the porous texture found in traditional foam applicators.
One of their main advantages is that they absorb very little liquid makeup. This can help reduce product waste, particularly when applying expensive foundations.
They are also relatively easy to clean because their surfaces do not contain the same type of porous foam structure.
However, silicone sponges require a different application technique. Rather than using repeated bouncing movements, users generally spread foundation gently across the skin and blend it carefully.
5. Powder Makeup Sponge
Powder makeup sponges and puffs are designed specifically for applying loose and pressed powders. They usually feature soft fabric, velour, or similar materials.
Their surfaces help distribute powder evenly and provide control when setting makeup. They are particularly useful for applying translucent powder underneath the eyes, around the nose, and across areas that become oily.
Some powder puffs include finger straps that make them easier to hold while applying products.
6. Triangular Makeup Sponge
Triangular makeup sponges feature pointed corners that provide excellent control when working around small facial areas.
Their shape makes them useful for applying and blending concealer around the nose, mouth, and under-eye region. They can also help remove excess powder from areas where precise application is required.
Many triangular sponges are disposable, making them convenient for professional makeup artists who work with multiple clients.
Benefits of Using a Makeup Sponge
A makeup sponge offers several advantages that can improve the overall makeup application experience. Its soft texture and flexible design make it suitable for blending different products while helping create a more polished appearance.
One of its biggest benefits is achieving an even foundation finish. Applying foundation with fingers or brushes can sometimes leave visible marks, especially when the product is not blended properly. A damp sponge can help soften these marks and distribute foundation more evenly.
Another advantage is controlled product application. Instead of applying a thick layer of foundation immediately, you can gradually build coverage using small amounts of product. This technique can help prevent makeup from looking unnecessarily heavy.
Makeup sponges are also helpful when blending multiple complexion products. After applying foundation, you can use a clean sponge to soften the edges of concealer, cream blush, and contour.
Additional benefits include:
- Smooth application: Helps blend liquid and cream products evenly.
- Natural appearance: Can create a softer, skin-like foundation finish.
- Buildable coverage: Allows you to gradually add more product where needed.
- Easy blending: Helps reduce harsh lines between different makeup products.
- Versatility: Different shapes are suitable for different makeup techniques.
- Convenience: Compact sizes make makeup sponges easy to carry.
- Beginner-friendly: Simple application movements make them easy to learn.
Although makeup sponges offer many benefits, the results depend on their quality, cleanliness, and the technique used.
How to Choose the Right Makeup Sponge
Selecting the right makeup sponge depends on your preferred products, application style, and personal requirements. Before purchasing one, consider a few important factors that can help you make a suitable choice.
Consider the Material
The material plays an important role in the performance of a makeup sponge. Traditional foam sponges are popular because they are soft, flexible, and suitable for liquid and cream products.
Silicone sponges are another option for people who want to minimize product absorption. Powder puffs, meanwhile, are designed for applying setting and finishing powders.
Choose a material that works well with the products you use most frequently.
Choose the Right Shape
Different shapes serve different purposes. A teardrop sponge is a versatile option for everyday makeup, while mini sponges are better for detailed blending.
Flat-edge designs provide additional control, and triangular sponges are helpful when working around smaller facial areas.
If you are purchasing your first makeup sponge, a medium-sized teardrop design is a practical starting point.
Check the Texture
A good-quality makeup sponge should feel soft and flexible. Its surface should not be excessively rough, stiff, or uneven.
The sponge should also return to its original shape after gentle squeezing. This flexibility makes it easier to blend products without applying unnecessary pressure.
Look for Easy Maintenance
Cleaning is an important part of makeup sponge maintenance. Choose an option that can be washed without losing its shape or becoming damaged too quickly.
Reusable sponges should be cleaned regularly, so selecting a durable product can make your beauty routine more convenient.
Consider Your Budget
You do not need to purchase an expensive makeup sponge to achieve attractive results. Many affordable options offer good performance for everyday makeup.
Instead of focusing only on price, consider product quality, material, durability, and customer reviews.
How to Use a Makeup Sponge Correctly
Using a makeup sponge may seem simple, but the correct technique can make a noticeable difference in your final appearance. A few basic steps can help you achieve smoother and more even coverage.
Step 1: Prepare Your Skin
Start by cleansing your face and applying your usual skincare products. Moisturizer helps create a comfortable base for makeup, while sunscreen provides daytime sun protection.
Allow your skincare products to settle before applying foundation. This can help prevent makeup from mixing with wet skincare layers.
Step 2: Wet the Sponge
For traditional foam makeup sponges, hold the applicator under clean running water until it expands.
Gently squeeze out the excess water using your hands. You can also press the sponge inside a clean towel to remove additional moisture.
The sponge should be damp rather than soaking wet. This helps it remain soft and flexible during application.
Not every makeup sponge needs to be wet. Silicone applicators and some powder puffs are generally used according to their product instructions.
Step 3: Apply Foundation
Place a small amount of foundation on the back of your hand or directly onto selected areas of your face.
You can begin with a little product and gradually add more where additional coverage is needed.
Avoid applying too much foundation at once because thick layers can be difficult to blend evenly.
Step 4: Blend Using Bouncing Motions
Use the rounded section of your damp sponge to gently press foundation across your face.
Move the sponge using light bouncing motions rather than dragging it repeatedly over the skin.
Pay attention to the hairline, jawline, and sides of the nose to avoid visible makeup edges.
Step 5: Blend Concealer
Use the pointed tip or smaller section of the sponge to blend concealer underneath your eyes and around the nose.
Apply gentle pressure and avoid rubbing delicate areas too aggressively.
This technique helps soften the edges of concealer and creates a more seamless appearance.
Step 6: Complete Your Makeup
After blending foundation and concealer, apply your preferred cream blush, contour, or bronzer.
Use a clean section of the sponge to soften harsh edges and blend the products together.
If you prefer a matte finish, apply setting powder with a suitable powder puff. Complete your routine with any additional makeup products you normally use.
Choosing a Makeup Sponge for Different Skin Types
Although makeup sponges can be used with different skin types, certain textures and application techniques may work better for individual needs.
Makeup Sponge for Dry Skin
People with dry skin often prefer soft sponges that work well with hydrating foundation formulas.
A damp foam sponge can help distribute liquid foundation without creating a thick appearance. Preparing the skin with moisturizer can also improve the overall application.
Avoid applying excessive powder to dry areas because it may emphasize flaky or rough texture.
Makeup Sponge for Oily Skin
For oily skin, a makeup sponge can help distribute lightweight foundation evenly.
After blending foundation, a powder puff can be used to apply a small amount of setting powder to areas that become shiny.
It is also important to clean the sponge regularly because oils and cosmetic residue can collect on its surface.
Makeup Sponge for Combination Skin
Combination skin includes both oily and dry areas, so a versatile teardrop sponge can be a practical choice.
Use gentle movements to blend foundation across the face and add coverage only where necessary.
A lightweight application can help prevent excessive product buildup around the forehead and nose.
Makeup Sponge for Sensitive Skin
People with sensitive skin should look for soft applicators with smooth surfaces.
Avoid using rough, damaged, or excessively stiff sponges. Clean the applicator regularly using a gentle cleanser and rinse it thoroughly.
If a particular material causes irritation, stop using it and consider a different option.
Makeup Sponge vs. Makeup Brush
Makeup sponges and brushes are two popular beauty tools, but they provide different application experiences.
A makeup brush uses bristles to spread and blend products. It is suitable for foundation, powder, blush, bronzer, and detailed application.
A makeup sponge uses a soft surface to press products into the skin. It is especially popular for blending foundation and concealer.
Both tools can create attractive results when used correctly.
| Feature | Makeup Sponge | Makeup Brush |
|---|---|---|
| Design | Soft foam or similar material | Bristles with a handle |
| Application | Pressing and bouncing | Spreading and buffing |
| Foundation finish | Smooth and blended | Buildable and controlled |
| Product absorption | Foam sponges absorb some product | Depends on brush type |
| Cleaning | Requires washing and drying | Requires regular brush cleaning |
| Best for | Foundation and concealer | Foundation, powder, and blush |
Many makeup enthusiasts prefer using both tools together. A brush can help distribute foundation quickly, while a sponge can soften the finish and blend visible edges.
Common Makeup Sponge Mistakes to Avoid
Even a high-quality makeup sponge cannot guarantee a flawless appearance if it is used incorrectly. Avoiding common mistakes can improve your application technique and help your beauty tools last longer.
Using a dry sponge incorrectly: Traditional foam sponges generally work well when damp. A completely dry sponge may absorb more liquid foundation and feel less flexible.
Applying too much pressure: Pressing too firmly can move foundation instead of blending it. Use light bouncing motions for a smoother result.
Using excessive foundation: Applying thick layers can make makeup appear heavy. Start with a small amount and build coverage gradually.
Dragging the sponge: Pulling the sponge repeatedly across the skin may create uneven coverage. Gentle pressing movements are usually more effective.
Ignoring the pointed tip: The narrow end is designed for smaller areas. Use it around the eyes, nose, and other places that need more precision.
Using a dirty applicator: Makeup residue and oils can accumulate inside a sponge. Regular cleaning helps maintain hygiene and application quality.
Storing it while wet: Keeping a damp sponge inside a closed makeup bag can encourage unpleasant odors and microbial growth. Allow it to dry completely before storage.
How to Clean and Maintain a Makeup Sponge
Cleaning your makeup sponge is an essential part of maintaining your beauty tools. Foundation, concealer, oils, and other cosmetic products can accumulate inside the material after repeated use.
A dirty sponge can affect makeup application and may become a source of unwanted microbial growth, especially when it remains damp.
Follow these simple cleaning steps to maintain your sponge.
Step 1: Wet the Sponge
Place the sponge under lukewarm running water until it becomes completely damp.
Avoid extremely hot water because it may damage the material.
Step 2: Apply a Gentle Cleanser
Use a dedicated makeup sponge cleanser or a mild soap suitable for cleaning cosmetic applicators.
Apply a small amount to the sponge and gently squeeze it to distribute the cleanser.
Step 3: Remove Makeup Residue
Massage the sponge carefully using your fingers.
Focus on areas where foundation, concealer, and other products have accumulated. Avoid twisting or pulling the material because this can damage its structure.
Step 4: Rinse Thoroughly
Rinse the sponge under clean running water while gently squeezing it.
Continue until the water runs clear and no visible cleanser remains.
Step 5: Dry Properly
Press the sponge inside a clean towel to remove excess water.
Place it in a clean, ventilated area where air can circulate around it. Make sure it is completely dry before storing it.
For everyday use, cleaning your sponge after each use is ideal when practical. At a minimum, wash it frequently and never share personal makeup applicators.
How Often Should You Replace a Makeup Sponge?
Makeup sponges gradually lose their original texture and performance through repeated use and washing. Their lifespan depends on material quality, frequency of use, and cleaning habits.
Many regularly used foam makeup sponges need replacement every one to three months, although some products may require replacement sooner.
Look for the following signs when deciding whether to purchase a new sponge:
- Visible cracks or small tears.
- A sponge that no longer returns to its original shape.
- Persistent stains after proper cleaning.
- An unpleasant smell that remains after washing and drying.
- A rough or damaged surface.
- Difficulty blending makeup evenly.
If your sponge develops visible mold or a persistent unpleasant odor, stop using it and replace it immediately.
Proper cleaning can help extend its useful life, but replacing damaged applicators is important for maintaining good beauty hygiene.
Creative Ways to Use a Makeup Sponge
A makeup sponge is not limited to foundation application. Its different surfaces can help with several other steps in a beauty routine.
Blending cream blush: Use the rounded side to soften the edges of cream blush for a natural appearance.
Applying concealer: The pointed tip helps blend concealer underneath the eyes and around the nose.
Softening contour: Gently press a clean sponge over cream contour to reduce harsh lines.
Applying tinted moisturizer: A damp sponge can distribute lightweight complexion products evenly.
Setting makeup: A suitable powder puff can press setting powder onto selected areas.
Correcting mistakes: A clean sponge can soften excess foundation or remove visible makeup edges.
Blending cream highlighter: Use gentle pressing movements to blend cream highlighter without disturbing the foundation underneath.
Remember to use a clean section of your applicator when switching between different products.
Conclusion
A makeup sponge is a simple but valuable addition to any beauty collection. It makes blending easier, helps create a smooth foundation finish, and offers a convenient way to apply different complexion products.
With so many shapes, sizes, and materials available, choosing the right makeup sponge depends on your skin type, preferred products, and everyday beauty routine. Whether you select a traditional teardrop sponge, a mini applicator, a flat-edge design, or a powder puff, proper technique and regular cleaning are essential for achieving good results.
Start with a soft, good-quality sponge, use gentle bouncing motions, and avoid applying too much product at once. Most importantly, remember that beautiful makeup does not require complicated techniques or expensive tools. A suitable makeup sponge, consistent practice, and proper care can help you achieve a smooth and naturally blended appearance.
A makeup sponge is used to apply and blend foundation, concealer, cream blush, contour, and other compatible cosmetic products. It helps create an even and smooth makeup finish.
Most traditional foam makeup sponges work best when slightly damp. Wetting the sponge helps it expand, become softer, and absorb less liquid foundation.
Yes. A makeup sponge is excellent for blending concealer underneath the eyes, around the nose, and over small areas that need additional coverage.
Ideally, wash your makeup sponge after every use. Frequent cleaning removes cosmetic residue and helps maintain better hygiene.