
Introduction
A polygel nail kit is a popular choice for people who want beautiful, durable, and salon-style nails at home. Whether you are a beginner learning nail enhancement for the first time or someone who already enjoys doing manicures, a polygel nail kit can help you create attractive nail extensions with the right tools and techniques.
Polygel combines some of the application benefits associated with acrylic and gel nail systems. Its thick consistency makes it easier to control than many traditional liquid-and-powder systems, helping you shape the product before curing it under a compatible nail lamp. With practice, you can create different nail lengths, shapes, and finishes without needing to visit a salon for every manicure.
However, achieving a professional-looking result requires more than purchasing a polygel nail kit. Nail preparation, product placement, proper curing, shaping, and aftercare all influence the final appearance and durability of your manicure.
This guide explains how to use a polygel nail kit step by step, which tools you need, how to avoid common mistakes, and how to achieve smooth, natural-looking results at home.
What Is a Polygel Nail Kit?
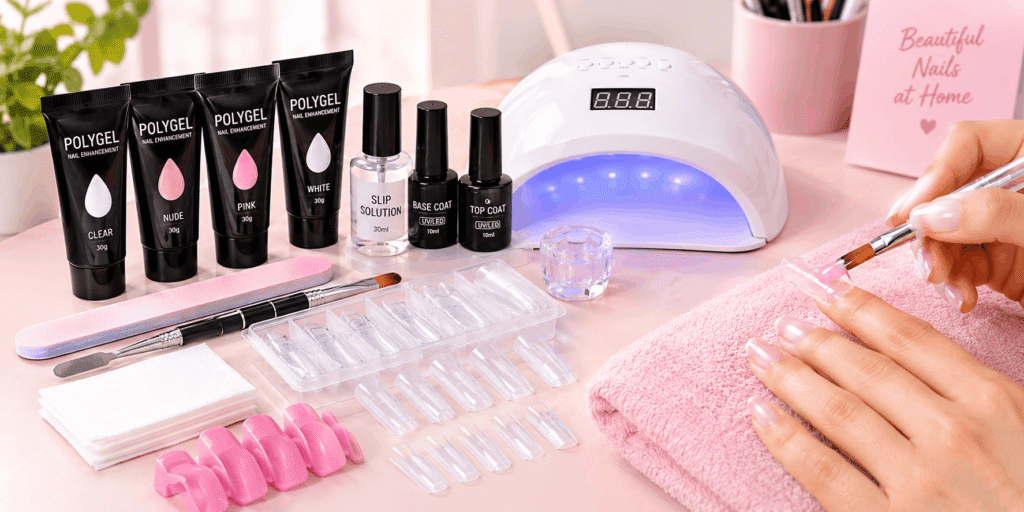
A polygel nail kit is a collection of products and tools designed to help users apply polygel to natural nails or create nail extensions. The exact contents vary by brand, but most beginner-friendly kits include several essential items.
Common components include:
- Polygel tubes: These contain the thick enhancement product used to build and shape the nails.
- Dual-ended application tool: Usually includes a spatula for picking up the product and a brush for spreading it.
- Slip solution: A compatible liquid that helps prevent the brush from sticking to the polygel during application.
- Nail forms or dual forms: These help create the desired length and shape of the extension.
- Base coat: A product used when required by the specific polygel system.
- Top coat: Adds a finished appearance and may provide extra shine.
- UV or LED nail lamp: Cures products formulated for use with the lamp’s wavelength and specifications.
- Nail file and buffer: Help refine the shape and smooth the surface.
- Other accessories: Some kits include nail clips, cuticle tools, lint-free wipes, and decorative items.
Before using your polygel nail kit, check the manufacturer’s instructions to confirm which products are included and which additional supplies you need.
Not every polygel nail kit uses the same application method. Some systems rely on dual forms, while others use traditional nail forms or tips. Choosing a kit with clear instructions can make the learning process easier, especially if you are new to nail extensions.
Why Choose a Polygel Nail Kit for Home Manicures?
A polygel nail kit offers several practical advantages for people who enjoy doing their own nails.
One major benefit is control. Polygel generally has a thick consistency that allows you to position and shape the product before curing. Unlike a fast-flowing liquid, it is less likely to spread immediately across the nail when used correctly.
Another advantage is versatility. Depending on the product and application technique, you can create short overlays, longer extensions, rounded nails, square tips, almond shapes, and other popular styles.
A polygel nail kit can also provide convenience. Once you understand the preparation and application process, you can complete your manicure at home using your preferred colors and finishes.
However, home application requires patience. A poorly prepared nail, an overly thick layer, or incomplete curing can affect the result. Beginners should focus on careful technique rather than trying to create extremely long extensions during their first application.

Step 1: Prep Like a Perfectionist
Nail preparation is one of the most important stages of using a polygel nail kit. Even a high-quality product may lift, look uneven, or become uncomfortable if the natural nails are not prepared correctly.
Clean Your Hands and Nails
Begin by washing your hands with soap and water. Dry them thoroughly before starting your manicure.
Remove any existing nail polish, gel polish, or other coating using a suitable removal method. If you have existing nail enhancements, avoid forcefully pulling or peeling them away because this can damage the natural nail plate.
Inspect each nail for visible damage, unusual discoloration, or irritation. Do not apply polygel over a nail that appears infected or has unexplained changes. Seek professional advice if you are unsure whether it is safe to proceed.
Clean tools and a tidy workspace are also important. Keep your polygel nail kit away from dust, food, and other sources of contamination.
Shape Your Natural Nails
Use a nail file to create a consistent starting shape. If you plan to build extensions with dual forms, you may prefer to keep your natural nails relatively short so they fit comfortably beneath the forms.
Avoid aggressive filing, particularly around the sides of the nails and the natural nail plate. Excessive filing can weaken the nails and cause sensitivity.
Gently push back the cuticles only if you can do so comfortably. Do not cut living skin or force tools underneath the cuticle area.
The aim is to create a clean surface while protecting the natural nail.
Remove Surface Shine Carefully
Some polygel systems require light buffing to remove the natural shine from the nail plate. Use a suitable fine-grit buffer and follow the product instructions.
You do not need to thin the natural nail or create deep scratches. Excessive buffing can make nails weak, painful, and more vulnerable to damage.
After preparation, remove dust with a clean nail brush or lint-free wipe. If your polygel nail kit instructions specify a nail cleanser or dehydrator, apply it as directed.
Apply the Required Base Products
Certain polygel systems require a dehydrator, primer, or base coat, while others use a different preparation process.
Follow the instructions supplied with your polygel nail kit instead of automatically combining products from different brands. Incompatible products may affect adhesion or curing.
If a base coat is required, apply a thin, even layer. Keep all nail products away from the skin and cuticles, and cure the base coat only according to the manufacturer’s directions.
Avoid touching the prepared nail surface with your fingers before application, as oils and residue can interfere with adhesion.
Select the Correct Dual Forms
If your polygel nail kit includes dual forms, choose a form that fits the width of each natural nail.
A suitable form should cover the nail from sidewall to sidewall without squeezing the surrounding skin. If a form is too narrow, the extension may look pinched or leave exposed areas. If it is too wide, the edges may extend beyond the natural nail and create an uneven finish.
Check each form before applying the product. Having the correct sizes ready makes the application process smoother and helps you work more consistently across all ten nails.
Preparation may take time, but it creates the foundation for a neat and professional-looking manicure.
Step 2: The Art of Application
Once your natural nails are prepared, you can begin applying the polygel. This stage requires a balance between using enough product to create strength and avoiding unnecessary thickness.
Apply a Thin Layer of Base Coat
If your chosen polygel nail kit requires a base coat, apply it evenly according to the manufacturer’s instructions.
Avoid allowing the product to flood the cuticles or touch the surrounding skin. Product contact can increase the risk of developing an allergy, particularly with repeated exposure to uncured acrylate ingredients.
Cure the base coat using the specified lamp and curing time. Do not assume that every UV or LED lamp works with every nail product.
Dispense the Polygel
Squeeze a small amount of polygel from the tube using the spatula end of your application tool.
Beginners often make the mistake of using too much product because they believe a thicker application will automatically produce stronger nails. In reality, excessive thickness can make the enhancement look bulky and may prevent proper curing.
Start with a manageable amount. You can add more product if necessary, but removing excess polygel after placement takes additional work.
If your kit includes a slip solution, use a small amount on the brush as directed. The solution helps the brush move through the thick product without dragging it excessively.
Do not substitute random liquids for the recommended slip solution. Some liquids may interfere with the product’s performance.
Place the Product Into the Dual Form
Spread the polygel inside the selected dual form, concentrating on creating an even layer.
Use gentle brush movements to distribute the product toward the sides and free edge. Keep the area near the cuticle thinner than the central stress area, while maintaining enough structure to support the extension.
The exact thickness and shape depend on your natural nail length and the manufacturer’s recommendations.
Before attaching the form, check that the product is distributed smoothly. Large lumps or uneven areas may create extra filing work later.
Attach the Form to Your Natural Nail
Position the filled dual form over your prepared nail, beginning at the cuticle area and lowering it carefully toward the free edge.
Apply gentle, controlled pressure to help the product spread evenly. Avoid pressing so hard that most of the polygel squeezes out from the sides.
Check the cuticle line and both sidewalls. If polygel touches your skin, remove the excess completely before curing. Do not cure the product while it is touching the skin.
Once the form is positioned correctly, hold it steady according to the kit’s instructions. Some systems allow you to secure the form with a clip, while others require you to hold it in place.
Cure the Polygel Correctly
Curing converts the formulated product into a hardened enhancement. It is an essential step when using a UV- or LED-curable polygel nail kit.
Place your hand inside the compatible lamp and follow the exact curing time specified by the manufacturer. Keep your fingers positioned correctly so the light reaches the required areas.
Avoid guessing the curing time or assuming that a longer exposure will fix an incompatible lamp. Thick applications, unsuitable lamps, and incorrect positioning can contribute to incomplete curing.
Uncured or undercured nail products can increase the risk of skin sensitization and allergic reactions. If you are uncertain whether the product has cured correctly, follow the manufacturer’s troubleshooting guidance rather than simply covering it with additional product.
Remove the Dual Form Carefully
After the product has been cured as directed, gently release the dual form if your system uses removable forms.
The form should come away without forceful pulling. If it feels stuck, check the manufacturer’s instructions rather than prying it away aggressively.
Inspect the new extension from above and from the side. Look for gaps, uneven edges, excessive thickness, or product that has reached the skin.
If your polygel nail kit uses paper forms instead of dual forms, the removal process will differ. Follow the instructions for that specific application method.
Repeat the Process for Each Nail
Continue with the remaining nails, using a correctly sized form and an appropriate amount of polygel for each one.
Work carefully rather than rushing to finish all ten nails. Consistent product placement, correct curing, and clean edges are more important than speed.
For beginners, short extensions are often easier to manage than very long ones. They also reduce the leverage placed on the natural nails during everyday activities.
Once every nail has been applied and cured, you can move on to shaping and finishing.
Step 3: Shape & Shine
After applying and curing the product, the next step is to refine your nails. Proper shaping helps your polygel nail kit deliver a smooth, balanced, and salon-inspired finish.
File the Nails Into Your Desired Shape
If you used dual forms, remove them according to the manufacturer’s instructions and inspect each nail. Use a nail file to refine the free edge and sidewalls.
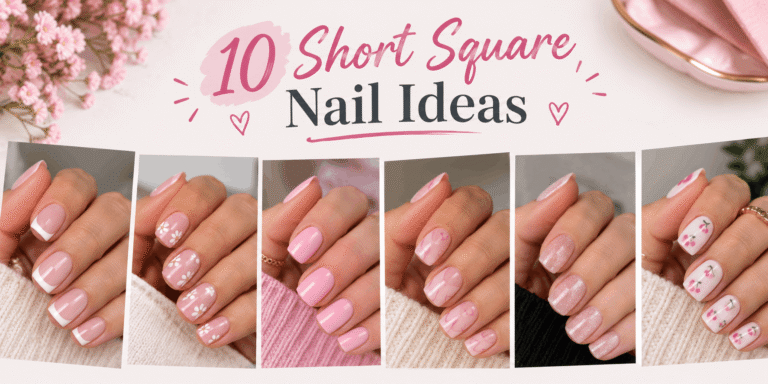
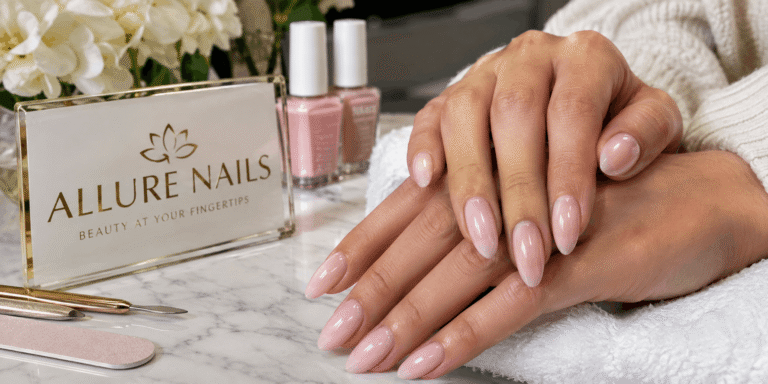
Popular shapes include square, oval, almond, and coffin. Choose a shape that suits your natural nail structure and the length you prefer.
Keep the file at a controlled angle and use gentle movements. Avoid filing too deeply into the natural nail or thinning the enhancement excessively. The goal is to create consistent edges without weakening the nail structure.
If you are a beginner, start with a short square or oval shape. These shapes are generally easier to maintain while you develop your filing technique.
Smooth the Surface
A polygel nail kit may produce a slightly uneven surface, especially when you are still learning how to distribute the product.
Use a suitable file or buffer to smooth small ridges and refine the overall contour. Pay attention to the transition between the cuticle area and the center of the nail.
The cuticle area should look neat and natural rather than thick or raised. The middle section should provide appropriate support, while the free edge should remain balanced.
Remove filing dust with a clean nail brush before applying your finishing products.
Apply a Top Coat
Once your nails are smooth and evenly shaped, apply the compatible top coat recommended for your polygel nail kit.
Spread a thin, even layer across each nail, covering the surface and free edge as instructed. Avoid letting the top coat touch your skin.
Cure it using the specified lamp and curing time. Some top coats leave a sticky inhibition layer that requires cleansing, while others are designed to cure without one. Follow the product instructions rather than wiping every top coat automatically.
A glossy top coat creates a classic manicure, while a compatible matte top coat offers a softer finish. You can also experiment with nail art, glitter, or other decorations designed for use with your system.
Finish With Cuticle Oil
After completing the manicure, apply cuticle oil around the nails and gently massage it into the surrounding skin.
Cuticle oil helps moisturize the skin and improves the finished appearance of your manicure. Applying hand cream regularly can also help prevent dryness.
Your polygel nail kit manicure is now complete. Take a moment to check that every nail has a consistent shape, a smooth surface, and clean edges.
Pro Tips for Polygel Pros
Getting better results with a polygel nail kit comes down to preparation, product control, and consistent technique. These practical tips can help beginners avoid common problems.
Use Less Product at First
One of the most common beginner mistakes is applying too much polygel. Excessive product can make nails look bulky, create uneven extensions, and complicate curing.
Start with a small amount and distribute it evenly. Add more only when necessary, while following the recommended structure and thickness for your product.
Keep the Cuticle Area Clean
Product flooding around the cuticles can create an untidy finish and increase the risk of lifting. More importantly, uncured nail product contacting the skin can contribute to allergic sensitization.
Use your brush to maintain a small, clean margin around the surrounding skin. If any product touches the skin, remove it completely before curing.
Never rely on filing cured product off the skin as a substitute for preventing contact during application.
Choose Compatible Tools and Products
Not every base coat, polygel, top coat, and lamp is interchangeable. Your polygel nail kit should include clear instructions about compatible products and curing requirements.
Using an unsuitable lamp or mixing incompatible formulas may affect the final result. Check the manufacturer’s guidance before purchasing additional accessories.
Work on One Nail at a Time
If you are new to polygel, completing one nail at a time can make the process easier to manage.
Apply the product, position the form, remove any excess, and cure according to the instructions before moving to the next nail. This approach gives you more control and reduces the chance of product spreading onto the skin.
With practice, you can develop a consistent routine without sacrificing accuracy.
Avoid Rushing the Preparation Stage
Even when your polygel nail kit contains everything you need, poor preparation can affect the manicure’s appearance and durability.
Clean the nail surface properly, remove dust, and use only the preparation products specified by the manufacturer. Avoid aggressive buffing or cutting living skin.
Careful preparation is more useful than repeatedly applying extra product to correct adhesion problems.
Maintain Your Nail Kit
Clean reusable tools according to their manufacturer’s instructions after each manicure. Keep brushes protected from dust and direct light, and close polygel tubes securely after use.
Store your products under the recommended conditions, away from excessive heat and sunlight. Check expiration dates and discard products that have changed unexpectedly in consistency, smell, or appearance.
A clean, well-maintained polygel nail kit makes future applications easier and helps keep your workspace organized.
Common Polygel Nail Kit Mistakes to Avoid
Understanding common application problems can help you achieve better results with less frustration.
Uneven or bulky nails: This often happens when too much product is placed inside the form. Use smaller amounts and distribute the polygel more evenly.
Lifting near the cuticles: Possible causes include poor preparation, product touching the skin, or incompatible products. Review your preparation technique and follow the kit’s instructions.
Soft or improperly cured product: Incorrect curing conditions or an unsuitable lamp may be responsible. Do not assume that additional top coat will correct undercuring.
Crooked extensions: A poorly positioned dual form can create an uneven shape. Check the alignment from the front and side before curing.
Rough edges: Inconsistent filing can leave sharp or uneven areas. Refine the free edge gently and avoid filing into the natural nail.
Correcting these issuesoften requires patience rather than additional product. If you repeatedly experience lifting or curing problems, review the manufacturer’s directions before trying another application.
How to Remove Polygel Nails Safely
Removing your manicure correctly is just as important as applying it. A polygel nail kit does not necessarily include everything required for removal, and different formulas may require different techniques.
Many polygel enhancements are removed primarily by carefully filing down the product. Some systems may have specific removal instructions, so always check the product label.
Do not peel, bite, or forcefully pull the enhancement away from your natural nail. These actions can remove layers of the natural nail plate and cause damage.
If filing is required, reduce the enhancement gradually with an appropriate file. Avoid aggressive filing near the natural nail, and leave a thin protective layer if recommended by the manufacturer and you are confident doing so safely.
If you are inexperienced, consider having a trained nail professional remove the enhancement. Stop if you experience pain, unusual heat, bleeding, or significant nail damage.
After removal, keep your nails clean and moisturized. Allow them to recover if they feel thin, sensitive, or weak before applying another enhancement.
How to Make Your Polygel Manicure Last Longer
The longevity of a polygel manicure depends on application quality, nail growth, daily activities, and the product system you use. No polygel nail kit can guarantee the same wear time for everyone.
To help maintain your manicure:
- Wear protective gloves when cleaning with household chemicals or washing dishes for extended periods.
- Avoid using your nails to open containers, scrape surfaces, or remove labels.
- Apply cuticle oil regularly to keep the surrounding skin moisturized.
- Inspect your nails for lifting, cracks, or damage.
- Have grown-out or damaged enhancements corrected rather than covering problems with additional product.
If a nail lifts, avoid trapping moisture beneath the enhancement. Do not glue down a lifted section or apply fresh product over a potentially contaminated area.
Remove or repair the enhancement using an appropriate method, and seek professional advice if you notice pain, swelling, discoloration, or other concerning changes.
Final Thoughts
A polygel nail kit is a convenient option for creating beautiful, salon-style nails at home. With the right tools, proper nail preparation, careful application, and correct curing, you can achieve smooth and attractive nail extensions without visiting a salon for every manicure. Beginners should start with simple shapes and shorter lengths while learning to control the product. Remember to keep uncured polygel away from your skin, follow the manufacturer’s instructions, and remove enhancements safely. With patience and regular practice, your polygel nail kit can help you develop a consistent nail care routine and enjoy creative, long-lasting manicure styles.
A polygel nail kit contains the products and tools needed to create nail extensions or overlays at home. It commonly includes polygel, an application brush, dual forms, a base coat, a top coat, and sometimes a UV or LED nail lamp.
Yes, a polygel nail kit can be suitable for beginners because the thick product is relatively easy to shape before curing. Beginners should start with short extensions and follow the manufacturer’s instructions carefully.
Polygel nails may last around two to three weeks, depending on nail preparation, application technique, product quality, and daily activities. Regular maintenance and avoiding excessive pressure can help preserve their appearance.
Most UV- or LED-curable polygel systems require a compatible nail lamp to harden the product. Always check the manufacturer’s curing requirements because not every lamp is suitable for every formula.
2 Comments