
Nail care is an important part of maintaining beautiful and healthy-looking hands. While nail polish, cuticle oils, and hand creams often receive the most attention, there is another simple tool that can make a noticeable difference in your manicure routine: nail buffers. These small but useful beauty tools help smooth rough nail surfaces, refine edges, remove minor ridges, and create a natural-looking shine without always needing nail polish.
Whether you enjoy doing your nails at home or regularly visit a professional nail salon, understanding how nail buffers work can help you achieve better results. They are available in different shapes, materials, textures, and grit levels, making it easier to find an option that suits your nail type and personal preferences.
Using the correct nail buffer can improve the appearance of your natural nails and help prepare them for polish, gel manicures, or other nail treatments. However, using one incorrectly or too frequently may weaken the nail plate. Therefore, knowing which buffer to choose and how to use it properly is essential.
This guide explains everything about nail buffers, including their benefits, different types, grit levels, proper techniques, common mistakes, and useful tips for maintaining beautiful nails.
What Are Nail Buffers?
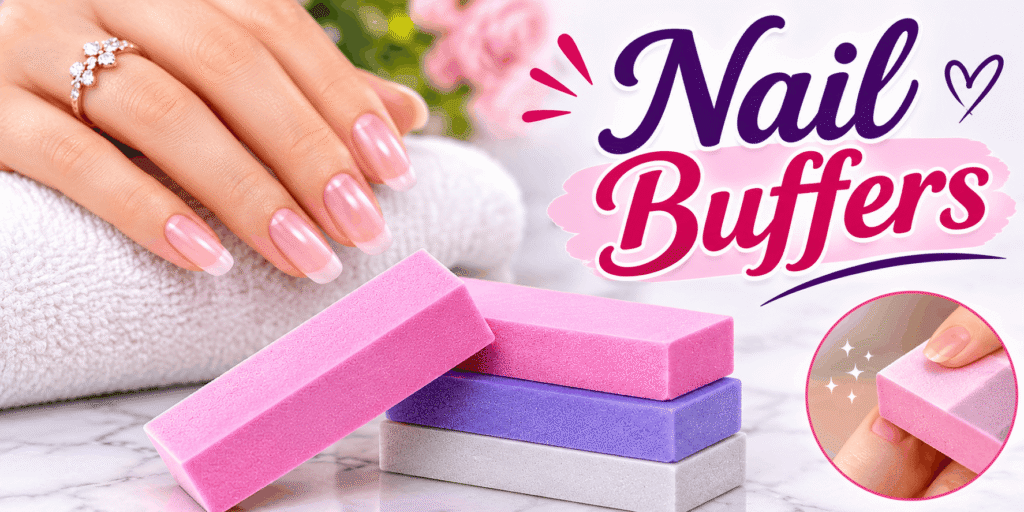
Nail buffers are manicure tools designed to smooth, refine, and polish the surface of natural or artificial nails. Unlike traditional nail files, which primarily shape the edges and shorten nails, buffers focus on improving the texture and appearance of the nail plate.
Most nail buffers have multiple textured surfaces or different levels of abrasiveness. Some are designed to remove minor surface irregularities, while others create a smooth finish or a natural shine. Depending on their construction, nail buffers may look like rectangular blocks, thin boards, cushioned files, or compact polishing tools.
They are commonly made from foam, synthetic materials, abrasive paper, or other materials that provide different levels of friction. Their design allows users to work gently across the nail surface without requiring complicated equipment.
A nail buffer can be useful for both natural and artificial nails, although the appropriate type depends on the material being treated. Natural nails generally require softer buffers because excessive abrasion can make them thin and fragile.
Different Types of Nail Buffers
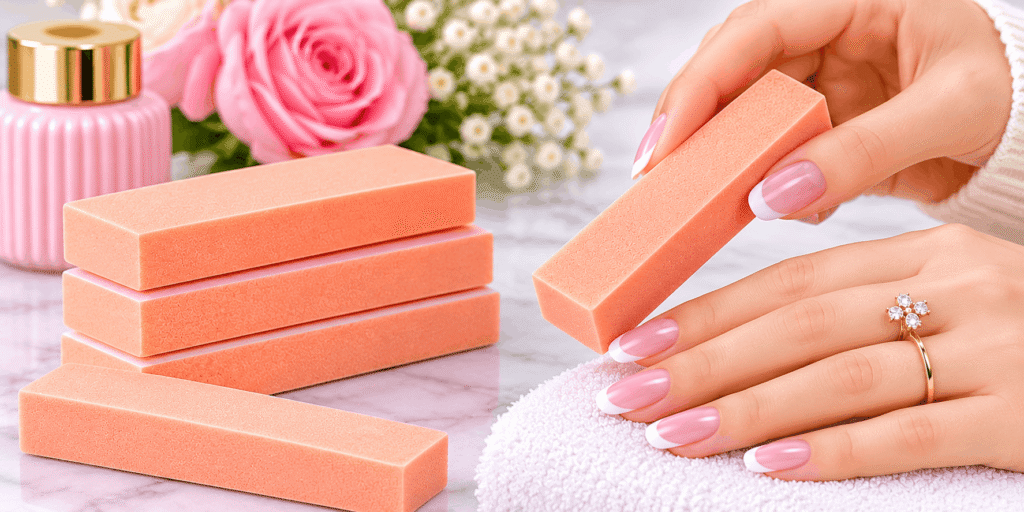
Nail buffers come in several styles, each offering specific advantages. Choosing the right type depends on your manicure goals, nail condition, and preferred level of convenience.
1. Block Nail Buffers
Block nail buffers are among the most popular options for everyday nail care. They usually have a rectangular shape with several sides featuring different textures. Each side may serve a separate purpose, such as removing roughness, smoothing ridges, refining the nail surface, or adding shine.
Their comfortable shape makes them easy to hold and control. Many beginners prefer block buffers because they provide multiple functions in one convenient tool.
They are particularly useful for home manicures and can help create a smooth finish before applying regular nail polish. However, users should avoid excessive pressure, especially when working with thin natural nails.
2. Four-Way Nail Buffers
Four-way nail buffers feature four different surfaces, each designed for a particular stage of nail preparation. One side may shape or refine the surface, another may smooth it, while the remaining sides help polish and enhance shine.
These buffers are convenient because they combine several manicure steps into one product. Instead of purchasing separate tools, users can complete different stages with a single buffer.
Four-way buffers are especially useful for people who enjoy maintaining their nails at home and prefer a simple manicure routine.
3. Sponge Nail Buffers
Sponge nail buffers contain a soft foam center covered with abrasive material. Their flexible construction allows them to follow the natural curves of the nail surface.
They are often gentler than rigid filing tools and can provide better control when smoothing uneven areas. Their cushioned structure also makes them comfortable to use.
Sponge buffers are available in different grit levels, allowing users to choose a texture suitable for their nail condition. They are a popular choice for both beginners and experienced manicure enthusiasts.
4. Shining Nail Buffers
Shining nail buffers are designed to enhance the natural appearance of nails by creating a smooth, glossy finish. They generally have very fine polishing surfaces that reduce minor surface roughness and improve light reflection.
These tools are particularly useful for people who prefer natural-looking nails without applying colored polish.
However, polishing should be done occasionally rather than every day. Repeated buffing can gradually remove layers from the nail plate and make nails weaker.
Understanding Nail Buffer Grit Levels
One of the most important things to understand before using nail buffers is their grit level. Grit refers to how coarse or fine the abrasive surface is. A lower grit number generally indicates a rougher surface, while a higher number indicates a finer texture.
Choosing the correct grit helps prevent unnecessary damage and allows you to achieve the finish you want.
Coarse Grit
Coarse-grit buffers have a more abrasive surface and are generally intended for artificial nails or specific professional nail-preparation tasks.
They can remove material more quickly, but they are usually too harsh for natural nail plates. Using coarse grit directly on natural nails may cause scratches, thinning, and breakage.
Beginners should avoid using coarse buffers on their natural nails.
Medium Grit
Medium-grit buffers provide a balance between smoothing and abrasion. They may be suitable for certain artificial nail applications and carefully controlled surface preparation.
However, even medium-grit products can be too aggressive for delicate natural nails. Always check the manufacturer’s instructions before choosing a buffer.
Fine Grit
Fine-grit buffers are generally more appropriate for gentle smoothing and finishing. They can help refine minor surface irregularities without removing as much material as coarser options.
For natural nails, a fine, nail-safe buffer is usually a better choice when occasional surface polishing is necessary.
Extra-Fine Grit
Extra-fine surfaces are commonly used for polishing and enhancing shine. They are designed to provide a smoother finish rather than aggressively removing material.
These surfaces can be useful when creating a natural glossy manicure. Nevertheless, even extra-fine buffers should not be used excessively.
Benefits of Using Nail Buffers
Nail buffers offer several benefits when used correctly. They can improve the appearance of natural nails and make a manicure look more polished and professional.
1. Creates a Smooth Nail Surface
One of the main purposes of nail buffers is to smooth minor surface irregularities. Natural nails sometimes develop visible ridges, uneven textures, or rough patches.
A suitable fine buffer can help improve the appearance of these imperfections. However, deep ridges should not be aggressively buffed away because they may reflect the natural structure of the nail.
2. Enhances Natural Shine
Some nail buffers have specialized polishing surfaces that create a glossy appearance. They help smooth the outer surface of the nail, allowing light to reflect more evenly.
This can make natural nails look healthier and more polished without requiring colored nail polish.
3. Improves Nail Polish Application
A properly prepared nail surface can help create a more even-looking manicure. Gentle smoothing may remove minor roughness that could otherwise affect the appearance of nail polish.
However, nails should be clean, dry, and free from excessive surface oils before polish application. Buffing is not always necessary before every manicure.
4. Refines the Overall Manicure
Nail buffers can help improve the finishing stage of a manicure. They create a cleaner appearance by smoothing minor imperfections and refining the nail surface.
When combined with appropriate shaping, moisturizing, and cuticle care, they can contribute to a neat and attractive result.
5. Convenient for Home Nail Care
Most nail buffers are small, lightweight, and easy to store. They do not require electricity or complicated instructions, making them convenient for home use.
A basic buffer can be included in a manicure kit alongside nail clippers, files, cuticle oil, and hand cream.
How to Use Nail Buffers Correctly
Using nail buffers properly is essential for achieving attractive results without damaging natural nails. A gentle approach is always better than applying excessive pressure.
Step 1: Clean Your Nails
Start by removing any existing nail polish with a suitable nail polish remover. Wash your hands and make sure your nails are free from dirt, oils, and other products.
Allow your nails to dry completely before beginning. Working on clean, dry nails makes it easier to control the buffer.
Step 2: Trim and Shape Your Nails
If necessary, trim your nails to your preferred length. Use a gentle nail file to shape the edges into your desired style.
Popular nail shapes include square, oval, round, almond, and squoval. Choose a shape that suits your natural nail length and personal style.
Step 3: Select the Appropriate Buffer
Choose a fine, nail-safe buffer designed for natural nails. Avoid rough surfaces that are intended for artificial nail products.
If your nails are already thin, peeling, or damaged, it may be better to skip buffing altogether.
Step 4: Buff Gently
Place the buffer lightly against the nail surface and move it gently according to the manufacturer’s directions. Avoid pressing hard or repeatedly working on the same area.
The purpose is to refine the surface, not remove significant layers of the nail plate.
Step 5: Add Shine
If your buffer includes a polishing side, use it gently to enhance the natural appearance of your nails.
Stop once the desired finish is achieved. Repeated polishing is unnecessary and may gradually weaken the nails.
Step 6: Moisturize Your Nails
Finish your manicure by applying cuticle oil and a nourishing hand cream. These products help moisturize the surrounding skin and keep your hands feeling soft.
Regular moisturizing is particularly helpful when your nails and cuticles feel dry.
Nail Buffers vs. Nail Files: What Is the Difference?
Although nail buffers and nail files may look similar, they serve different purposes in a manicure routine.
Nail files are primarily used to shorten nails, shape their edges, and refine their overall length. They usually have an abrasive surface suitable for working along the free edge of the nail.
Nail buffers, on the other hand, are designed mainly to smooth and polish the surface of the nail plate. They may have several textures for different finishing stages.
Another difference is their level of abrasiveness. Some nail files are designed to remove more material, while many buffers have finer surfaces intended for polishing.
Both tools can be useful, but they should not be treated as interchangeable. Using a rough nail file across the natural nail surface can cause unnecessary damage.
How Often Should You Use Nail Buffers?
The frequency of buffing depends on your nail condition, the type of buffer, and your overall manicure routine.
Healthy natural nails generally do not need frequent surface buffing. Occasional gentle polishing may be enough for people who want a smoother or shinier appearance.
If your nails are thin, brittle, peeling, or damaged, avoid buffing until their condition improves. Repeated abrasion can make these problems worse.
Artificial nails may require different maintenance techniques depending on the product and application method. Professional guidance is useful when working with acrylic, gel, or other enhancements.
Remember that natural nails do not need to look perfectly smooth to be healthy. Some surface ridges are normal and should not be removed simply for cosmetic reasons.
Common Mistakes to Avoid When Using Nail Buffers
Although nail buffers are simple tools, using them incorrectly can affect nail health. Avoiding common mistakes can help you maintain better results.
Buffing Too Frequently
One of the biggest mistakes is buffing natural nails too often. Every buffing session removes some surface material, even when a fine buffer is used.
Excessive use may make nails thinner, weaker, and more likely to break. Keep buffing occasional and gentle.
Applying Too Much Pressure
Pressing the buffer firmly against the nail does not produce better results. It can create unnecessary friction and damage the nail plate.
Use light movements and stop when the desired finish is achieved.
Using the Wrong Grit
A coarse buffer may be suitable for certain artificial nail applications but can be damaging to natural nails.
Always choose a product designed for your intended use and read its instructions.
Sharing Nail Buffers
Sharing manicure tools without proper cleaning can spread bacteria and fungal infections.
Personal nail buffers should not be shared. Professional salons should follow appropriate cleaning and sanitation practices, including replacing disposable tools when necessary.
Buffing Damaged Nails
If your nails are already peeling, splitting, or unusually thin, buffing may make the problem worse.
Focus on gentle nail care, moisturizing, and avoiding unnecessary cosmetic treatments instead.
Tips for Choosing the Best Nail Buffers
Choosing the right nail buffer can make your manicure routine easier and more effective. Consider the following factors before purchasing one.
Consider Your Nail Type: If you have natural nails, look for a fine, gentle buffer. People with artificial nails may require different products depending on their nail enhancement system.
Check the Grit Level: Read the product description carefully. A buffer should match your intended purpose, whether smoothing, refining, or polishing.
Look for Comfortable Design: A block-shaped or cushioned buffer may be easier to control, especially if you are new to home manicures.
Choose Quality Materials: Look for a buffer with durable construction and an evenly textured surface. Poor-quality products may wear out quickly or provide inconsistent results.
Consider Multi-Sided Options: Four-sided and multi-step buffers can be convenient because they combine different finishing surfaces in one tool.
Read Product Instructions: Always check whether the buffer is designed for natural nails, artificial nails, or both.
How to Keep Your Nail Buffers Clean
Keeping manicure tools clean is an important part of maintaining good nail hygiene. Nail buffers can collect dust, oils, and product residue during use.
For reusable buffers, follow the manufacturer’s cleaning instructions. Some tools may tolerate gentle washing, while others can lose their abrasive properties when exposed to water or cleaning products.
Allow reusable tools to dry completely before storing them. Keep them in a clean, dry container away from moisture and dust.
Disposable buffers should be replaced when they become worn, dirty, or damaged. Avoid sharing personal buffers with friends or family members.
If you visit a nail salon, choose a professional establishment that follows appropriate hygiene procedures and uses properly sanitized or disposable manicure tools.
Final Thoughts
Nail buffers are simple yet useful tools that can improve the appearance of natural and artificial nails when selected and used correctly. From smoothing minor surface irregularities to enhancing natural shine, they offer several benefits for people who enjoy maintaining beautiful nails.
Understanding different buffer types, grit levels, and proper techniques can help you achieve better manicure results while protecting your natural nail plate. Choosing a gentle buffer, avoiding excessive pressure, and limiting how frequently you polish your nails are especially important.
Remember that healthy nails do not need constant buffing or a perfectly glossy surface. A balanced nail care routine that includes gentle shaping, regular moisturizing, and proper hygiene is often more beneficial than frequent cosmetic treatments.
Whether you prefer a simple natural manicure or enjoy experimenting with different nail styles, the right nail buffer can be a helpful addition to your beauty collection. With careful use and suitable products, you can maintain neat, smooth, and naturally beautiful-looking nails.
Nail buffers are used to smooth the surface of nails, refine minor imperfections, and create a natural shine. They can also help prepare nails for certain manicure treatments when used appropriately.
Yes, gentle nail buffers can be useful for natural nails when used occasionally. Choose a fine buffer and avoid excessive pressure or repeated polishing
Natural nails do not require frequent buffing. Occasional gentle use is generally sufficient, while thin or damaged nails should not be buffed.
Yes. Specialized polishing buffers can create a smooth, glossy appearance by refining the nail surface and improving light reflection.
One Comment