
Nail gems are one of the easiest ways to transform a simple manicure into something expressive, polished, and full of personality. From delicate crystal accents to colorful rhinestone arrangements, these tiny decorations can make even a neutral nail color look special. The appeal is not limited to dramatic designs either: a single gem placed thoughtfully can create a more elegant effect than an entire nail covered in decoration.
What makes nail gems interesting is their flexibility. They can look playful on short nails, glamorous on long extensions, subtle on everyday manicures, or striking enough for weddings and special occasions. Instead of treating them as an extra decoration, think of them as small styling details that help define the overall character of your manicure.
Why Nail Gems Are More Than Just a Sparkling Trend
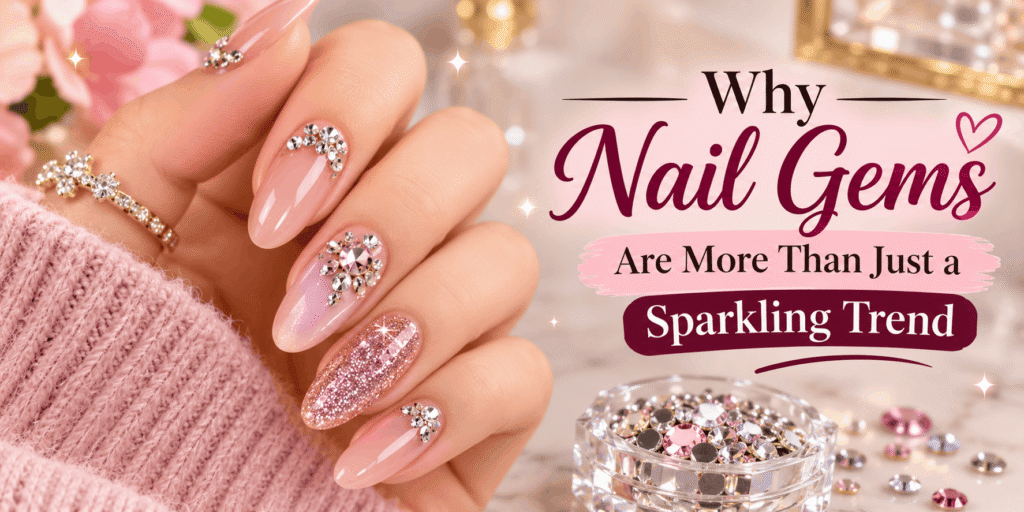
Nail gems bring a different dimension to nail art because they add texture as well as color. Traditional polish creates a smooth surface, while gems introduce raised details that reflect light from different angles. This changes how a manicure looks as your hands move, making the design feel more dynamic.
Their nostalgic appeal also comes from the way they connect different eras of beauty. Decorative rhinestones remind many people of early-2000s fashion, when shiny accessories, glossy makeup, and playful embellishments were everywhere. Modern nail designs take that inspiration and give it a more refined direction.
Today’s gem manicures do not have to look overly decorated. Instead of placing large stones on every nail, many designs use smaller crystals, carefully spaced accents, and combinations of different finishes. This makes the style easier to adapt to personal preferences.
Another reason nail gems remain appealing is that they work with almost any manicure color. Clear crystals can complement nude polish, colorful stones can brighten a pastel manicure, and metallic decorations can add contrast to darker shades.
The secret is choosing a design with a clear visual purpose. A manicure does not need dozens of gems to stand out. Sometimes the most attractive result comes from using fewer decorations in more thoughtful positions.
Nail Gem Inspiration: Designs for Different Personalities
The best nail gem design is not necessarily the most expensive or complicated one. It is the one that matches the mood you want your manicure to communicate. Some people prefer delicate details, while others enjoy colorful arrangements that immediately attract attention.
Here are several ways to approach nail gems without making every manicure look the same.
1. Minimal Crystal Accents
If you like clean manicures but want something more interesting than plain polish, minimal crystal accents are a good starting point.
Apply a nude, milky pink, or sheer beige base and place one small clear gem near the cuticle or along one side of the nail. You can decorate just one or two nails rather than repeating the design across your entire hand.
This approach works especially well for:
- Everyday manicures.
- Office-friendly nail designs.
- Short natural nails.
- Weddings and formal occasions.
- People who prefer understated accessories.
The placement matters more than the quantity. A crystal positioned slightly away from the center can make the manicure look intentional without overwhelming the nail.
2. Rainbow Rhinestone Nails
Rainbow nail gems bring a playful quality to nail art. Instead of choosing only clear crystals, use small stones in different colors to create a bright arrangement.
You can place the colors in a sequence, create a scattered pattern, or use a different shade on each nail. A transparent or pale base helps the decorations remain the main attraction.
For a more balanced result, choose a limited color palette. Pink, purple, blue, and clear stones can create a coordinated look without making the manicure feel random.
Rainbow designs are especially suitable for parties, summer events, vacations, and anyone who enjoys expressive nail art.
3. Gem French Tips
A French manicure already has a recognizable structure, which makes it an excellent foundation for nail gems.
Keep the traditional nude or pink base and add tiny crystals along the French tip. You could decorate the entire curved edge with miniature stones or place just two or three gems near the corners.
Another option is to replace part of the traditional white tip with colorful rhinestones. This creates a more decorative finish while keeping the familiar French manicure shape.
For shorter nails, use smaller stones and avoid placing too many decorations near the free edge. This helps preserve the clean appearance of the design.
4. Pearl and Crystal Combinations
Pearls and crystals create an interesting contrast because they reflect light differently. Crystals offer a sharper sparkle, while pearls provide a softer, more delicate finish.
Try combining miniature pearls with clear rhinestones on a milky white or pale pink base. You can arrange them in small clusters or create a decorative pattern on one accent nail.
This combination works beautifully for bridal manicures, engagement celebrations, formal dinners, and romantic nail designs.
To prevent the design from looking crowded, leave some empty space around each decorative group.
5. Metallic Gemstone Details
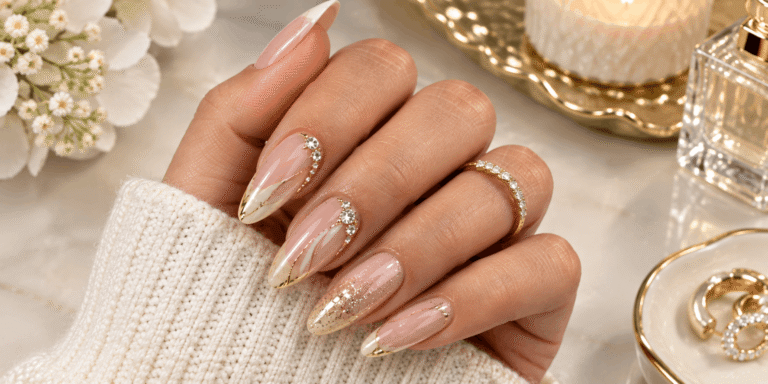
Metallic nail decorations offer a different look from traditional transparent rhinestones. Gold, silver, and rose-gold details can make a manicure feel more like jewelry.
You can use tiny metallic studs, small geometric pieces, or crystal decorations with metallic settings.
Gold details look particularly attractive with warm beige, chocolate brown, cream, and peach polish. Silver decorations pair naturally with cool pink, lavender, blue, and grey shades.
If you want a coordinated appearance, match the metallic finish to the jewelry you normally wear.
6. Celestial Gem Nails
Celestial designs use stars, moons, and tiny crystals to create a dreamy manicure.
A deep blue or lavender base can provide a beautiful background, while small silver gems create the appearance of stars. For a lighter version, use a sheer pink or milky base with delicate gold moon decorations.
You can create a different celestial arrangement on each nail or keep the design concentrated on two accent nails.
This style is a good choice when you want nail art that feels decorative but still follows a recognizable theme.
7. Gem Cuticle Accents
Cuticle accents are a useful option when you want to experiment with nail gems without covering the entire nail.
Place miniature crystals in a curved line near the base of the nail, following its natural shape. You can create a complete outline or decorate only one side.
The result can look especially beautiful with sheer polish because the natural nail color remains visible.
Make sure the gems are not placed directly on irritated or damaged skin. Keep them on the nail plate and leave enough space around the cuticle to avoid discomfort.
8. Statement Gem Accent Nails
If you enjoy dramatic manicures, dedicate one or two nails to larger gemstone arrangements.
Start with a simple polish color and create a central decorative cluster using different gem sizes. Surround a larger crystal with smaller stones to produce a balanced composition.
This design can look impressive with almond, coffin, and square nail shapes. However, large decorations are more likely to catch on clothing or hair, so secure them carefully and consider their placement before applying them.
How to Create Gem Nails at Home
You do not need professional nail-art experience to create a beautiful gem manicure. The process becomes easier when you prepare the nail surface properly, select decorations that suit your nail length, and use an adhesive designed for nail applications.
The most important thing is to avoid rushing the placement. A few carefully positioned gems usually look better than decorations applied without a clear arrangement.
Tools and Materials You Will Need
Before starting, gather everything in one place so you do not have to search for tools while the adhesive is drying.
| Tool or material | Purpose |
|---|---|
| Nail file | Shapes the natural nail |
| Nail buffer | Smooths the nail surface gently |
| Cuticle pusher | Moves back loose cuticle tissue |
| Nail cleanser | Removes surface oil and residue |
| Base coat | Prepares the nail for polish |
| Nail polish or gel polish | Creates the background color |
| Nail gems | Adds decorative details |
| Nail gem adhesive | Helps secure larger decorations |
| Wax pencil or gem picker | Picks up and positions small stones |
| Tweezers | Helps handle larger decorations |
| Fine nail-art brush | Applies small amounts of adhesive |
| Top coat | Protects suitable parts of the manicure |
Choose decorations with smooth edges and an appropriate size for your nails. Very large stones can look attractive in a photograph but may be uncomfortable during everyday activities.
Step 1: Prepare Your Nails
Begin by removing old polish and washing your hands. Shape your nails with a file, gently smooth any rough edges, and clean away dust.
If your cuticles need attention, soften them and carefully push back loose tissue. Avoid cutting living cuticle skin because it helps protect the area around the nail from infection.
The nail surface should be clean and dry before applying polish or adhesive. Oils, lotion, and leftover polish can interfere with how well products adhere.
Step 2: Choose a Base Color
Select a polish color that complements the gems you plan to use.
For a subtle design, consider:
- Milky white.
- Sheer pink.
- Nude beige.
- Soft peach.
- Pale lavender.
For a more dramatic manicure, try burgundy, navy, emerald, or chocolate brown.
Apply a thin base coat and allow it to dry according to the product instructions. Follow with your chosen polish, using thin layers rather than one thick application.
If you are using gel polish, cure each layer according to the manufacturer’s instructions.
Step 3: Plan Your Gem Placement
Before applying adhesive, arrange your gems on a clean surface and decide where they should go.
This small planning step can prevent an unbalanced design. Consider the shape of each nail and how the decorations will look when your fingers are together.
For example, a single crystal may work best near the cuticle, while a curved line of tiny stones can complement a French tip.
You can also take a quick photograph of your planned arrangement so you can follow the same pattern during application.
Step 4: Apply the Adhesive Carefully
Use nail gem adhesive or a suitable nail-art gel recommended for the type of decoration you have selected.
Apply a small amount to the intended position. Avoid spreading adhesive across the entire nail unless the product specifically requires that application method.
The correct adhesive depends on the decoration and manicure system. Ordinary craft glue, household glue, and superglue are not appropriate substitutes for nail products.
Keep adhesive away from the skin, cuticles, and eyes.
Step 5: Position the Gems
Pick up each decoration with a wax pencil, gem picker, or suitable tweezers.
Place it gently onto the adhesive and adjust its position before the product sets. Avoid pressing so hard that the gem moves away from its intended location.
For a cluster design, position the largest stone first and arrange smaller decorations around it.
Work on one nail at a time. This makes it easier to control the placement and prevents the adhesive from drying before the decorations are positioned.
Step 6: Secure and Finish the Design
Follow the adhesive manufacturer’s curing or drying instructions. If the product requires a UV or LED lamp, use the specified lamp and curing time.
A suitable top coat can help protect the manicure, but it should be applied according to the type of gem and adhesive used. Avoid covering the top surface of faceted crystals if you want to preserve their sparkle.
Some nail artists seal around the edges of decorations instead of coating the entire stone.
Allow the manicure to finish setting before returning to activities that could disturb the decorations.
How to Make Nail Gems Last Longer
A beautiful gem manicure is more satisfying when the decorations stay in place. Although no application method guarantees that every gem will remain attached, a few habits can reduce premature lifting.
Choose the right adhesive: Use a product intended for nail decorations. The correct formula can make a noticeable difference, especially with larger stones.
Keep the nail surface clean: Oil, dust, and moisture can interfere with adhesion. Prepare the nail properly before applying decorations.
Avoid oversized stones on short nails: Large gems can extend beyond the natural nail surface and catch on everyday objects. Smaller decorations are usually more practical.
Do not place gems too close to the edge: Decorations near the free edge may experience more friction when you type, open packages, or perform household tasks.
Wear gloves for cleaning: Household cleaning products and repeated exposure to water can affect some manicure products. Protective gloves can help reduce unnecessary exposure.
Avoid picking at loose decorations: If a gem begins lifting, do not pull it off forcefully. Remove or repair it carefully using an appropriate method.
Give your nails a break when needed: If your natural nails become weak, sensitive, or damaged, take a break from decorative applications and allow them to recover.
Choosing Nail Gems for Your Nail Shape and Length
A design that looks beautiful on long extensions may need a different arrangement on short natural nails. The best results come from considering the available nail space rather than copying a design exactly.
Short Nails
Short nails look attractive with small crystals, miniature pearls, and simple accent arrangements.
Try a single gem near the cuticle, a tiny vertical line, or a small cluster on one accent nail. Avoid covering the entire nail with large decorations because they can make the available space look crowded.
Almond Nails
The tapered shape of almond nails works well with delicate vertical arrangements.
A line of tiny crystals down the center can emphasize the shape, while small clusters near the base create a softer effect. Pearl details and curved gem patterns also complement this silhouette.
Square Nails
Square nails provide a structured surface for geometric gem designs.
Try symmetrical arrangements, tiny metallic studs, or crystals placed along the French tip. The straight edge can make clean decorative patterns particularly noticeable.
Coffin Nails
Long coffin nails provide more room for detailed designs.
You can experiment with larger crystal clusters, mixed-size rhinestones, and decorative patterns. However, keep the design balanced so the nail does not become excessively heavy or uncomfortable.
Common Mistakes That Can Ruin a Gem Manicure
Nail gems are relatively simple to use, but small application mistakes can affect the final appearance and durability.
Using too much adhesive: Excess product can spread around the decoration and create an untidy finish. Apply only what is needed to secure the gem.
Choosing decorations that are too large: Oversized gems can interfere with everyday activities and may catch on fabric or hair. Select sizes that suit your nail length.
Placing every gem randomly: A scattered design can look attractive when it has a consistent pattern. Without some planning, the result may feel unbalanced.
Applying gems to wet polish: If the polish has not reached the appropriate stage for decoration, the gems may slide or sink into the surface. Follow the polish and adhesive instructions.
Covering every crystal with thick top coat: Some top coats can reduce the reflective appearance of faceted stones. Apply the finish carefully and check product compatibility.
Ignoring nail hygiene: Reusing dirty tools or allowing moisture and debris to collect around lifted decorations can create problems. Clean tools properly and remove decorations that are no longer securely attached.
Pulling gems off by hand: Forceful removal can damage the natural nail plate. Use an appropriate removal method for the adhesive and manicure system.
Nail Gems for Everyday Wear and Special Occasions
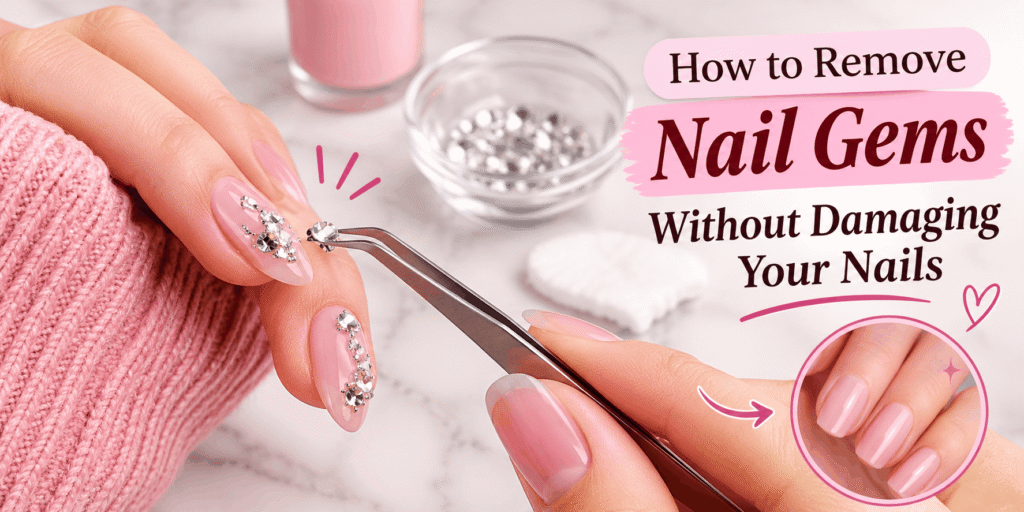
One of the biggest advantages of nail gems is that the same decoration can create very different results depending on how you use it.
For everyday wear, small clear crystals on a nude or pink base offer a polished appearance without becoming distracting. A single gem on each ring finger can be enough to add personality to a simple manicure.
For parties and celebrations, colorful rhinestones and larger decorative arrangements provide more visual impact. You can coordinate the gem colors with your outfit, accessories, or makeup.
Wedding manicures often benefit from pearls, clear crystals, and soft metallic accents. These decorations complement traditional bridal colors while adding a little extra detail to close-up photographs.
For festive events, consider combining different gem shapes and colors. Star-shaped decorations, colorful stones, and metallic accents can create a manicure that feels more playful.
The key is to match the decoration to the occasion rather than assuming that more sparkle always means a better design.
How to Remove Nail Gems Without Damaging Your Nails
Removing nail gems carefully is just as important as applying them correctly. Pulling or scraping decorations away can remove layers of the natural nail, especially when strong adhesive or hard gel products are involved.
Start by identifying the type of product used to attach the gems. Different adhesives and manicure systems require different removal methods.
If a decoration is attached with a removable nail adhesive, follow the product instructions and gently loosen it without forcing the stone away.
For gel-based decorations, use the removal method recommended for that specific system. Some products require professional filing or soaking, while others need specialized removal procedures.
If you have acrylic or hard-gel extensions, professional removal may be the safest choice.
After removing the decorations:
- Clean away remaining product gently.
- Avoid aggressive scraping or filing.
- Wash and dry your hands.
- Apply cuticle oil to the surrounding skin.
- Use a moisturizer to support comfortable, hydrated hands.
- Give your nails time to recover if they feel weak or sensitive.
If you notice pain, swelling, unusual discoloration, or signs of infection, stop applying nail products and seek appropriate medical advice.
Final Thoughts
Nail gems offer an easy way to give a manicure more personality without changing your entire nail routine. Their appeal comes from the variety of ways they can be used, whether you prefer one delicate crystal, a colorful rhinestone arrangement, or a detailed design inspired by jewelry.
The most successful gem manicures are not necessarily the ones with the most decoration. They are the designs where the color, placement, nail shape, and size of each stone work together.
Start with a simple arrangement, experiment with different finishes, and choose decorations that feel comfortable for your everyday routine. Once you understand how placement and balance affect the final look, nail gems become a creative way to make even an ordinary manicure feel special.
FREQUENTLY ASKED QUESTIONS
Nail gems are small decorative pieces, such as rhinestones, crystals, pearls, and metallic studs, used to add sparkle and texture to manicures.
Prepare your nails, apply your chosen polish, and use nail gem adhesive or a suitable nail-art gel to position each decoration. Follow the product’s drying or curing instructions to secure the gems.
A nail gem adhesive or nail-art gel designed for decorations is generally suitable. Avoid household glue and superglue because they are not intended for nail applications.
One Comment