
There is something instantly eye-catching about star nails. A tiny star can turn an otherwise simple manicure into something playful, dreamy, or even surprisingly elegant without requiring an overly complicated design. Depending on the colors, finishes, and placement you choose, stars can look delicate and minimal or bold enough to become the main feature of the entire manicure.
The best part is how flexible the trend can be. You can combine stars with French tips, chrome finishes, soft pastels, jewel tones, metallic details, or sheer bases. Even a small collection of tiny stars scattered across a neutral manicure can create a completely different effect from large statement stars placed on a dark background.
Instead of treating celestial nails as one specific look, think of them as a design idea that can be adapted to your personal style. These 10 ideas range from soft and feminine to dramatic and futuristic, giving you plenty of ways to experiment with the trend.
1. Soft Lilac Stars for a Dreamy Finish
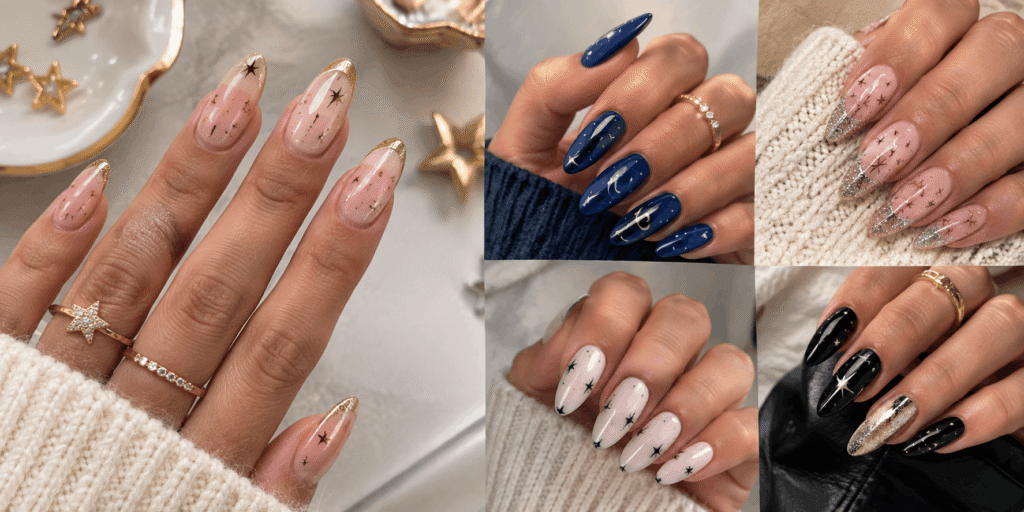
Lilac is an easy color to pair with celestial details because it already has a soft, slightly magical quality. A sheer or pale lilac base creates a delicate background, allowing small stars to stand out without making the manicure feel too busy.
For a subtle version, keep the base almost translucent and add tiny white or silver stars near the tips of the nails. You can vary their sizes slightly so the design looks more organic instead of perfectly repeated.
Another option is to use a slightly stronger lavender shade and place metallic stars on only two or three nails. Keeping the remaining nails relatively simple gives the design some breathing room and makes the decorative nails more noticeable.
A glossy top coat can make this combination look especially polished. If you prefer a softer finish, a satin or pearly top coat can create an entirely different mood.
You can also experiment with the placement. Stars do not need to sit directly in the center of the nail. A tiny star near one side of the cuticle or close to the tip can create a more editorial appearance.
The key to making lilac star nails look sophisticated is restraint. You do not necessarily need stars on every nail. A few carefully positioned details can have more visual impact than covering the entire manicure with decorations.
2. Mixed-Metal Star Charms
If you want your manicure to feel more three-dimensional, metallic charms can take the celestial idea in a completely different direction.
Instead of using one metallic shade throughout the manicure, combine gold, silver, and perhaps a slightly warmer metallic tone. The contrast makes each charm more noticeable and gives the nails a collected, jewelry-like appearance.
A neutral base works particularly well for this design. Sheer pink, nude, milky white, or a translucent beige can provide enough contrast for the metallic decorations while keeping the overall look wearable.
You can place tiny stars alongside dots, moons, small gems, or other simple charms, but try not to make every nail equally decorated. Leaving a few nails with only a glossy base can make the embellished ones feel more intentional.
For a more dramatic manicure, use a darker base and let the metallic stars become the brightest elements. Deep navy, chocolate brown, burgundy, or forest-inspired shades can create a nighttime effect without relying on traditional black.
The shape and size of the charms also matter. Tiny flat stars can create a delicate result, while larger raised decorations make the manicure more noticeable.
If you prefer designs that look like miniature jewelry, mixed metallic details are an easy way to achieve that effect.
3. Candy-Colored Celestial Tips
Pastel colors can make star nails feel playful rather than traditional. Instead of choosing one shade for the entire manicure, use a different soft color across several nails.
Think lavender, baby pink, pale blue, buttery yellow, mint, and peach. The colors can be used as French tips, small sections, or backgrounds for individual stars.
One approach is to keep the base sheer and create pastel French tips, then add tiny stars above the tips. This gives you two layers of decoration without making the manicure visually heavy.
You can also reverse the idea by using pastel stars over a neutral base. A pale blue star on one nail, a pink star on another, and a tiny yellow star somewhere else can create a cheerful mismatched effect.
For a more coordinated result, keep all the stars the same shape while changing only their colors. This gives the manicure variety while maintaining a visual connection between the nails.
Pastel designs are especially useful if you want a celestial manicure that feels appropriate for everyday wear. The soft colors keep the stars from looking too dramatic, while the small details prevent the manicure from becoming plain.
A glossy finish usually works well here, but a matte top coat can create a softer, almost illustrated appearance.
4. Mismatched French Tips With Tiny Stars
French manicures do not have to use the same tip color on every nail. A mismatched version can make your star nails feel more modern and creative.
Instead of traditional white tips, try different shades such as pink, blue, purple, green, and yellow. You can keep the base sheer or use a soft nude shade so that the colorful tips remain the main focus.
Tiny stars can then be added above or below the French line. They can match the color of each tip or contrast with it.
For example, a blue French tip could have a tiny silver star, while a pink tip could have a white star. Another option is to use gold stars across every nail regardless of the tip color, creating a consistent metallic element throughout the manicure.
The asymmetry is what makes this look interesting. The nails do not need to be identical, but they should still feel like part of the same design.
You can also experiment with different French shapes. A curved tip gives a classic appearance, while a diagonal or micro-French line can make the manicure feel more contemporary.
This is a good choice if you like colorful nail art but do not want a completely covered design.
5. A Gilded Star Accent
Gold is one of the easiest metallic shades to incorporate into celestial nail art because it instantly creates a decorative, almost jewelry-inspired effect.
For a refined version, begin with a sheer nude, pale pink, or milky base. Then add a single gold star to several nails rather than covering every surface with decoration.
The stars can be outlined rather than filled in. Fine gold outlines create a delicate effect, especially when paired with a glossy neutral base.
If you want more shine, combine the stars with small gold dots. The dots can be scattered around the stars to suggest tiny points of light without requiring a complicated illustration.
Another option is to place one larger star on a single accent nail while keeping the other nails almost completely bare. This creates a focal point and can be easier to maintain than a heavily decorated manicure.
Gold can also be paired with subtle shimmer. A transparent glitter layer underneath the stars can create a soft glow, while a completely glossy base keeps the design cleaner.
The beauty of this look is that it does not need bright colors to make an impression. A neutral background allows the metallic details to do all the work.
6. A Throwback ’90s Star Design
If you prefer playful nail art, bring some retro energy into the celestial trend with a colorful ’90s-inspired manicure.
Instead of aiming for perfect symmetry, combine bold colors, small stars, dots, squiggles, and simple graphic shapes. The result should feel fun rather than overly polished.
You can use a clear or pale base and build the design with bright pink, blue, purple, orange, or green. Each nail can have a slightly different arrangement while still sharing the same color palette.
For a stronger throwback look, use larger outlined stars in contrasting colors. A blue star over a pink background or a yellow star against purple can create a distinctly retro feeling.
You can also incorporate tiny stars around larger graphic elements, creating the impression of stickers scattered across the nails.
The trick is not to make every detail too precise. A slightly playful, hand-drawn appearance can actually make this style feel more authentic.
If you want a toned-down version, use only two or three colors and keep the stars small. This gives you the retro influence without making the manicure extremely colorful.
7. Pink French Tips With Star Details
Pink and star nail make a naturally soft combination, but the look does not have to be overly sweet.
Start with a sheer pink or milky base and add a delicate pink French tip. The pink can be very pale for a subtle manicure or brighter if you want the tips to stand out.
Small white, silver, or gold stars can then be placed selectively. One star on each accent nail may be enough.
For more dimension, combine different finishes. A glossy pink French tip can sit against a translucent base, while the stars have a metallic finish.
You could also create a tiny constellation effect by connecting miniature stars with extremely thin lines. Keep the lines delicate so they do not overpower the base.
Another approach is to place one star directly on the French tip and leave the rest of the nail clean. This creates a tiny surprise rather than an obvious theme.
Pink does not have to mean pale pink either. Dusty rose, raspberry, mauve, bubblegum, and deeper berry shades can all change the mood of the design.
A muted pink can make the manicure feel sophisticated, while a brighter shade makes it more playful.
8. Y2K-Inspired Star and Animal Print
For a more unusual take on star nails, combine celestial details with a small dose of Y2K-inspired animal print.
The easiest way to keep this combination from becoming overwhelming is to divide the design across different nails. Some nails can feature stars while one or two carry a small leopard-inspired pattern.
A sheer or neutral base can help connect the two ideas. You can then use metallic stars to bring the celestial element into the design.
If you want a stronger Y2K feeling, experiment with pink, silver, blue, or metallic finishes. The goal is to create contrast rather than make every nail follow exactly the same pattern.
For example, one nail might have a silver star, another might have a small leopard section, and another could feature a simple French tip. Repeating one color throughout the manicure helps the mismatched elements feel intentional.
This style is especially useful if you like nail art that does not look like a standard matching set.
You can also keep the animal print very small. A single accent section can be enough to communicate the idea without turning the entire manicure into a print-heavy design.
9. Deep Blue Night-Sky Stars
Dark blue creates one of the most natural backgrounds for celestial nail art because it immediately suggests a night sky.
Instead of using a flat navy color alone, you can create more depth with a slightly shimmery or glossy blue base. Tiny silver or pale gold stars can then be placed across selected nails.
A darker manicure does not have to look heavy. Keeping the stars small and leaving some areas of the base visible can make the design feel spacious.
For an even more celestial effect, add tiny dots around the stars. These can represent distant points of light without requiring detailed artwork.
Another option is to use different shades of blue across the nails. A deep navy on one nail, a medium blue on another, and a translucent blue shimmer on another can create variety while keeping the palette cohesive.
If you want a dramatic accent, one nail can feature a larger star while the rest carry miniature versions.
This look works particularly well when the finish is highly glossy because the shine can make the dark base appear deeper.
For a softer interpretation, choose a dusty or muted blue instead of a very dark shade and pair it with white stars.
10. Metallic Stars on a Neutral Base
If you want something that feels celestial without being overly themed, a neutral base with metallic stars is one of the easiest directions to try.
Start with a nude, cream, soft beige, translucent pink, or milky white base. The exact color is less important than keeping the background relatively understated.
Then add stars in gold, silver, rose gold, or another metallic shade. You can use the same color throughout the manicure or mix two metallic finishes for more contrast.
The stars can be tiny and scattered, placed near the cuticle, or positioned toward the tips. Another option is to create one statement nail with several stars while keeping the remaining nails minimal.
This design is particularly versatile because it can work with different nail lengths and shapes. Short nails can carry tiny metallic stars without feeling crowded, while longer nails provide more space for larger decorative elements.
If you prefer a minimalist manicure, use only one star on each nail. If you want more sparkle, combine stars with tiny dots or a subtle shimmer underneath.
The result is decorative enough to feel special while remaining much more understated than a full celestial illustration.
Finding Your Own Star Nail Style
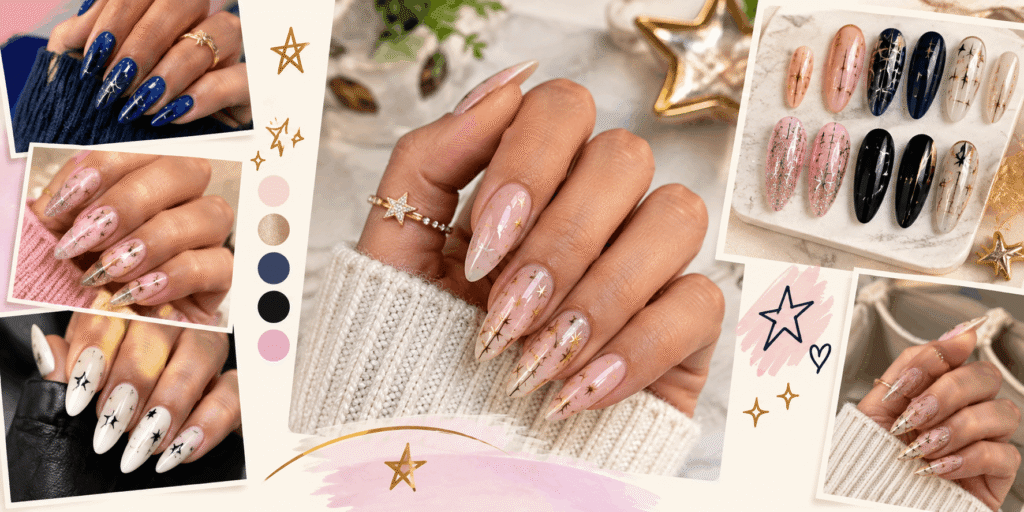
The most interesting thing about star nails is that there is no requirement to make every nail identical. The same basic star motif can look completely different depending on the base color, finish, placement, and supporting details.
If you usually prefer minimalist manicures, start with tiny metallic stars over a sheer or neutral base. If you enjoy colorful designs, combine pastel French tips with multicolored stars. For something dramatic, a deep blue background can turn the nails into a miniature night sky.
You can also mix two or three of these ideas instead of choosing only one. A manicure could combine lilac nails, metallic stars, a mismatched French tip, and one darker accent nail.
The important thing is to create a visual connection between the different elements. Repeating one metallic shade, using the same star shape, or keeping a consistent base color can make a mixed manicure feel intentional rather than random.
Making Star Nails Work With Different Nail Shapes
Your nail shape can influence how a celestial design looks. There is no single shape that you need to choose for this trend, but some layouts may complement certain silhouettes particularly well.
Short, rounded nails can look great with tiny stars because the small decorations do not compete with the limited nail space. A sheer base with one metallic star per nail can create a clean result without making the nails look crowded.
Square nails provide more horizontal space, which can work nicely with French tips and small star accents. You can place a star just above the tip or near one corner for a simple graphic effect.
Almond nails offer a longer surface, making them suitable for larger stars, constellation-inspired details, or combinations of stars and French tips. The elongated shape can also make decorative elements look more spread out.
Coffin or tapered-square nails provide even more room for creative designs. You can use different star sizes, metallic accents, or a full night-sky effect without necessarily filling every part of the nail.
The important thing is to consider the amount of empty space. A design usually looks more balanced when some of the natural base remains visible.
Choosing Between Minimal and Maximal Star Designs
One of the easiest ways to personalize this trend is to decide how much decoration you actually want.
A minimalist manicure might use a sheer base with tiny stars on only two or three nails. The stars can be placed near the cuticle, along the sidewall, or close to the tip.
This approach works especially well if you normally wear neutral nails but want a small decorative element.
A medium-detail design could combine French tips with stars, using the same color palette throughout. This gives you more visual interest without covering the entire nail.
A maximal manicure can include stars, shimmer, charms, dots, metallic finishes, and multiple colors. The key is to establish a color relationship so the design still looks connected.
For example, you could use silver stars across several different base colors. Even though the nails are mismatched, the repeated silver detail ties them together.
Another method is to repeat the same background color while changing the decorations. This creates variety without losing consistency.
There is no requirement for every nail to carry the same amount of detail. In fact, alternating decorated and simpler nails can make the overall manicure feel more intentional.
Star Nails With Chrome and Shimmer
Chrome finishes can give celestial designs a more futuristic appearance. Instead of using a traditional glossy base, try a pearly, glazed, or metallic finish underneath your stars.
A pale chrome base with silver stars creates a soft icy effect, while gold stars over a warm pearl base can feel more luxurious.
You can also use chrome only on selected nails. For example, most nails could have a sheer pink base while one or two feature a pearlescent finish and tiny stars.
If you enjoy stronger nail art, a silver chrome background with small colored stars can create a futuristic contrast.
Another option is to use shimmer rather than full chrome. A translucent glitter or pearl effect can create the impression of light behind the stars without making the entire manicure metallic.
When using reflective finishes, smaller decorations often work better because the background is already visually noticeable.
Adding Stars Without Making the Manicure Look Crowded
It can be tempting to fill every available space when creating nail art, particularly if you have a lot of tiny decorations available.
However, negative space can make the stars stand out more clearly.
Instead of placing five or six stars on every nail, try using different quantities across the manicure. One nail might have a single large star, another could have three tiny stars, and another might remain completely plain.
Varying the position can also create movement. Some stars can sit close to the cuticle while others appear near the tip or side of the nail.
The same principle applies to color. If the base is already bright, keep the star details relatively simple. If the base is neutral, you can afford to make the stars more noticeable.
This balance can make star nails look more polished and less like a collection of unrelated stickers.
Creating a Constellation-Inspired Look
If you want something more detailed than individual stars, use several tiny stars to create a constellation-inspired arrangement.
Start with a simple base color and place small stars at different points across the nail. Very thin lines can connect selected stars if you want a more recognizable constellation effect.
The lines do not need to connect every star. Leaving some stars separate can make the design feel more natural.
Silver or gold works particularly well for the linework, but white can create a softer result against darker bases.
A navy, deep blue, muted purple, or even sheer black-inspired background can make the stars especially visible.
For a lighter interpretation, use a milky base and extremely fine gold lines. This turns the constellation concept into something much more delicate.
The trick is to keep the linework thin. Thick connections can quickly make a tiny constellation look more like a geometric diagram than celestial nail art.
Mixing Stars With French Tips
French tips and celestial motifs are surprisingly easy to combine because the French line naturally creates a visual boundary where small stars can be placed.
A traditional white French tip with tiny gold stars can create a clean look. For something more colorful, replace white with lavender, pink, blue, or green.
You can also make the French tips mismatched. Each nail can have a different color while the stars remain the same shade.
Another idea is to place a star directly over the tip instead of on the bare base. This makes the star feel like part of the French design rather than an additional decoration.
Micro-French tips are particularly useful for shorter nails because they leave more visible base space for small details.
For longer nails, you can use a wider French tip and place several tiny stars just above the line.
When to Choose Stickers, Charms, or Hand-Painted Stars
The method you use to create the stars can change the final appearance.
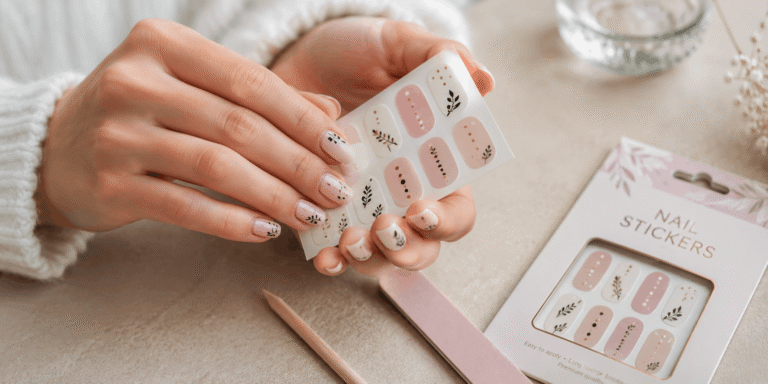
Nail stickers are useful when you want consistent shapes and a relatively quick application. They can be particularly convenient for tiny stars that would be difficult to paint by hand.
Charms create a more dimensional effect. They can look like miniature jewelry attached to the nail and are useful when you want the stars to physically stand out from the surface.
Hand-painted stars offer the most flexibility. You can change the size, shape, outline, and placement of every star, which makes the manicure feel more customized.
Tiny painted stars do not have to be perfectly identical. Slight variations can make the design look more artistic.
If you are creating the manicure yourself, start with the larger elements before adding tiny details. This makes it easier to keep the overall composition balanced.
A top coat can then help protect the design and create a consistent finish.
Keeping Your Celestial Manicure Looking Fresh
Once your star nails are finished, simple maintenance can help the design remain attractive for longer.
Avoid using your nails as tools for opening, scraping, or picking at objects. Mechanical pressure can contribute to chips or damage regardless of how simple or elaborate the nail design is.
If your manicure includes raised charms, pay particular attention to them because they can catch on clothing or hair. A suitable application method and protective top coat can help keep decorative pieces secure.
Moisturizing the skin around the nails can also keep the manicure looking more polished. Cuticles can become dry from frequent hand washing, weather, or exposure to cleaning products.
If you use nail polish remover regularly, choose a method appropriate for your manicure and avoid unnecessary repeated removal and reapplication.
The exact lifespan of the design depends on the products used, your nail preparation, your daily activities, and whether the manicure is done with regular polish, gel, or another system.
If you notice discomfort, irritation, or other unusual changes around the nails, remove the product and allow the area to recover rather than continuing to cover it.
Easy Ways to Make the Trend Feel More Personal
You do not have to recreate a design exactly as you see it online. One of the easiest ways to make star nails feel personal is to change the color palette.
Someone who prefers soft colors might choose milky pink, lilac, pale blue, and silver. Someone who likes warmer tones could use cream, peach, gold, and rose shades.
For a dramatic look, deep blue, burgundy, forest green, and metallic gold can create a richer combination.
You can also use your favorite nail shape as the starting point rather than choosing a design first.
If you like short nails, focus on tiny stars, micro-French tips, and simple accents. Longer nails can accommodate larger stars, constellations, charms, and more elaborate backgrounds.
Your wardrobe can also influence the palette. Neutral clothing can pair easily with almost any celestial design, while colorful outfits may look more cohesive with a simpler nail palette.
Another easy personalization trick is to choose one repeating detail. It could be a metallic star, a specific color, tiny dots, or a pearly finish.
That repeated element gives mismatched nails a common thread.
The Final Takeaway
Star nails are one of those nail-art ideas that can be interpreted in almost any direction. They can be delicate and understated, colorful and playful, glamorous and metallic, or dark and dramatic.
The 10 designs in this guide show how much difference a base color and a few small details can make. Lilac creates a dreamy finish, pastel colors bring a playful mood, French tips add structure, metallic stars create a jewelry-inspired effect, and dark blue can turn the nails into a miniature night sky.
You also do not need to decorate every nail in exactly the same way. Mixing simple nails with statement accents can make the finished manicure feel more modern and less repetitive.
If you prefer a minimalist look, start with a sheer base and one tiny star. If you want something more noticeable, experiment with chrome, charms, colorful tips, or constellation-inspired details.
The most important part is choosing a design that fits your own style and the amount of maintenance you are comfortable with. A celestial manicure should feel like an expression of your taste rather than a strict formula you have to follow.
Whether you choose tiny gold stars or a full colorful night-sky design, the smallest details can completely change the character of your manicure.
2 Comments