Introduction
Tired of waiting for nail polish to dry or spending money on regular salon appointments? Nail wraps have become one of the biggest beauty trends for achieving flawless, salon-worthy nails in just minutes. These ultra-thin adhesive nail coverings offer an easy alternative to traditional nail polish, gel manicures, and even some press-on nails—without the mess, strong odors, or lengthy drying times.
Whether you love elegant nude manicures, trendy chrome finishes, glitter accents, floral prints, or seasonal nail art, nail wraps make it possible to achieve professional-looking results from the comfort of your home. Their beginner-friendly application and affordable price have made them a favorite among beauty enthusiasts, busy professionals, students, and anyone looking for a quick manicure that still looks polished.
Modern nail wraps are available in a variety of materials, including real nail polish strips, vinyl wraps, gel wraps, and semi-cured gel strips. With proper application and aftercare, many can last anywhere from a week to three weeks, making them a practical option for everyday wear.
In this complete guide, you’ll learn everything you need to know about nail wraps—from the different types available and how to apply them correctly to expert tips for making them last longer, common mistakes to avoid, and the best brands to try in 2026.
What’s Inside This Guide
- What Are Nail Wraps?
- Why Nail Wraps Are So Popular
- Different Types of Nail Wraps
- Nail Wraps vs. Nail Polish vs. Press-On Nails
- How to Apply Nail Wraps Step by Step
- Best Nail Wrap Brands to Try
- How Long Do Nail Wraps Last?
- How to Remove Nail Wraps Safely
- Pros and Cons of Nail Wraps
- Expert Tips for Long-Lasting Results
- Common Mistakes to Avoid
- Frequently Asked Questions
- Final Thoughts
- Related Articles
What Are Nail Wraps?💅
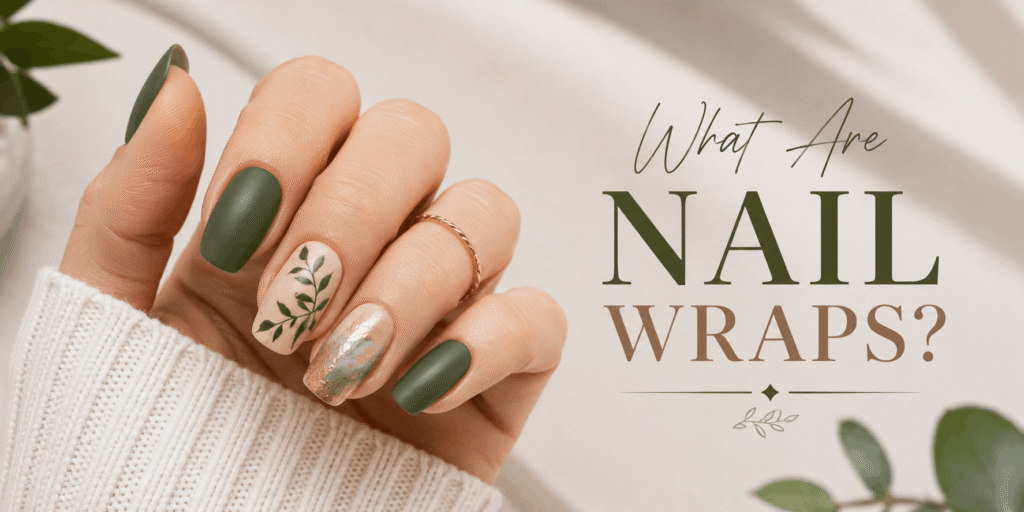
Nail wraps are thin decorative coverings designed to adhere directly to your natural nails. Unlike traditional nail polish that requires multiple coats and drying time, nail wraps are pre-designed and ready to apply. You simply choose the correct size, stick the wrap onto your nail, smooth it into place, trim the excess, and enjoy an instant manicure.
Today’s nail wraps come in thousands of colors, textures, and patterns. Whether you prefer minimalist neutral shades, bold geometric designs, marble effects, glitter finishes, or intricate artwork, there’s a nail wrap style for every personality and occasion.
Many nail wraps are made using:
- Real nail polish
- Vinyl adhesive material
- Gel polish
- Semi-cured gel
Some even mimic expensive salon nail art that would otherwise require professional skills.
One of the biggest advantages is convenience. Most applications take only 15 to 20 minutes, making nail wraps an excellent option for people with busy schedules.
Why Nail Wraps Have Become So Popular✨
The popularity of nail wraps has exploded over the past few years, thanks to social media tutorials, beauty influencers, and the growing demand for easy at-home beauty solutions.
Here are some of the biggest reasons people love them.
Fast and Easy Application
Unlike traditional polish that requires multiple coats and drying time, nail wraps are ready to wear almost immediately after application.
No Smudging
Since there’s no wet polish involved, you don’t have to worry about accidentally ruining your manicure minutes after finishing it.
Huge Variety of Designs
Nail wraps are available in almost every style imaginable, including:
- Chrome
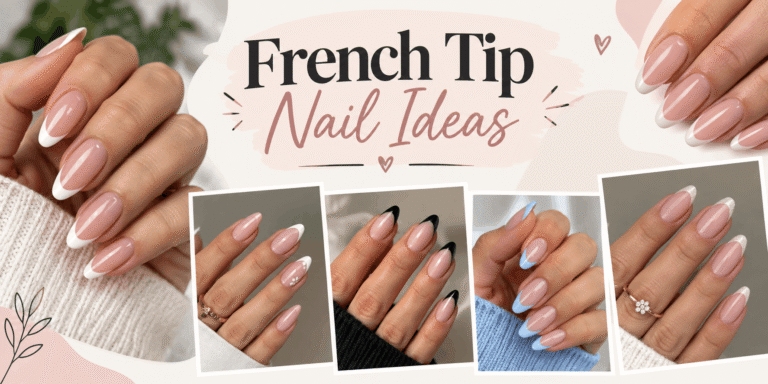
- French tips
- Floral prints
- Marble
- Animal prints
- Glitter
- Holographic finishes
- Minimalist nude designs
- Seasonal holiday artwork
This makes changing your manicure incredibly simple.
Affordable Alternative to Salon Visits
Many nail wrap kits cost a fraction of a professional manicure while still delivering impressive results.
Perfect for Beginners
Even if you’ve never painted your own nails successfully, nail wraps are much easier to apply than liquid polish.
Different Types of Nail Wraps🎨
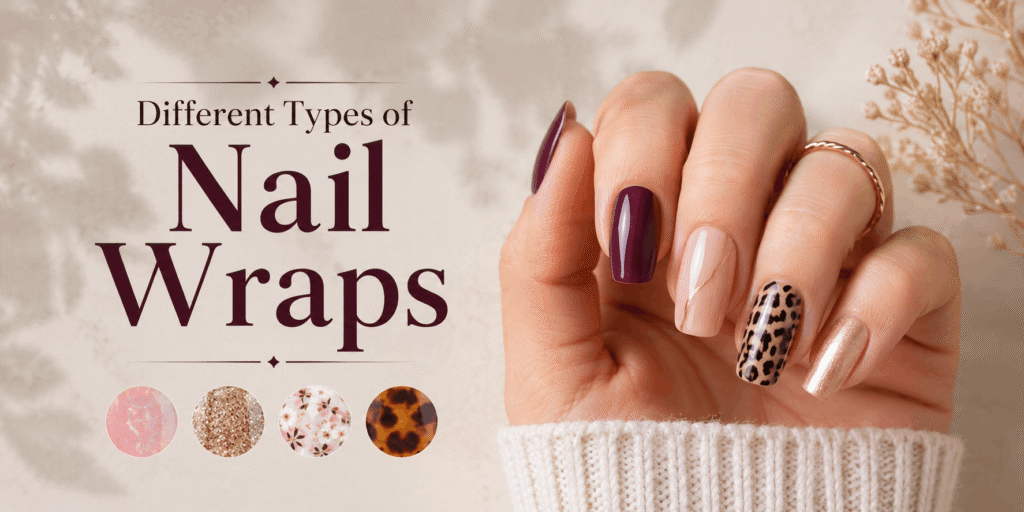
Not every nail wrap works the same way. Understanding the different options helps you choose the best one for your lifestyle.
1. Polish Nail Wraps
Made from real nail polish that’s partially dried into flexible strips.
Best for:
- Natural manicures
- Beginners
- Quick application
- Everyday wear
Pros
- Looks like traditional polish
- No drying time
- Flexible
- Easy removal
2. Vinyl Nail Wraps
Vinyl wraps are decorative adhesive stickers that come in thousands of artistic designs.
Popular options include:
- Leopard print
- Marble
- Floral
- Abstract art
- Ombre
- Cartoon designs
- Metallic finishes
Most users apply a clear top coat for extra durability.
3. Semi-Cured Gel Nail Wraps
These premium wraps require curing under an LED or UV lamp after application.
They’re popular because they provide:
- Salon-quality shine
- Longer wear time
- Better chip resistance
- Stronger finish
Many beauty experts consider semi-cured wraps the closest alternative to professional gel manicures.
4. Gel Nail Wraps
Gel nail wraps are thicker and more flexible than standard polish strips.
Advantages include:
- More durable
- Better gloss
- Comfortable wear
- Professional appearance
Although they’re slightly more expensive, many users find the added longevity worth the investment.
Nail Wraps vs. Nail Polish vs. Press-On Nails💎
| Feature | Nail Wraps | Nail Polish | Press-On Nails |
| Application Time | 15–20 minutes | 30–60 minutes | 10–20 minutes |
| Drying Time | None | Required | None |
| Beginner-Friendly | Excellent | Moderate | Excellent |
| Adds Nail Length | No | No | Yes |
| Nail Art Options | Excellent | Skill Required | Limited |
| Removal | Easy | Easy | Moderate |
| Durability | Good to Excellent | Moderate | Good |
For most people, nail wraps offer the best balance between convenience, affordability, and style.
How to Apply Nail Wraps Step by Step
Applying nail wraps correctly is the key to achieving a long-lasting manicure.
Step 1 – Prepare Your Nails
Start with clean, dry nails.
Remove:
- Old polish
- Dirt
- Oil
- Lotion residue
Then:
- Wash your hands
- Push back your cuticles
- Lightly buff the nail surface
- Clean nails with rubbing alcohol
Skipping preparation is one of the biggest reasons nail wraps peel early.
Step 2 – Choose the Correct Size
Select the wrap that best matches each nail.
If you’re between sizes, choose the slightly smaller option rather than allowing the wrap to overlap your skin.
A proper fit creates a cleaner finish and helps prevent lifting.
Step 3 – Apply the Nail Wrap
Carefully peel the wrap from its backing.
Position it slightly above the cuticle line before smoothing it toward the tip of your nail.
Use your finger or a silicone tool to remove any air bubbles.
Work slowly to achieve the smoothest finish.
Step 4 – Remove the Excess
Trim away extra material using small nail scissors or clippers.
Next, file downward in one direction until the wrap perfectly matches your nail shape.
Avoid filing back and forth, as this can weaken the edge and cause premature lifting.
Best Nail Wrap Brands to Try in 2026🎨
Several brands consistently receive excellent reviews for quality, durability, and ease of application.
Dashing Diva
Known for:
- Glossy gel-like finish
- Beginner-friendly application
- Long-lasting wear
- Huge design selection
Color Street
Made from real nail polish.
Popular because they provide:
- Natural appearance
- Flexible application
- Large color range
- No drying time
Ohora
One of the leading semi-cured gel wrap brands.
Perfect for:
- Long-lasting manicures
- Professional shine
- Gel lovers
- Chip-resistant finishes
Lily & Fox
An affordable option with hundreds of creative nail art designs.
Ideal for:
- Budget shoppers
- Seasonal manicures
- Trend lovers
- Frequent style changes
How Long Do Nail Wraps Last?⏳
The lifespan of nail wraps depends on the type you choose, how carefully they’re applied, and your daily activities. With proper preparation and aftercare, quality nail wraps can stay beautiful for several days—or even weeks.
| Type of Nail Wrap | Average Wear Time |
| Standard Nail Wraps | 5–10 days |
| Polish Nail Strips | 7–14 days |
| Gel Nail Wraps | Up to 2 weeks |
| Semi-Cured Gel Wraps | 2–3 weeks |
Several factors affect longevity, including:
- Proper nail preparation
- Quality of the adhesive
- Frequent handwashing
- Exposure to water
- Household cleaning
- Daily typing
- Gardening or manual work
- Using a protective top coat (where recommended)
The better your application technique, the longer your manicure will stay smooth and chip-free.
How to Remove Nail Wraps Safely💡
Removing nail wraps correctly helps protect your natural nails from peeling, thinning, or damage.
Removing Standard Nail Wraps
Most regular nail wraps come off easily.
Follow these steps:
- Soak your nails in warm water for several minutes.
- Gently lift one corner using an orangewood stick.
- Slowly peel the wrap away from the nail.
- Remove any leftover adhesive with rubbing alcohol or nail polish remover.
- Apply cuticle oil afterward to restore moisture.
Never rip nail wraps off forcefully, as this can damage the top layer of your natural nails.
Removing Semi-Cured Gel Nail Wraps
Semi-cured gel wraps require a slightly different process.
Most manufacturers recommend:
- Lightly filing away the shiny top layer.
- Soaking cotton in acetone.
- Wrapping each nail with foil for 10–15 minutes.
- Gently pushing away the softened gel.
- Washing your hands and applying nourishing cuticle oil.
Patience during removal helps keep your nails healthy.
Pros and Cons of Nail Wraps📖
Like every beauty product, nail wraps have both advantages and disadvantages.
Pros
Quick Application
Most manicures take less than 20 minutes.
No Drying Time
There’s no waiting around for polish to dry, reducing the chance of smudges or dents.
Countless Design Options
From elegant French tips to holographic chrome finishes, nail wraps offer nearly endless possibilities.
Budget-Friendly
Compared to regular salon appointments, nail wraps are an affordable way to enjoy stylish nails at home.
Travel-Friendly
They’re lightweight, compact, and easy to pack, making them perfect for vacations or business trips.
Beginner-Friendly
Even people with little manicure experience can achieve professional-looking results.
Cons
Usually Single-Use
Most nail wraps cannot be reused once removed.
Quality Varies
Lower-quality wraps may peel, wrinkle, or lose their shine much sooner.
Preparation Is Essential
Skipping proper nail prep often leads to lifting within a few days.
Some Require Extra Equipment
Semi-cured gel wraps require an LED or UV lamp for curing.
Expert Tips to Make Nail Wraps Last Longer
Professional nail technicians recommend following these simple habits to maximize wear time.
1. Prep Your Nails Thoroughly
Always remove natural oils using rubbing alcohol before application.
A clean nail surface creates stronger adhesion.
2. Don’t Touch the Adhesive
Handling the sticky side too much can weaken the adhesive.
Hold wraps by the edges whenever possible.
3. Seal the Edges Carefully
Press firmly around:
- Cuticles
- Sidewalls
- Nail tips
This helps prevent lifting.
4. Avoid Water Immediately After Application
Try not to soak your hands for several hours after applying nail wraps.
This gives the adhesive time to bond properly.
5. Wear Gloves While Cleaning
Household cleaners and prolonged exposure to water can shorten the lifespan of your manicure.
Rubber gloves provide excellent protection.
6. Apply Cuticle Oil Carefully
Healthy cuticles support healthy nails.
However, avoid letting excess oil seep underneath fresh nail wraps.
7. Store Unused Wraps Properly
Keep leftover wraps sealed in their original packaging.
Exposure to air can dry out the adhesive and reduce performance.
Common Mistakes to Avoid
Even premium nail wraps won’t perform well if applied incorrectly.
Avoid these common mistakes:
- Applying wraps to oily nails
- Choosing the wrong wrap size
- Stretching the wrap during application
- Leaving air bubbles underneath
- Filing back and forth instead of one direction
- Skipping nail preparation
- Removing wraps aggressively
- Using your nails as tools
- Exposing fresh wraps to excessive moisture too soon
Paying attention to these details can significantly improve durability and appearance.
Final Thoughts
Nail wraps have revolutionized at-home manicures by making salon-quality nails faster, easier, and more affordable than ever before. Whether you love timeless nude shades, glitter finishes, chrome effects, floral patterns, or bold seasonal designs, there’s a nail wrap to match every personality and occasion.
Their quick application, zero drying time, and beginner-friendly design make them an excellent choice for busy professionals, students, parents, and beauty lovers alike. With proper nail preparation, careful application, and simple aftercare, high-quality nail wraps can provide a beautiful manicure that lasts for days—or even weeks.
If you’re looking for a hassle-free way to elevate your nail routine in 2026, nail wraps are a stylish and practical beauty trend well worth trying.