Cat eye nail polish is a popular choice for anyone who wants a manicure with depth, movement, and a distinctive reflective finish. Unlike ordinary nail polish, which usually creates a consistent colour across the nail, this magnetic formula can produce a bright line or glowing band that shifts as the light changes. The result resembles the narrow reflection seen in a cat’s eye, giving the manicure a dimensional appearance without requiring complicated nail art.
One of the most appealing features of cat eye nail polish is its versatility. You can create a subtle shimmer for everyday wear, a dramatic velvet-like effect for special occasions, or a deep, jewel-toned design that looks different from every angle. Although the finished result can appear professionally detailed, the technique is manageable at home when you use the correct products and understand how magnetic polish works.
What Is Cat Eye Nail Polish and How Does It Work?
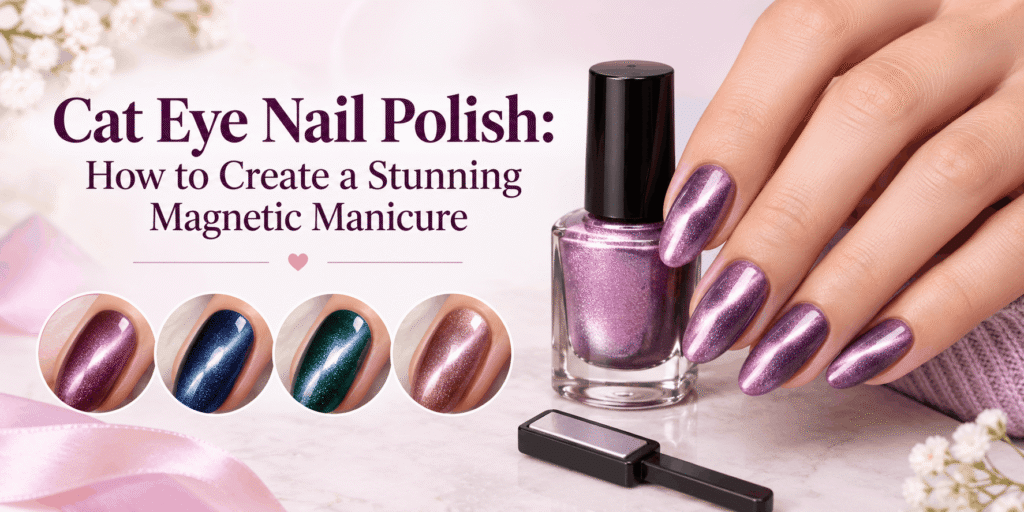
Cat eye nail polish is a special type of polish that contains tiny magnetic particles. When a magnet is held near the wet coating, these particles move or align in response to the magnetic field. This changes how they reflect light, creating a concentrated stripe, curved highlight, or glowing effect across the nail.
The magnet does not simply paint a line onto the surface. Instead, it influences the position of the reflective particles within the polish. The direction, distance, and angle of the magnet can therefore change the pattern you create. This is why the same shade can produce several different effects depending on how it is applied.
Many cat eye formulas are sold as gel polish, although magnetic effects are also available in some other nail products. Gel versions generally require a compatible UV or LED nail lamp to cure each layer. Ordinary nail polish, by contrast, dries through evaporation and should not be placed under a lamp unless the product instructions specifically require it.
Why the Finish Looks Different From Regular Nail Polish
Traditional nail polish mainly relies on pigments, glitter, or shimmer to create its colour and appearance. Cat eye polish uses magnetic particles to produce a more directional reflection. Instead of seeing the same shimmer evenly across the nail, you may notice a bright strip surrounded by darker or softer-looking areas.
The contrast between the reflective section and the surrounding colour creates the signature effect. On a black or deep navy base, the highlight can look especially bright. Lighter shades may create a softer, more delicate result, while colours such as emerald, burgundy, and violet can produce a rich, gemstone-inspired appearance.
The final look also depends on lighting. A magnetic stripe may appear sharply defined under direct light but softer when viewed from another angle. This changing reflection is part of the appeal rather than a sign that the polish has changed colour.
What You Need to Create a Cat Eye Manicure
Before starting, gather the products and tools required for your particular polish system. Having everything ready makes it easier to position the magnet while the coating is still workable.
Cat eye nail polish in your chosen shade.
A compatible magnetic wand or nail-art magnet.
A suitable base coat.
A compatible top coat.
A UV or LED lamp if you are using gel polish.
Nail file and buffer for gentle preparation.
Cuticle pusher, if needed, for careful nail preparation.
Lint-free wipes and products recommended for your polish system.
Check the manufacturer’s instructions before combining products from different systems. Some formulas work best with specific base coats, top coats, magnets, or curing times. Using compatible products can help you achieve a cleaner finish and reduce application problems.
How to Apply Cat Eye Nail Polish at Home
A successful cat eye manicure depends on preparation, controlled application, and careful use of the magnet. You do not need to create an elaborate design on your first attempt. Start with a simple straight highlight, then experiment with different angles once you are comfortable with the technique.
Step 1: Prepare Your Natural Nails
Begin by removing any old polish and washing your hands. Dry your nails thoroughly before applying new products. Gently shape the free edges with a nail file and remove surface dust. If you need to manage your cuticles, do so carefully without cutting living skin or causing irritation.
Avoid aggressive buffing because excessive filing can thin the natural nail. The goal is to create a clean, suitable surface rather than remove layers of the nail plate. If your polish system requires a particular preparation product, follow its instructions and avoid adding oils or hand cream immediately before application.
Good preparation helps the manicure look neat around the edges. It also makes it easier to apply thin, even layers without accidentally flooding the cuticle area.
Step 2: Apply a Suitable Base Coat
Apply a thin layer of base coat and allow it to dry or cure according to the product instructions. A base coat can help create a more even foundation and improve compatibility between the natural nail and the colour layer.
If you are using gel products, keep the base coat away from your skin. Gel that touches the cuticles or sidewalls should be removed before curing, following the product instructions. Repeated skin contact with uncured gel products can lead to allergic sensitisation.
A smooth foundation is particularly useful for magnetic designs because uneven surfaces can interrupt the reflective pattern. Take your time with this step instead of trying to compensate for preparation problems with thicker colour layers.
Step 3: Apply the Cat Eye Colour
Apply a thin, even layer of cat eye nail polish. Some systems recommend using a dark base colour underneath the magnetic shade to make the effect look stronger. Others are designed to be applied directly over the base coat. Follow the instructions for your chosen formula.
If you use a separate dark base, allow it to dry or cure as directed before applying the magnetic layer. Black is a common choice because it creates strong contrast, but navy, dark purple, and other deep shades can also complement certain magnetic colours.
Avoid applying the magnetic polish too thickly. A heavy layer may be difficult to control, and gel polish that is too thick can cure improperly. The particles need to remain mobile long enough for the magnet to create the desired reflection.
Step 4: Use the Magnet to Create the Cat Eye Effect
While the magnetic polish is still wet or uncured, hold the magnet above the nail according to the manufacturer’s directions. Keep it close enough to influence the particles without touching the surface. The ideal distance varies by magnet and formula, so practise with the recommended positioning.
For a classic cat eye design, position the magnet so that the reflective particles form a narrow stripe across the nail. Hold it steady for the recommended time instead of moving it continuously. Sudden movements can produce a less defined pattern.
You can change the direction of the stripe by rotating the magnet or adjusting its position. A diagonal highlight looks dynamic, while a centred vertical line can make the nail appear elongated. For the most consistent result, practise on one nail before repeating the same movement across the rest.
Step 5: Cure or Dry the Polish Correctly
Once the magnetic pattern looks right, follow the product’s instructions for curing or drying. If you are using gel polish, cure it with the recommended lamp and timing. Do not assume that a longer curing time will fix every application problem; the correct lamp, compatible formula, and appropriate layer thickness all matter.
If you are using a regular magnetic polish that air-dries, allow it to dry as directed before applying additional products. Keep your hands still while the coating sets, because accidental contact can disturb the design.
Some magnetic effects may soften or shift before the polish is fully set. Working one nail at a time can help you control the pattern, particularly when you are still learning.
Step 6: Seal the Design With a Top Coat
After the colour has been cured or dried as directed, apply a compatible top coat in a thin, even layer. This can improve shine and help protect the manicure from everyday wear. Avoid dragging the brush too firmly across the magnetic highlight, as excessive pressure may affect the appearance of the design in some formulas.
For gel systems, cure the top coat according to the manufacturer’s directions. If the system leaves a tacky inhibition layer, remove it only if the instructions call for that step and use the recommended product.
Check the edges of your nails before finishing. A neat application around the cuticles and sidewalls makes the manicure look more professional. Avoid filing or peeling the finished coating, as this can damage both the design and the natural nail.
Popular Cat Eye Nail Polish Designs to Try
One reason cat eye nail polish remains appealing is that a single magnetic shade can create several different looks. The style can be understated or dramatic depending on the colour, the shape of the highlight, and whether you add other nail-art details. Choosing a design that suits your personal style is more important than following every trend.
Classic Magnetic Stripe
The classic stripe is a simple starting point for beginners. It features one concentrated line of light across a smooth, glossy base. The stripe can be diagonal, vertical, or horizontal, depending on the placement of the magnet.
For an elegant everyday manicure, choose a shade such as rose, silver, soft mauve, or champagne. If you prefer a more dramatic look, deep blue, green, and burgundy create stronger contrast. Keeping the rest of the nail free from extra decoration allows the magnetic reflection to remain the main feature.
Velvet Cat Eye Nails
Velvet cat eye nails create a softer, more evenly distributed glow rather than one sharply defined stripe. The reflective particles appear to spread across the surface, giving the nails a plush, fabric-like appearance.
This style can work beautifully with neutral shades, muted pinks, olive green, and smoky purple. It is also a good option if you like magnetic nail art but prefer a less obvious line. The result depends on the formula and magnet technique, so follow product-specific guidance and experiment on a practice nail before completing the whole manicure.
Dark Cat Eye Nails
Dark cat eye nails combine a deep base with a bright magnetic reflection. Black, midnight blue, dark plum, and forest green can create a moody appearance that works well for evening events and colder seasons.
The key is to preserve the contrast between the background and the reflective particles. Applying the colour evenly and positioning the magnet consistently can help the stripe look crisp. A glossy top coat enhances the depth, while a matte finish may change the overall appearance if the product system supports it.
Cat Eye Nail Polish Colours That Suit Different Styles
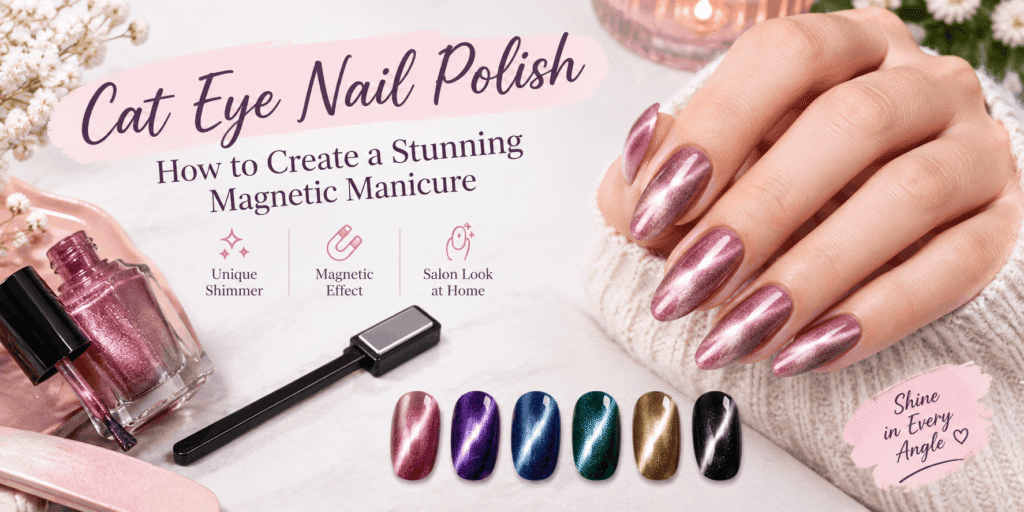
Choosing the right colour can completely change the appearance of a magnetic manicure. Some shades create a subtle shimmer that works well for everyday wear, while others produce a bold, high-contrast reflection that attracts attention. Consider your wardrobe, preferred nail length, and the occasion when deciding which colour to use.
Pink, Nude, and Champagne Cat Eye Nails
Pink, nude, and champagne shades are ideal if you prefer a softer manicure. Their reflective finish adds dimension without making the nails look overly dramatic. These colours can complement office outfits, casual clothing, and special-event looks where you want a polished appearance.
A pale pink magnetic shade creates a delicate glow, while champagne offers a warmer, more luminous effect. Nude cat eye polish can look especially elegant on medium-length almond or oval nails. If you want a little extra detail, add a small rhinestone to one accent nail rather than decorating every finger.
Blue, Purple, and Green Magnetic Shades
Blue cat eye nail polish can range from a light icy shimmer to a deep midnight finish. Navy and sapphire shades often create a dramatic contrast between the magnetic highlight and the darker background. They are suitable for evening manicures and anyone who prefers cooler colours.
Purple offers a different effect, with shades ranging from soft lavender to rich plum. Lighter purple can look playful and delicate, while deeper tones create a luxurious appearance. Green shades such as emerald and forest green can resemble polished gemstones when the magnetic reflection catches the light.
You can choose one shade for every nail or use two complementary colours for a coordinated design. For example, navy and silver can create a cool-toned manicure, while emerald and gold-inspired magnetic polish offer a warmer combination. Keep the number of colours limited if you want the magnetic effect to remain the main focus.
Red, Burgundy, and Black Cat Eye Nails
Red cat eye polish is a striking option for people who enjoy bold manicures. A bright red shade creates a lively appearance, while burgundy and wine tones feel deeper and more understated. These colours work well for celebrations, dinners, and seasonal nail designs.
Black cat eye nails offer a dramatic base that makes many magnetic highlights appear especially vivid. Depending on the polish, the reflective stripe may look silver, blue, purple, or another contrasting shade. If a completely black manicure feels too intense, use a black magnetic design on one or two accent nails and choose a complementary colour for the rest.
Remember that the exact finish depends on the formula and lighting. A shade that appears subtle indoors may show a much stronger reflection under direct light, so check the colour under different lighting conditions before deciding on your final design.
Choosing the Best Cat Eye Nail Design for Your Nail Shape
The shape of your nails can influence how the magnetic pattern appears. Although there are no strict rules, some designs naturally complement certain shapes because they follow the direction and proportions of the nail.
Short and Square Nails
Short nails can look stylish with a simple diagonal or centred magnetic stripe. A compact design prevents the nail from looking crowded and allows the reflective effect to remain visible. Deep colours, soft pinks, and silver-toned magnetic shades are all suitable options.
Square nails have a defined edge that pairs well with clean, geometric-looking highlights. You can position the stripe diagonally for contrast or use a vertical line to create the impression of a longer nail. Avoid adding too many decorations if the nail surface is small.
Almond and Oval Nails
Almond and oval nails provide a naturally curved outline, making them suitable for elongated magnetic designs. A diagonal stripe can follow the nail’s direction, while a narrow vertical highlight can emphasise its length.
These shapes work well with velvet-style effects, jewel-inspired colours, and softer neutral shades. If you prefer a minimal manicure, use a single magnetic colour on every nail. For a more detailed look, combine the design with a delicate accent line or one small decorative element.
Long Coffin and Stiletto Nails
Long coffin and stiletto nails provide more space for dramatic nail art. A bright magnetic stripe can be combined with chrome details, fine lines, or carefully placed embellishments. However, the design can quickly become busy if every nail has multiple decorative elements.
A balanced approach is to use cat eye polish across all nails and reserve additional details for one or two fingers. Because longer nails can catch on objects more easily, maintain the free edges and avoid using the nails as tools. The shape should also be comfortable and practical for your daily activities.
Common Cat Eye Nail Polish Mistakes and How to Avoid Them
Magnetic manicures may look complicated at first, but many application problems come from a few simple mistakes. Understanding what causes them can help you achieve a more consistent finish without repeatedly removing and reapplying the polish.
Holding the Magnet Too Far Away
If the magnet is too far from the nail, it may not influence the particles enough to create a clear stripe. The result can appear faint or spread out instead of producing the concentrated reflection you wanted.
Follow the instructions supplied with your magnet and polish. Practise with a single nail to find a comfortable position, keeping the magnet close without touching the wet coating. If the pattern remains weak, check whether the product is designed for magnetic use and whether the magnet is suitable for that formula.
Moving the Magnet Too Quickly
Moving the magnet continuously or changing its angle before the pattern develops can create an inconsistent effect. For a classic stripe, it is often easier to hold the magnet steady for the recommended period.
Once you understand how the particles respond, you can experiment with curved or layered effects. Start with simple movements, however, because complex patterns are harder to reproduce consistently across all ten nails.
Applying Thick Layers of Polish
Thick layers can make the polish harder to control and may create an uneven surface. With gel products, excessive thickness can also interfere with proper curing. Apply thin layers and follow the manufacturer’s instructions rather than trying to achieve full opacity in one heavy application.
If the colour looks too sheer, a second thin coat may provide a more even result. Always check whether the product instructions recommend multiple coats and how the magnetic effect should be created for each layer.
Forgetting to Prepare the Nails Properly
Dust, moisture, and residue can interfere with application and affect how smoothly the polish spreads. Before starting, make sure the nail surface is clean and dry and that your tools are ready.
Avoid aggressive buffing in an attempt to make the nail perfectly smooth. Excessive filing can weaken natural nails. If the surface has pronounced ridges, use a product and technique appropriate for your nails rather than removing too much of the natural nail plate.
Using Incompatible Products
A base coat, magnetic colour, and top coat should be compatible with one another. Mixing products without checking their instructions may affect adhesion, drying, curing, or the final appearance.
This is particularly important when working with gel polish. Use the lamp type and curing time recommended for the specific product. If the polish remains soft, wrinkles, or appears improperly cured, do not assume that adding more top coat will solve the issue.
How to Make Cat Eye Nail Polish Last Longer
A well-applied magnetic manicure can look attractive for days, but its longevity depends on the formula, nail preparation, application technique, and your daily routine. A few practical habits can help reduce premature chipping and keep the finish looking neat.
First, prepare your nails carefully and apply the products in thin, even layers. Avoid flooding the cuticles or allowing polish to collect around the sidewalls. Product that touches the skin should be removed before curing when using gel, following the manufacturer’s instructions.
Second, protect your hands during activities that involve water, cleaning products, or repeated friction. Wearing suitable household gloves can reduce direct contact with detergents and help limit unnecessary wear. Try not to use your nails to open cans, scrape surfaces, or pull at packaging.
Third, give the manicure time to dry or cure properly. Regular nail polish may feel dry on the surface before the deeper layers have hardened. Gel polish requires the correct lamp and curing process; it does not simply air-dry like traditional lacquer.
Finally, check your nails regularly. If the coating starts lifting, do not pick at it or apply more product over the loose area. Remove or repair the affected coating according to the product instructions. If your natural nail becomes painful, damaged, or separated from the nail bed, stop applying polish to that nail and seek appropriate advice.
How to Remove Cat Eye Nail Polish Safely
The correct removal method depends on whether your manicure uses regular magnetic polish or gel polish. Identifying the formula before removal is important because the two types do not necessarily respond to the same products or techniques.
Removing Regular Magnetic Nail Polish
If your cat eye polish is a conventional air-drying formula, use a nail polish remover suitable for that product. Place the remover on a cotton pad and gently wipe the coating away without scrubbing aggressively.
Wash your hands afterwards if recommended for the remover, then apply moisturiser to your hands and a suitable cuticle oil around the nails. Removers can leave the surrounding skin feeling dry, so gentle aftercare can help restore comfort.
Removing Magnetic Gel Polish
Gel polish generally requires the removal method specified by its manufacturer. Some systems are designed to be soaked off with an appropriate remover, while others require careful professional filing. Do not assume that every gel product can be removed in the same way.
Never peel or forcefully scrape off gel polish. Pulling away an attached coating can remove layers of the natural nail, leaving it thin and vulnerable. Avoid filing deeply into the natural nail, and consider professional removal if you are uncertain about the product or technique.
If you experience persistent redness, itching, swelling, or other unusual reactions around your nails, stop using the product and seek medical advice. Do not cover an irritated area with another layer of polish.
Final Thoughts
Cat eye nail polish offers a creative way to achieve a manicure that looks dimensional, glossy, and full of movement. Its magnetic particles create a reflective effect that can change with the angle of the light, allowing one shade to produce several different appearances. From delicate pinks and neutral tones to dramatic blues, greens, and dark jewel shades, there is plenty of room to personalise the finish.
The best results come from proper nail preparation, thin and controlled application, and careful use of the magnet. Choosing compatible products and following the correct drying or curing instructions is equally important, especially when working with gel polish.
Whether you prefer a simple magnetic stripe or a more elaborate velvet-inspired design, begin with a technique you can manage comfortably. Protect your natural nails, avoid peeling off the coating, and use the appropriate removal method when it is time for a fresh manicure. With patience and practice, cat eye nail polish can become a versatile addition to your nail-care and beauty routine.
Yes, beginners can try cat eye nail polish at home, particularly with a simple magnetic stripe. Start with a reliable product, follow the instructions, and practise on one nail before completing the entire manicure. Gel formulas require additional care because they must be cured correctly and kept off the skin.
A magnetic tool is generally needed to create the signature effect. Many cat eye polish kits include a magnet, although some products are sold separately. Different magnets can produce different patterns, so check compatibility and follow the manufacturer’s guidance.
Yes. Some formulas are designed to work without a separate black base, and the final result depends on the polish’s colour and opacity. A dark base can increase contrast for certain shades, but it is not essential for every product. Follow the instructions for your chosen formula and experiment with a practice nail.
Yes. Some formulas are designed to work without a separate black base, and the final result depends on the polish’s colour and opacity. A dark base can increase contrast for certain shades, but it is not essential for every product. Follow the instructions for your chosen formula and experiment with a practice nail.
Yes, magnetic effects are available in different types of nail products, including gel formulas and some air-drying polishes. Their application, drying, and removal methods can differ significantly. Read the label carefully so you know whether the product requires a lamp or a particular removal process.
There is no single lifespan that applies to every manicure. Longevity depends on the formula, nail preparation, application quality, daily activities, and how well the coating is maintained. A careful application and gentle handling may help the manicure remain attractive for longer, but chipping can still occur.